Comprehensive guide to Solo: deploy Hiero consensus networks locally with one command or full manual control. Covers setup, deployment methods, operations, advanced features, integration, and troubleshooting.
This documentation provides a comprehensive guide to using Solo to launch a Hiero Consensus Node network, including setup instructions, usage guides, and information for developers. It covers everything from installation to advanced features and troubleshooting.
Known issue: MinIO image pulls are currently blocked. MinIO stopped
publishing new community images as of 2025-10-23, so deployments with MinIO
enabled fail with ImagePullBackOff. This affects Solo versions below
v0.91.0; starting with v0.91.0, Solo replaces the default tenant image and
no workaround is needed.
Easiest fix: run ONE_SHOT_WITH_BLOCK_NODE=true BLOCK_STREAM_STREAM_MODE=BLOCKS solo one-shot single deploy to skip MinIO entirely.
If you need MinIO (record streams/backups): see the
values-file workaround
in Troubleshooting.
1 - Simple Solo Setup
Get started with Solo quickly. This section guides you through prerequisites, one-command deployment, network management, and cleanup. Perfect for developers and testers getting their first Hiero network running locally.
1.1 - System Readiness
Verify hardware and software requirements before deploying a local Hiero test network with Solo. Check system prerequisites, install Docker/Podman, configure platform-specific settings, and ensure your machine is ready.
Overview
Before you deploy a local Hiero test network with solo one-shot single deploy, your machine must meet specific hardware, operating system, and tooling requirements.
This page covers the minimum and recommended memory, CPU, and storage; supported platforms (macOS, Linux, and Windows — natively with PowerShell, or via WSL2); and the required versions of Docker/Podman, Node.js, and Kubernetes tooling.
By the end of this page, your container runtime will be installed and your platform environment configured. Then proceed to Quickstart to install Solo and deploy.
Hardware Requirements
Solo’s resource requirements depend on your deployment size:
Configuration
Minimum RAM
Recommended RAM
Minimum CPU
Minimum Storage
Single-node
12 GB
16 GB
4 cores
20 GB free
Multi-node (3+ nodes)
16 GB
24 GB
8 cores
20 GB free
Note: If you are using Docker Desktop, ensure the resource limits under
Settings → Resources are set to at least these values - Docker caps usage
independently of your machine’s total available memory.
Software Requirements
Solo sets up most of the tools it needs for you. The table below shows what each
install method provides, what Solo provisions automatically, and what you must
install yourself.
You install it — Docker Desktop (macOS/Windows) or Docker Engine (Linux). Solo auto-installs Podman on Linux/macOS/WSL2 if Docker Engine is not found. Not supported on native Windows.
Note: Solo’s provisioned copies of kubectl, Kind, and Helm live in ~/.solo/bin,
which is not necessarily on your PATH. If you want to run kubectl, kind, or helm
commands yourself (some guides do), install kubectl,
Kind, and
Helm on your PATH separately.
Windows (WSL2) prerequisite
Kind (which Solo provisions automatically) requires WSL2 to be enabled on
Windows, but you do not need a WSL2 Linux distro installed — only the WSL2
feature itself. Enable it with:
wsl--install--no-distribution
WSL2 requires hardware virtualization and the Virtual Machine Platform Windows
feature. If virtualization is unavailable (for example, wsl --install reports
HCS_E_HYPERV_NOT_INSTALLED), use the native Windows (PowerShell) path
instead, which does not require WSL2.
Docker
Solo requires Docker Desktop (macOS, Windows) or Docker Engine / Podman (Linux) with sufficient resources:
Memory: at least 12 GB available for containers.
CPU: at least 6 cores available for containers.
Configure Resources by Platform
macOS and Windows (Docker Desktop)
To allocate the required resources in Docker Desktop:
Open Docker Desktop.
Go to Settings > Resources > Memory and set it to at least 12 GB.
Go to Settings > Resources > CPU and set it to at least 6 cores.
Click Apply & Restart.
Note: If Docker Desktop does not have enough memory or CPU allocated, the one-shot deployment will fail or produce unhealthy pods.
Linux
Docker Engine on Linux uses system memory directly and does not have a resource allocation interface like Docker Desktop.
Resource Check:
Ensure your machine has at least 12 GB of free RAM available before running solo one-shot single deploy.
Check available memory with: free -h
If you have insufficient RAM, the deployment may fail or pods may become unhealthy.
Podman on Linux:
If using Podman instead of Docker Engine, ensure your system has at least 12 GB of free RAM available.
Platform Setup
Solo supports macOS, Linux, and Windows (natively with PowerShell, or via WSL2). Select your platform below to install the required container runtime and configure your environment, before proceeding to Quickstart:
⚠️ Homebrew support is being deprecated. Solo will stop publishing updates to Homebrew after August 31, 2026. New users should install via npm. Existing Homebrew users should migrate before August 31.
Settings → Resources → Memory: set to at least 12 GB
Settings → Resources → CPU: set to at least 6 cores
Click Apply & Restart
macOS prerequisite: Docker Desktop must be open before running solo one-shot single deploy. The Docker daemon is not started automatically on macOS, so confirm Docker Desktop is running from your menu bar before you begin.
Log out and back in for the group changes to take effect.
Fedora/RHEL: Replace the apt-get commands above with your distro’s
package manager. For example, on Fedora: sudo dnf install -y docker-ce docker-ce-cli containerd.io (after adding Docker’s dnf repo — see
Docker’s Fedora guide).
Then run sudo systemctl enable --now docker and
sudo usermod -aG docker ${USER}.
Install Solo:
npm install -g @hiero-ledger/solo@latest
Verify the installation:
solo --version
Run Solo natively from Windows PowerShell. Run every command below in a PowerShell terminal.
Note: Open a new PowerShell window after installing tools so updated PATH entries take effect.
Your environment is ready. Proceed to Quickstart to install Solo and deploy.
Note: Make sure your machine meets the
Windows (WSL2) prerequisite first. If WSL
and a Linux distribution are already installed, skip step 1 (and you may use a
distribution other than Ubuntu).
Run the following command in Windows PowerShell (as Administrator), then reboot and open the Ubuntu terminal. All subsequent commands must be run inside the Ubuntu (WSL2) terminal.
wsl --install Ubuntu
Install Node.js (>= 22.0.0) inside the Ubuntu terminal:
If you experience issues installing or upgrading Solo - for example, conflicts
with a previous installation - clean up your environment and reinstall:
To remove a legacy npm install or perform a full environment reset
(delete Solo-managed Kind clusters and your ~/.solo directory), see the
Cleanup guide.
macOS “mounts denied” error on Apple Silicon: If solo one-shot single deploy
fails immediately with a “mounts denied” or “path is not shared from the host”
error, add /opt/homebrew to Docker Desktop’s File Sharing list:
Settings → Resources → File Sharing → + → add /opt/homebrew → Apply & Restart.
This can occur on Apple Silicon Macs (M1/M2/M3/M4) when Homebrew’s install path
(/opt/homebrew) is not included in Docker Desktop’s shared directories.
Intel Mac users (Homebrew path /usr/local) are not affected.
WSL2 fails to install (for example, wsl --install reports
HCS_E_HYPERV_NOT_INSTALLED): WSL2 requires hardware virtualization and the
Virtual Machine Platform feature. See Microsoft’s
Install WSL guide, or
use the native Windows (PowerShell) path, which does not require WSL2.
First deploy fails with a PostgreSQL startup timeout: If
solo one-shot single deploy fails during mirror node setup with a
PostgreSQL startup timeout, this is a known intermittent issue on first
deploy. Destroy the deployment and retry:
solo one-shot single destroy
solo one-shot single deploy
1.2 - Quickstart
Deploy a local Hiero test network with a single command using the Solo CLI. This guide covers installation, one-shot deployment, network verification, and accessing local service endpoints.
Overview
Solo Quickstart provides a single, one-shot command path to deploy a running Hiero test network using the Solo CLI tool.
This guide covers installing Solo, running the one-shot deployment, verifying the network, and accessing local service endpoints.
Note: This guide assumes basic familiarity with command-line interfaces and Docker.
Prerequisites
Before you begin, ensure you have completed the following:
System Readiness:
Prepare your local environment (Docker, Kind, Kubernetes, and related tooling) by following the System Readiness guide.
macOS prerequisite: Docker Desktop must be installed and open before running solo one-shot single deploy. The Docker daemon is not started automatically on macOS, so confirm Docker Desktop is running from your menu bar before you begin.
Apple Silicon: If solo one-shot single deploy fails with a “mounts denied” error, see Troubleshooting Installation.
Windows (PowerShell): Complete the System ReadinessWindows tab first, then run the commands on this page from a PowerShell terminal. The solo and kubectl commands are identical in PowerShell; only shell-specific commands (pipes, port checks, and ~/.solo paths) differ, and those show a PowerShell tab.
Note: Quickstart only covers what you need to run solo one-shot single deploy and verify that the network is working.
Detailed version requirements, OS-specific notes, and optional tools are documented in the System Readiness.
Step 1: Install Solo CLI
Install the latest Solo CLI globally using one of the following methods:
npm (recommended for all platforms):
npm install -g @hiero-ledger/solo@latest
Note: npm requires Node.js >= 22.0.0 to already be present (check with node --version; upgrade via nvm or nodejs.org if needed — Solo will fail with an EBADENGINE warning on Node.js 20.x or earlier). Solo provisions kubectl, Helm, and Kind automatically at deploy time.
Homebrew (deprecated — macOS/Linux/WSL2 only):
brew install hiero-ledger/tools/solo
⚠️ Homebrew support is being deprecated. Solo will stop publishing updates to Homebrew after August 31, 2026. New users should install via npm. Existing Homebrew users should migrate before August 31.
Verify the installation
Confirm that Solo is installed and available on your PATH:
solo --version
Expected output (version may be different):
******************************* Solo *********************************************
Version			: 0.84.0
**********************************************************************************
If you see a similar banner with a valid Solo version, your installation is successful.
Step 2: Deploy a local network (one-shot)
Use the one-shot command to create and configure a fully functional local Hiero network:
solo one-shot single deploy
This command performs the following actions:
Creates or connects to a local Kubernetes cluster using Kind.
Deploys the Solo network components.
Sets up and funds default test accounts.
Exposes gRPC and JSON-RPC endpoints for client access.
⏱ First-run time:solo one-shot single deploy typically takes
3–5 minutes when container images are already cached locally, or
10–20 minutes on the very first run while Solo pulls images over the
network (longer on slower connections). Long pauses with no visible output
change are normal — the deploy is still running. Later deployments reuse the
local image cache and complete faster. See
Solo Image Cache.
Note: During deployment you may see Stopping port-forward for port [N]
printed in yellow. This is expected - as it sets up the network, Solo stops
and re-establishes port-forwards to finalize the port configuration (clearing
stale forwards and migrating ports as needed). It does not indicate a failure.
PostgreSQL startup timeout: If the first deployment fails during mirror
node setup with a PostgreSQL startup timeout, destroy the deployment and
retry — this is a known intermittent issue on first deploy:
solo one-shot single destroy
solo one-shot single deploy
What gets deployed
Component
What it does
Use it for
Consensus Node
Processes transactions and maintains the shared ledger.
Sending transactions and queries via a Hiero SDK.
Mirror Node
Indexes all transaction history and exposes a REST API and gRPC stream.
Querying balances, history, and subscribing to event feeds.
Explorer UI
Browser-based dashboard for inspecting accounts and transactions.
Browsing the network state without writing code.
JSON-RPC Relay
Ethereum-compatible JSON-RPC interface layered on top of the consensus node.
Connecting MetaMask, Hardhat, Foundry, and ethers.js.
Multiple Node Deployment - for testing consensus scenarios
To deploy multiple consensus nodes, pass the --num-consensus-nodes flag:
solo one-shot multi deploy --num-consensus-nodes 3
This deploys 3 consensus nodes along with the same components as the
single-node setup (mirror node, explorer, relay).
Note: Multiple node deployments require more resources. Ensure you have
at least 16 GB of memory and 8 CPU cores allocated to Docker before
running this command. See
System Readiness for
the full multi-node requirements.
For multi-node teardown, run solo one-shot multi destroy.
Capture your deployment name
solo one-shot single deploy (and multi deploy) assigns a unique name to
each deployment. Subsequent Solo commands and SDK guides reference it as
<your-deployment-name> — substitute your actual value when you run them.
Retrieve the most recent deployment’s name with:
solo one-shot show deployment
The output includes a Deployment Name: line - use that value as <deployment-name> in other commands.
Verify the network
After the one-shot deployment completes, verify that the Kubernetes workloads are healthy.
You can monitor the Kubernetes workloads with standard tools:
Confirm that all Solo-related pods are in a Running or Completed state.
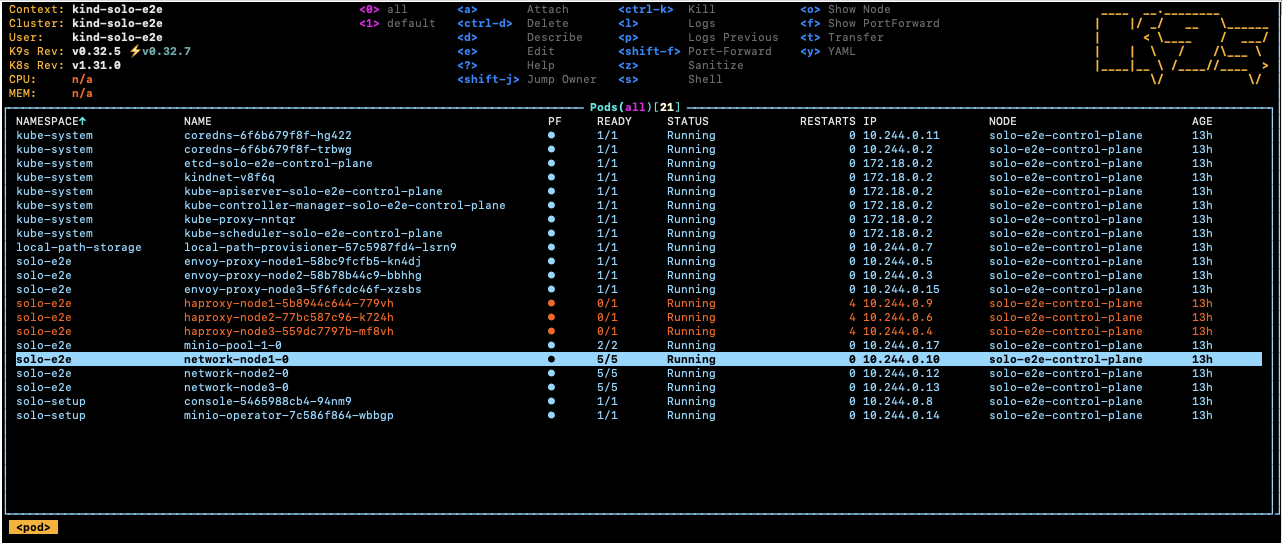
Tip: The Solo testing team recommends k9s for managing Kubernetes clusters. It provides a terminal-based UI that makes it easy to view pods, logs, and cluster status. Install it with brew install k9s and run k9s to launch.
Step 3: Access your local network
After the one-shot deployment completes and all pods are running, Solo sets up
port-forwards so you can reach your local services. For the full endpoint
reference — default ports for Solo 0.63+ and Solo 0.62 and earlier, verification
commands, and port lookup — see Service Endpoints.
Open http://localhost:38080 in your browser to explore your network.
Step 4: Tear down your network
When you are finished, destroy the network to free up resources:
solo one-shot single destroy
For a full teardown procedure including failure recovery, see the Cleanup guide. For granular stop/start and management options, see Managing Your Network.
Next Steps
With your network running, connect your application or explore Solo further:
Service Endpoints — Quick reference for all default ports and connection details.
1.3 - Managing Your Network
Learn how to start, stop, and restart consensus nodes, reset the ledger to genesis, capture logs and diagnostics, and troubleshoot a running Solo network. Master day-to-day network operations and troubleshooting.
Overview
This guide covers day-to-day management operations for a running Solo network,
including starting, stopping, and restarting nodes, resetting the ledger to
genesis, capturing logs, and troubleshooting.
Prerequisites
Before proceeding, ensure you have completed the following:
System Readiness - your local environment meets all hardware and software requirements.
Quickstart - you have a running Solo network deployed using solo one-shot single deploy.
Note: If you need to upgrade an existing Solo network, see
Upgrade Your Network.
solo one-shot show deployment
Expected output — the deployment name you passed to solo one-shot single deploy, or the default one-shot if you did not specify --deployment:
Deployment Name: one-shot (default)
Most management commands require your deployment name. Find it with solo one-shot show deployment — see Capture your deployment name. It defaults to one-shot unless you passed --deployment. Use it as <deployment-name> in all commands on this page.
Stopping and Starting Nodes
Important: The solo consensus node stop/start/restart commands act on
consensus nodes only. They do not stop the mirror node, Hiero Explorer,
JSON-RPC relay, block node, or the shared services (PostgreSQL, Redis,
MinIO) - those keep running. Solo has no stop/start command for the
non-consensus components (their lifecycle is add/destroy). To pause the
whole network, see Stop the entire network.
Stop consensus nodes
Pause the consensus node(s) without destroying the deployment:
solo consensus node stop --deployment <deployment-name>
Start consensus nodes
Bring stopped consensus node(s) back online:
solo consensus node start --deployment <deployment-name>
Restart consensus nodes
Stop and start all consensus nodes in a single operation:
solo consensus node restart --deployment <deployment-name>
To verify pod status after any of the above commands, see Verify the network in the Quickstart guide.
Stop/start vs. ledger reset:stop/start/restart pause and resume
consensus nodes without touching ledger state — accounts, balances, and
transaction history are preserved. To return the ledger to genesis and
discard all on-ledger state, see
Reset the ledger to genesis.
Stop the entire network
Solo does not provide a single command to stop every component. To pause the
entire network - consensus, mirror, Explorer, relay, block node, and
shared services - while preserving its data, scale every workload in the
deployment namespace to zero with kubectl. For one-shot deployments the
namespace matches your deployment name.
This stops all pods but keeps the Kind cluster, persistent volumes, and
configuration intact. To bring the network back online, scale the workloads
back up (Solo’s default deployments run a single replica each):
Note: Scaling to zero pauses the network without deleting it. To remove
the network entirely (cluster, volumes, and configuration), use
solo one-shot single destroy - see the
Cleanup guide.
Verify Network is Working
To confirm your Hedera network is fully operational, create a test account using the Ledger account creation command:
solo ledger account create --deployment <deployment-name>
Expected output:
*** new account created ***
-------------------------------------------------------------------------------
{"accountId": "0.0.1001",
"publicKey": "302a300506032b6570032100439379b330f3b57b5deffda196c7c0c3387f3330a838c021954303e260606f24",
"balance": 100}
Once the account is created, verify it in the web-based Explorer UI:
Open your browser to http://localhost:38080
In the search bar, enter the account ID (e.g., 0.0.1001)
View the account details, balance, and transaction history
This confirms that:
The network is processing transactions
The consensus node is responding correctly
The mirror node is indexing transactions
The explorer is displaying data properly
Reset the ledger to genesis
To return a running deployment to a clean genesis state without tearing it down
and redeploying, reset the ledger system. This clears the saved consensus state
and ledger-related secrets, returning the ledger to genesis - with no accounts,
files, or balances beyond the genesis defaults:
solo ledger system reset --deployment <deployment-name>
solo ledger system reset is the counterpart to solo ledger system init
(which initializes a new deployment). Use it when you want a fresh ledger - for
example, to rerun a scenario from a known starting point - while keeping the
same Kind cluster and deployment.
Flag
Description
--deployment
The deployment to reset.
--node-aliases
Comma-separated consensus node aliases to reset. Defaults to all nodes in the deployment.
--cluster-ref
The cluster reference, for a deployment that spans multiple clusters.
Note: This discards on-ledger state created since genesis and cannot be
undone. It does not delete the cluster or deployment - to remove those
entirely, use solo one-shot single destroy (see the
Cleanup guide).
Viewing Logs
To capture logs and diagnostic information for your deployment:
solo deployment diagnostics all --deployment <deployment-name>
Logs are saved to ~/.solo/logs/ (on native Windows, $env:USERPROFILE\.solo\logs\).
Expected output:
******************************* Solo *********************************************
Version : 0.59.1
Kubernetes Context : kind-solo
Kubernetes Cluster : kind-solo
Current Command : deployment diagnostics all --deployment <deployment-name>
**********************************************************************************
✔ Initialize [0.3s]✔ Get consensus node logs and configs [15s]✔ Get Helm chart values from all releases [2s]✔ Downloaded logs from 10 Hiero component pods [1s]✔ Get node states [10s]Configurations and logs saved to /Users/<username>/.solo/logs
Log zip file network-node1-0-log-config.zip downloaded to /Users/<username>/.solo/logs/<deployment-name>
Helm chart values saved to /Users/<username>/.solo/logs/helm-chart-values
You can also retrieve logs for a specific pod directly using kubectl:
kubectl logs -n <namespace> <pod-name>
Important: Solo deploys each network into a Kubernetes namespace. For one-shot deployments, the namespace defaults to one-shot (matching the default deployment name). You can override it by passing --namespace to solo one-shot single deploy.
To find your deployment namespace, use any of:
# Look up the namespace Solo recorded for this deploymentsolo deployment config info --deployment <deployment-name>
# Or list all namespaces and pick the one matching your deploymentkubectl get ns
# Or inspect pods and use the NAMESPACE columnkubectl get pods -A | grep -v kube-system
For one-shot deployments the namespace matches the deployment name, which defaults to one-shot unless you passed --deployment (retrieve it with solo one-shot show deployment).
Replace <namespace> and <pod-name> with the values from your deployment.
1.4 - Upgrade Your Network
Learn how to upgrade an existing Solo network deployment to a newer Hiero version using the Solo CLI and verify compatibility before you begin.
Overview
This guide explains how to upgrade an existing local Solo network deployment to a newer Hiero version. It is intended for networks that were already deployed with solo one-shot single deploy.
Note: If you just completed Quickstart with the latest Solo release, you do not need to upgrade unless you are intentionally moving an older deployment to a newer version.
Prerequisites
Before upgrading, ensure you have completed the following:
Quickstart - you have already deployed a running Solo network using solo one-shot single deploy.
System Readiness - your local environment meets Solo requirements.
A currently running Solo deployment to upgrade.
Step 1: Find your deployment name
The default for one-shot deployments is one-shot. If you used a different name, find it with solo one-shot show deployment (see Capture your deployment name). Use that value as <deployment-name> in the upgrade command.
Step 2: Upgrade the network
Run the following command to upgrade an existing Solo network deployment to a newer Hiero version:
solo consensus network upgrade --deployment <deployment-name> --upgrade-version <version>
Replace <version> with the target Hiero version, for example v0.59.0.
Important: This command is only for networks already deployed with Solo. Do not run it immediately after Quickstart unless you are moving an older deployment to a newer version.
Step 3: Verify the upgrade
After upgrading, confirm the network is healthy by checking pod status:
kubectl get pods -n <namespace>
For one-shot deployments, the namespace matches the deployment name, which defaults to one-shot unless you passed --deployment (retrieve it with solo one-shot show deployment).
1.5 - Upgrading an existing Solo installation
Upgrade an existing Solo installation to the latest release - whether you installed via Homebrew or npm - and perform a clean reinstall when an upgrade leaves a broken or conflicting state.
Overview
If you already have Solo installed, upgrade to the latest release using the same
package manager you originally installed with. This page covers the Homebrew and
npm upgrade paths, switching between them, and a clean-reinstall recipe for when
an upgrade leaves Solo in a broken state.
⚠️ Homebrew support is being deprecated. Solo will stop publishing updates to Homebrew after August 31, 2026. Existing Homebrew users should migrate to npm before August 31. See Switching between Homebrew and npm.
Tip: Check your current version first with solo --version, and compare
it against the latest release on the
Solo releases page.
Upgrade a Homebrew install
If you installed Solo with brew install hiero-ledger/tools/solo, update
Homebrew’s formula list and upgrade:
brew update
brew upgrade hiero-ledger/tools/solo
brew update refreshes Homebrew’s formulae; brew upgrade then installs the
latest Solo (and Node.js, its only Homebrew dependency). Verify the new
version:
solo --version
Upgrade an npm install
If you installed Solo with npm, re-run the global install with the @latest tag
to move to the newest release:
npm install -g @hiero-ledger/solo@latest
Note: Unlike the Homebrew formula, npm does not install Node.js - make
sure Node.js is present before upgrading. (Solo provisions kubectl, Helm, and
Kind automatically at deploy time regardless of install method.) After a
major-version upgrade, re-check the required tool versions in
System Readiness.
Resolving an EEXIST package-name conflict
Solo is published to npm under two package names - @hiero-ledger/solo and
@hashgraph/solo - that are mirrors of the same tool. Both install the same
solo command-line binary, so only one can be globally installed at a time. If
you already installed Solo under one name and then install it under the other,
npm refuses to overwrite the existing binary and the install fails with
EEXIST:
npm error code EEXIST
npm error path /Users/user/.nvm/versions/node/v22.14.0/bin/solo
npm error EEXIST: file already exists
npm error File exists: /Users/user/.nvm/versions/node/v22.14.0/bin/solo
npm error Remove the existing file and try again, or run npm with --force to overwrite files recklessly.
This is expected npm behavior - npm will not overwrite a binary owned by a
different package name. To resolve it, uninstall the other package first, then
install the one you want:
# Switching to the @hiero-ledger namespacenpm uninstall -g @hashgraph/solo
npm install -g @hiero-ledger/solo@latest
Note: If you installed under @hiero-ledger/solo and want to move to
@hashgraph/solo, swap the names in the commands above.
If the install still reports EEXIST after uninstalling - for example because
an orphaned solo binary was left behind - remove the leftover binary and
reinstall:
To install a specific (non-latest) Solo release - for example, to reproduce a
bug, run a regression test, or pin a version across a team - use a versioned
Homebrew formula or npm tag instead of latest.
Note: A versioned brew formula or npm tag pins Solo to that release - it
will not move when you run brew upgrade or npm update. To change versions
later (including returning to the latest release, or downgrading),
switching in place is not supported: uninstall Solo first
(brew uninstall hiero-ledger/tools/solo, or npm uninstall -g @hiero-ledger/solo),
then run the versioned install command below for the version you want. This
keeps your ~/.solo data - only a Clean reinstall removes
it. If you are switching package managers, see also
Switching between Homebrew and npm.
brew install hiero-ledger/tools/solo@0.76.0
The tap publishes a versioned formula (solo@<version>) for each release.
npm install -g @hiero-ledger/solo@0.76.0
Note: On Solo v0.74.0 and later, a global install - including a pinned
version - automatically pre-pulls that version’s container images into the
image cache
(~/.solo/cache/images/), which can take a few minutes and several GB on
first run. Set SOLO_NO_CACHE=true (npm) or HOMEBREW_NO_SOLO_CACHE
(Homebrew) to skip it.
Confirm the installed version:
solo --version
Tip: Installing a versioned formula or npm tag pins Solo to that
release - it will not move when you run brew upgrade or npm update. To
return to the latest release, follow
Upgrade a Homebrew install or
Upgrade an npm install above. If you hit a “two
solo binaries on PATH” conflict when switching, remove the other install
first (see
Switching between Homebrew and npm).
Switching between Homebrew and npm
To migrate from Homebrew to npm, remove the Homebrew copy first so you do not
end up with two solo binaries on your PATH:
# Remove the Homebrew copy before installing via npmbrew uninstall hiero-ledger/tools/solo
If an upgrade leaves Solo in a broken state - for example, conflicts from an
older install or a partially migrated ~/.solo - remove Solo and its
configuration, then reinstall.
Warning: This deletes your Solo home directory (~/.solo), including the
image cache, cached configuration,
and logs. The reinstall step below re-pulls the image cache (a few minutes,
several GB) on Solo v0.74.0 and later. Destroy any running deployments first
with solo one-shot single destroy - see the
Cleanup guide.
For additional cleanup options - removing a legacy npm install, Solo-managed
Kind clusters, and other artifacts - see the
Cleanup guide.
1.6 - Cleanup
Learn how to properly destroy a Solo network deployment, manage resource usage, and perform a full reset when the standard destroy command fails along with how to clean up resources safely and completely.
Overview
This guide covers how to tear down a Solo network deployment, understand
resource usage, and perform a full reset when needed.
Prerequisites
Before proceeding, ensure you have completed the following:
Quickstart — you have a running Solo
network deployed using solo one-shot single deploy.
Destroying Your Network
Important: Always destroy your network before deploying a new one to avoid
conflicts and errors.
To remove your Solo network:
solo one-shot single destroy
For multi-node one-shot deployments, use:
solo one-shot multi destroy
This command performs the following actions:
Uninstalls all component Helm releases (consensus, mirror, relay, explorer).
Removes the Solo cluster chart and disconnects the cluster reference.
Deletes the deployment from Solo’s local configuration and clears the cache.
Does NOT delete the Kind cluster - the cluster persists after destroy.
Failure modes and rerunning destroy
If solo one-shot single destroy fails part-way through (for example, due to an
earlier deploy error), some resources may remain:
The Solo namespace or one or more PVCs may not be deleted, which can leave
Docker volumes appearing as “in use”.
The destroy commands are designed to be idempotent, so you can safely rerun
solo one-shot single destroy to complete cleanup.
If rerunning destroy does not release the resources, use the Full Reset
procedure below to force a clean state.
Remove the Kind cluster
solo one-shot single destroy intentionally leaves the Kind cluster in Docker
so you can redeploy quickly. If you want a completely clean slate, delete the
cluster after destroying the deployment:
kind delete cluster --name solo-cluster
solo-cluster is Solo’s default Kind cluster name; run kind get clusters to
confirm yours if you used a custom name. To also remove Solo’s local
configuration and cache, use the Full Reset procedure.
Resource Usage
Solo deploys a fully functioning mirror node that stores the transaction history
generated by your local test network. During active testing, the mirror node’s
resource consumption will grow as it processes more transactions. If you notice
increasing resource usage, destroy and redeploy the network to reset it to a
clean state.
Full Reset
Warning: This is a last resort procedure. Only use the Full Reset if
solo one-shot single destroy fails or your Solo state is corrupted. For
normal teardown, always use solo one-shot single destroy instead.
# Delete only Solo-managed Kind clusters (names starting with "solo")kind get clusters | grep '^solo'|whileread cluster;do kind delete cluster -n "$cluster"done# Remove Solo configuration and cacherm -rf ~/.solo
Warning: The commands above will delete all Solo-managed Kind clusters and
remove your Solo home directory (~/.solo). Always use the grep '^solo'
filter when listing clusters - omitting it will delete every Kind cluster on
your machine, including any unrelated to Solo.
After deleting the Kind cluster, Kubernetes resources (including namespaces and
PVCs) and their associated volumes should be released. If Docker still reports
unused volumes that you want to remove, you can optionally run:
# Optional: remove all unused Docker volumesdocker volume prune
Warning:docker volume prune removes all unused Docker volumes on your
machine, not just those created by Solo. Only run this command if you
understand its impact.
To redeploy after a full reset, follow the
Quickstart guide.
Clean up legacy npm installations
If you previously installed Solo via npm (for example, from older workshops or
documentation), remove the global package to avoid conflicts with a newer npm
install. Solo has been published under two npm names — @hiero-ledger/solo and
@hashgraph/solo — so remove both to be sure no copy is left behind:
# Remove any npm-based Solo install (safe to run even if not present)npm uninstall -g @hiero-ledger/solo
npm uninstall -g @hashgraph/solo
Deep-dive into advanced deployment methods, network customization, and operational management. This section covers YAML-driven deployments, manual component orchestration, dynamic node management, and CI/CD integration. Ideal for DevOps engineers and system administrators requiring full control.
2.1 - Using Environment Variables
A comprehensive reference of all environment variables supported by Solo, including their purposes, default values, and expected formats. Configure Solo deployments through environment variable tuning.
Overview
Solo supports a set of environment variables that let you customize its
behaviour without modifying command-line flags on every run. Variables set
in your shell environment take effect automatically for all subsequent Solo
commands.
The variables on this page configure Solo itself. They are not the same as the
variables Solo passes on to the external tools it runs (helm, kubectl, kind).
Those are filtered by an allowlist — see
Subprocess Environment Filtering
if a variable you set is not reaching one of those tools.
Setting environment variables
How you set a variable depends on your shell. Use the tab for your platform:
# For a single command onlyCONSENSUS_NODE_VERSION=v0.73.0 solo one-shot single deploy
# For the current sessionexportCONSENSUS_NODE_VERSION=v0.73.0
# Persist across sessions (add to ~/.bashrc or ~/.zshrc)echo'export CONSENSUS_NODE_VERSION=v0.73.0' >> ~/.zshrc
# For the current session$env:CONSENSUS_NODE_VERSION='v0.73.0'# Persist for your user (all future sessions)[System.Environment]::SetEnvironmentVariable('CONSENSUS_NODE_VERSION','v0.73.0','User')# Or add it to your PowerShell profileAdd-Content$PROFILE'$env:CONSENSUS_NODE_VERSION = "v0.73.0"'
Tip: Variables set in your shell environment (or persisted as shown above) take effect automatically for all subsequent Solo commands.
General
Environment Variable
Description
Default Value
SOLO_HOME
Path to the Solo cache and log files
~/.solo
SOLO_CACHE_DIR
Path to the Solo cache directory
~/.solo/cache
SOLO_LOG_LEVEL
Logging level for Solo operations. Accepted values: trace, debug, info, warn, error
info
SOLO_DEV_OUTPUT
Treat all commands as if the --debug flag were specified (--debug was formerly --dev)
false
SOLO_CHAIN_ID
Chain ID of the Solo network
298
FORCE_PODMAN
Force the use of Podman as the container engine when creating a new local cluster. Accepted values: true, false
false
Network and Node Identity
Environment Variable
Description
Default Value
DEFAULT_START_ID_NUMBER
Raw node ID number for the first consensus node. The first node account ID is resolved as 0.0.<DEFAULT_START_ID_NUMBER>
3
SOLO_NODE_INTERNAL_GOSSIP_PORT
Internal gossip port used by the Hiero network
50111
SOLO_NODE_EXTERNAL_GOSSIP_PORT
External gossip port used by the Hiero network
50111
SOLO_NODE_DEFAULT_STAKE_AMOUNT
Default stake amount for a node
500
GRPC_PORT
Local port-forward for consensus node gRPC. Default is 35211 for Solo 0.63+ (changed from 50211 to avoid Windows ephemeral-port conflicts). See Port availability.
35211
LOCAL_NODE_START_PORT
Local node start port for the Solo network
30212
Operator and Key Configuration
Environment Variable
Description
Default Value
SOLO_OPERATOR_ID
Operator account ID for the Solo network
0.0.2
SOLO_OPERATOR_KEY
Operator private key for the Solo network
302e020100...
SOLO_OPERATOR_PUBLIC_KEY
Operator public key for the Solo network
302a300506...
FREEZE_ADMIN_ACCOUNT
Freeze admin account ID for the Solo network
0.0.58
GENESIS_KEY
Genesis private key for the Solo network
302e020100...
Note: Full key values are omitted above for readability. Refer to the
source defaults for complete key strings.
Node Client Behaviour
Environment Variable
Description
Default Value
NODE_CLIENT_MIN_BACKOFF
Minimum wait time between retries, in milliseconds
1000
NODE_CLIENT_MAX_BACKOFF
Maximum wait time between retries, in milliseconds
1000
NODE_CLIENT_REQUEST_TIMEOUT
Time a transaction or query retries on a “busy” network response, in milliseconds
600000
NODE_CLIENT_MAX_ATTEMPTS
Maximum number of attempts for node client operations
600
NODE_CLIENT_SDK_PING_MAX_RETRIES
Maximum number of retries for node health pings
5
NODE_CLIENT_SDK_PING_RETRY_INTERVAL
Interval between node health ping retries, in milliseconds
10000
NODE_COPY_CONCURRENT
Number of concurrent threads used when copying files to a node
4
EXPERIMENTAL_COPY_WRAPS_LIB_IN_PARALLEL
Copy the WRAPS proving-key library to every consensus node concurrently during solo network deploy, instead of one node at a time. Concurrent copies finish faster on a network deploy with many nodes and ample bandwidth, but can saturate a constrained connection when several multi-hundred-megabyte copies run at once. Accepted values: true, false
false
LOCAL_BUILD_COPY_RETRY
Number of retries for local build copy operations
3
ACCOUNT_UPDATE_BATCH_SIZE
Number of accounts to update in a single batch operation
10
Pod and Network Readiness
Environment Variable
Description
Default Value
PODS_RUNNING_MAX_ATTEMPTS
Maximum number of attempts to check if pods are running
900
PODS_RUNNING_DELAY
Interval between pod running checks, in milliseconds
1000
PODS_READY_MAX_ATTEMPTS
Maximum number of attempts to check if pods are ready
300
PODS_READY_DELAY
Interval between pod ready checks, in milliseconds
2000
NETWORK_NODE_ACTIVE_MAX_ATTEMPTS
Maximum number of attempts to check if network nodes are active
300
NETWORK_NODE_ACTIVE_DELAY
Interval between network node active checks, in milliseconds
1000
NETWORK_NODE_ACTIVE_TIMEOUT
Maximum wait time for network nodes to become active, in milliseconds
1000
NETWORK_PROXY_MAX_ATTEMPTS
Maximum number of attempts to check if the network proxy is running
300
NETWORK_PROXY_DELAY
Interval between network proxy checks, in milliseconds
2000
NETWORK_DESTROY_WAIT_TIMEOUT
Maximum wait time for network teardown to complete, in milliseconds
120
STATE_DOWNLOAD_STABLE_MAX_ATTEMPTS
Maximum number of attempts to check whether a consensus node’s saved state has stopped changing on disk, before solo consensus state download archives it and before solo consensus network freeze stops the nodes
180
STATE_DOWNLOAD_STABLE_DELAY
Interval between saved state stability checks, in milliseconds
2000
STATE_DOWNLOAD_STABLE_POLLS_REQUIRED
Number of consecutive checks that must report an unchanged saved state before it is treated as stable
3
Block Node
Environment Variable
Description
Default Value
BLOCK_NODE_PODS_RUNNING_MAX_ATTEMPTS
Maximum number of attempts to check if block node pods are running
900
BLOCK_NODE_PODS_RUNNING_DELAY
Interval between block node pod running checks, in milliseconds
1000
BLOCK_NODE_ACTIVE_MAX_ATTEMPTS
Maximum number of attempts to check if block nodes are active
100
BLOCK_NODE_ACTIVE_DELAY
Interval between block node active checks, in milliseconds
60
BLOCK_NODE_ACTIVE_TIMEOUT
Maximum wait time for block nodes to become active, in milliseconds
60
BLOCK_STREAM_STREAM_MODE
The blockStream.streamMode value in consensus node application properties. Only applies when a Block Node is deployed
BOTH
BLOCK_STREAM_WRITER_MODE
The blockStream.writerMode value in consensus node application properties. Only applies when a Block Node is deployed
FILE_AND_GRPC
Relay Node
Environment Variable
Description
Default Value
RELAY_PODS_RUNNING_MAX_ATTEMPTS
Maximum number of attempts to check if relay pods are running
900
RELAY_PODS_RUNNING_DELAY
Interval between relay pod running checks, in milliseconds
1000
RELAY_PODS_READY_MAX_ATTEMPTS
Maximum number of attempts to check if relay pods are ready
100
RELAY_PODS_READY_DELAY
Interval between relay pod ready checks, in milliseconds
1000
Mirror Node
Environment Variable
Description
Default Value
DISABLE_IMPORTER_SPRING_PROFILES
Disable automatic configuration of Mirror Node importer Spring profiles for block-node integration.
false
SPRING_PROFILES_ACTIVE
Spring profiles to use for the Mirror Node importer when automatic importer profile configuration is enabled.
blocknode
MIRROR_NODE_SCHEMA_READY_MAX_ATTEMPTS
Maximum number of attempts to check if the Mirror Node database schema has been built (signalled by importer pod readiness)
900
MIRROR_NODE_SCHEMA_READY_DELAY
Interval between Mirror Node database schema checks, in milliseconds
2000
MIRROR_NODE_IMPORTER_DETECT_MAX_ATTEMPTS
Maximum number of attempts to detect a running Mirror Node importer pod. If no importer pod is found, the database schema wait is skipped
15
MIRROR_NODE_IMPORTER_DETECT_DELAY
Interval between Mirror Node importer pod detection attempts, in milliseconds
2000
MIRROR_NODE_CHART_UPGRADE_MAX_ATTEMPTS
Maximum number of attempts to install or upgrade the Mirror Node Helm chart before failing. Retries ride out transient Kubernetes API server outages
3
MIRROR_NODE_CHART_UPGRADE_RETRY_DELAY_SECS
Delay between Mirror Node Helm chart install/upgrade attempts, in seconds
15
Load Balancer
Environment Variable
Description
Default Value
LOAD_BALANCER_CHECK_DELAY_SECS
Delay between load balancer status checks, in seconds
5
LOAD_BALANCER_CHECK_MAX_ATTEMPTS
Maximum number of attempts to check load balancer status
60
Lease Management
Environment Variable
Description
Default Value
SOLO_LEASE_ACQUIRE_ATTEMPTS
Number of attempts to acquire a lock before failing
10
SOLO_LEASE_DURATION
Duration in seconds for which a lock is held before expiration
Image version for the solo-deployment chart’s Cheetah component
SOLO_CONTAINERS_VERSION
Image version for the solo-deployment chart’s Solo containers component
MINIO_OPERATOR_VERSION
Release version of the MinIO Operator to use
PROMETHEUS_STACK_VERSION
Release version of the Prometheus Stack to use
GRAFANA_ALLOY_VERSION
Helm chart version of Grafana Alloy installed by solo cluster-ref config setup --grafana-alloy
LOKI_VERSION
Helm chart version of the Loki log store installed by solo cluster-ref config setup --grafana-alloy
GRAFANA_PODLOGS_CRD_VERSION
Grafana Alloy release tag the PodLogs custom resource definition is fetched from during solo network deploy --enable-monitoring-support
Tip: To pin component versions for a solo one-shot single deploy, prefix
the command with these variables. See the
One-Shot Deployment section below for an example.
Edge Component Versions
These variables only take effect when solo one-shot single deploy or
solo one-shot multi deploy is invoked with the --edge flag (solo one-shot falcon deploy does not accept --edge in v0.72.0). They let you point a
one-shot deploy at arbitrary component tags — release candidates,
pre-releases, or any other tag the component’s registry exposes — without
rebuilding Solo.
Component
Environment Variable
Falls back to
Consensus Node
CONSENSUS_NODE_EDGE_VERSION
CONSENSUS_NODE_VERSION
Mirror Node
MIRROR_NODE_EDGE_VERSION
MIRROR_NODE_VERSION
JSON-RPC Relay
RELAY_EDGE_VERSION
RELAY_VERSION
Explorer
EXPLORER_EDGE_VERSION
EXPLORER_VERSION
Block Node
BLOCK_NODE_EDGE_VERSION
BLOCK_NODE_VERSION
Solo Chart
SOLO_CHART_EDGE_VERSION
SOLO_CHART_VERSION
Set only the variables for components you want to override; the rest use their
compiled-in edge defaults. Without --edge, every *_EDGE_VERSION variable is
ignored.
Release version of the Network Load Generator Helm chart to use
v0.7.0
NETWORK_LOAD_GENERATOR_PODS_RUNNING_MAX_ATTEMPTS
Maximum number of attempts to check if Network Load Generator pods are running
900
NETWORK_LOAD_GENERATOR_POD_RUNNING_DELAY
Interval between Network Load Generator pod running checks, in milliseconds
1000
One-Shot Deployment
Environment Variable
Description
Default Value
ONE_SHOT_WITH_BLOCK_NODE
Deploy Block Node as part of a one-shot deployment
false
MIRROR_NODE_PINGER_TPS
Transactions per second for the Mirror Node monitor pinger. Set to 0 to disable
5
CONSENSUS_NODE_EDGE_VERSION
Edge (newer-than-default) consensus node version used by --edge in one-shot deploys. Falls back to CONSENSUS_NODE_VERSION.
v0.74.0-rc.1
MIRROR_NODE_EDGE_VERSION
Edge mirror node version used by --edge in one-shot deploys. Falls back to MIRROR_NODE_VERSION.
v0.153.1
EXPLORER_EDGE_VERSION
Edge explorer version used by --edge in one-shot deploys. Falls back to EXPLORER_VERSION.
26.0.0
RELAY_EDGE_VERSION
Edge relay version used by --edge in one-shot deploys. Falls back to RELAY_VERSION.
0.76.2
BLOCK_NODE_EDGE_VERSION
Edge block node version used by --edge in one-shot deploys. Falls back to BLOCK_NODE_VERSION.
0.31.0
Pinning Component Versions
solo one-shot single deploy does not yet expose CLI flags for pinning
individual component versions. To run a one-shot deployment against specific
releases, prefix the command with the
Component Versions environment variables:
CONSENSUS_NODE_VERSION=v0.73.0 MIRROR_NODE_VERSION=v0.153.1 solo one-shot single deploy
Any of the *_VERSION variables listed in
Component Versions can be combined in the same command
to pin multiple components at once.
Note:
This is the current recommended approach for version pinning in one-shot
deployments.
CLI flags for version overrides on one-shot are planned for Q2 — tracked
in hiero-ledger/solo#4242.
Environment variables will remain valid for one-off overrides after the
CLI flags land, so the form above will continue to work.
Image Cache
Solo caches the container images it deploys as local archives to speed up
repeat deployments. The cache is enabled by default; these variables disable it
per context. See Solo Image Cache for
the full feature and the solo cache image commands.
Environment Variable
Description
Default
ENABLE_IMAGE_CACHE
Set to false to disable the image cache during solo one-shot deploys. Requires Solo v0.78.0 or later (earlier releases have an inverted-logic bug in this flag).
enabled
SOLO_NO_CACHE
Set to true to skip the image pull during an npm global install.
enabled
HOMEBREW_NO_SOLO_CACHE
Set to any value to skip the image pull during a Homebrew install.
enabled
CACHE_IMAGE_MAX_CONCURRENCY
Max concurrent image cache pull/load operations
12
Note: The cached component versions follow the same environment-variable
mechanism as Pinning Component Versions above -
the *_VERSION environment variables affect the images the cache pulls, but
the --*-version CLI flags do not.
2.2 - Network Deployments
Step-by-step workflows and component-level customization for users who need full control over network initialization, configuration, and scaling. Explore YAML-driven deployments, manual orchestration, dynamic node management, and extensive reference documentation.
2.2.1 - One-shot Falcon Deployment
Deploy a complete Solo network from a single YAML file for repeatable advanced setups, CI pipelines, and custom component configuration. Falcon combines simplicity with full customization using the Solo values file format.
Overview
One-shot Falcon deployment is Solo’s YAML-driven one-shot workflow. It uses the same core
deployment pipeline as solo one-shot single deploy, but lets you inject
component-specific flags through a single values file.
Use One-shot Falcon deployment when you need a repeatable advanced setup, want to check a complete deployment into source control, or need to customise component flags without running every Solo command manually.
Falcon is especially useful for:
CI/CD pipelines and automated test environments.
Reproducible local developer setups.
Advanced deployments that need custom chart paths, image versions, ingress,
storage, TLS, or node startup options.
Important: Falcon is an orchestration layer over Solo’s standard commands.
It does not introduce a separate deployment model. Solo still creates a
deployment, attaches clusters, deploys the network, configures nodes, and then
adds optional components such as mirror node, explorer, and relay.
Prerequisites
Before proceeding, ensure you have completed the following:
System Readiness - your local environment meets the hardware and software requirements for Solo, Kubernetes, Docker, Kind, kubectl, and Helm.
Quickstart -you are already familiar with the standard one-shot deployment workflow.
How Falcon Works
When you run Falcon deployment, Solo executes the same end-to-end deployment
sequence used by its one-shot workflows:
Connect to the Kubernetes cluster.
Create a deployment and attach the cluster reference.
Set up shared cluster components.
Generate gossip and TLS keys.
Deploy the consensus network and, if enabled, the block node (in parallel).
Set up and start consensus nodes.
Optionally, deploy mirror node, explorer, and relay in parallel for faster
startup.
Create predefined test accounts.
Write deployment notes, versions, port-forward details, and account data to a local output directory.
The difference is that Falcon reads a YAML file and maps its top-level sections
to the underlying Solo subcommands.
Values file section
Solo subcommand invoked
network
solo consensus network deploy
setup
solo consensus node setup
consensusNode
solo consensus node start
mirrorNode
solo mirror node add
explorerNode
solo explorer node add
relayNode
solo relay node add
blockNode
solo block node add (when ONE_SHOT_WITH_BLOCK_NODE=true)
For the full list of supported CLI flags per section, see the
Falcon Values File Reference.
If you set network.--application-properties, see
Custom Application Properties
for the difference between Solo’s default merge mode and full overwrite mode.
Prepare a Falcon values file
Instead of authoring a values file by hand, you can use the interactive prepare wizard to generate one:
solo one-shot falcon prepare
The wizard prompts for component toggles (mirror node, explorer, relay), consensus node count, component versions, ingress, storage type, developer options, and port forwarding. All prompts have sensible defaults, so you can press Enter to accept them.
To generate a values file with all defaults (no prompts):
solo one-shot falcon prepare --quiet-mode
To specify a custom output path:
solo one-shot falcon prepare --output-values-file ./my-values.yaml
Output file location
By default, the generated file is written to ~/.solo/cache/falcon-values.yaml — a deterministic absolute path regardless of how or where Solo is invoked. You can override this with --output-values-file. The success message always prints the fully resolved path so there is no ambiguity.
Default: ~/.solo/cache/falcon-values.yaml — always the same location.
Relative path: --output-values-file ./configs/my-values.yaml — resolved against the current working directory (so /tmp/configs/my-values.yaml if invoked from /tmp).
Absolute path: --output-values-file /tmp/falcon-values.yaml — written to that exact location regardless of the current working directory.
The generated file is ready to use with solo one-shot falcon deploy --values-file. For the full list of flags the wizard sets, see the Falcon Values File Reference.
Create a Falcon Values File
Create a YAML file to control every component of your Solo deployment. The file can have any name -falcon-values.yaml is used throughout this guide as a convention.
Note: Keys within each section must be the full CLI flag name including the -- prefix - for example, --release-tag, not release-tag or -r. Any section you omit
from the file is skipped, and Solo uses the built-in defaults for that component.
Example: Single-Node Falcon Deployment
The following falcon-values.yaml example deploys a standard single-node network with mirror node,
explorer, and relay enabled:
Note: --values-file specifies which YAML file to load.
--values-file selects the YAML file to load.
--deployment, --namespace, --cluster-ref, and --num-consensus-nodes
are top-level one-shot inputs.
Important: Do not rely on --deployment inside falcon-values.yaml.
Solo intentionally ignores --deployment values from section content during
Falcon argument expansion. Set the deployment name on the command line if you
need a specific name.
Tip: When not specified, Falcon uses these defaults: --deployment one-shot,
--namespace one-shot, --cluster-ref one-shot, and --num-consensus-nodes 1.
Pass any of these explicitly on the command line to override them.
The --node-aliases value in the relayNode section must match the node aliases
generated by --num-consensus-nodes. Nodes are auto-named node1, node2,
node3, and so on. Setting this to only node1 is valid if you want the relay
to serve a single node, but specifying all aliases is typical for full coverage.
Use this pattern when you need a repeatable multi-node deployment but do not
want to manage each step manually.
Note: Multi-node deployments require more host resources than single-node
deployments. Follow the resource guidance in
System Readiness, and increase Docker
memory and CPU allocation before deploying.
Common Falcon Customisations
Because each YAML section maps directly to the corresponding Solo subcommand,
you can use Falcon to centralise advanced options such as:
Custom release tags for the consensus node platform.
Local chart directories for mirror node, relay, explorer, or block node.
Local consensus node build paths for development workflows.
Ingress and domain settings.
Mirror node external database settings.
Node startup settings such as state files, port forwarding, and stake amounts.
Storage backends and credentials for stream file handling.
Example: Local Development with Local Chart Directories
This pattern is useful for local integration testing against unpublished
component builds.
Falcon with Block Node
Falcon can also include block node configuration.
Note: Block node workflows are advanced and require higher resource
allocation and version compatibility across consensus node, block node, and
related components.
Docker memory must be set to at least 16 GB before deploying with block node enabled.
Block node support also requires the
ONE_SHOT_WITH_BLOCK_NODE=true environment variable to be set before
running falcon deploy. Without it, Solo skips the block node add step even
if a blockNode section is present in the values file.
Block node deployment is subject to version compatibility requirements. Minimum
versions are consensus node ≥ v0.72.0 and block node ≥ 0.29.0. Mixing
incompatible versions will cause the deployment to fail. Check the
Version Compatibility Reference
before enabling block node.
Use block node settings only when your target Solo and component versions are
known to be compatible.
Deployment Output
After a successful Falcon deployment, Solo writes deployment metadata to
~/.solo/one-shot-<deployment>/ where <deployment> is the value of the
--deployment flag (default: one-shot).
This directory typically contains:
notes - human-readable deployment summary
versions - component versions recorded at deploy time
forwards - port-forward configuration
accounts.json - predefined test account keys and IDs. All accounts are
ECDSA Alias accounts (EVM-compatible) and include a publicAddress field.
The file also includes the system operator account.
This makes Falcon especially useful for automation, because the deployment
artifacts are written to a predictable path after each run.
To inspect deployment output, check the ~/.solo/one-shot-<deployment>/ directory directly.
If port-forwards are interrupted after deployment, restore them by rerunning the component commands (such as solo consensus node start, solo mirror node add, etc.)
Destroy a Falcon Deployment
Destroy the Falcon deployment with:
solo one-shot falcon destroy
Solo removes deployed extensions first, then destroys the mirror node, network,
cluster references, and local deployment metadata.
If multiple deployments exist locally, Solo prompts you to choose which one to
destroy unless you pass --deployment explicitly.
solo one-shot falcon destroy --deployment falcon-demo
When to Use Falcon vs. Manual Deployment
Use Falcon deployment when you want a single, repeatable command backed by a
versioned YAML file.
Use Step-by-Step Manual Deployment
when you need to pause between steps, inspect intermediate state, or debug a
specific deployment phase in isolation.
In practice:
Falcon is better for automation and repeatability.
Manual deployment is better for debugging and low-level control.
Tip: If you are creating a values file for the first time, start from the
annotated template in the Solo repository rather than writing one from scratch:
This file includes all supported sections and flags with inline comments
explaining each option. Copy it, remove what you do not need, and adjust the
values for your environment.
2.2.2 - Falcon Values File Reference
Comprehensive reference for all supported CLI flags per section of a Falcon values file, including defaults, types, and descriptions. Use this as your source of truth when customizing Falcon deployments.
Overview
This page catalogs the Solo CLI flags accepted under each top-level section of a
Falcon values file. Each entry corresponds to the command-line flag that the
underlying Solo subcommand accepts.
Sections map to subcommands as follows:
Section
Solo subcommand
network
solo consensus network deploy
setup
solo consensus node setup
consensusNode
solo consensus node start
mirrorNode
solo mirror node add
explorerNode
solo explorer node add
relayNode
solo relay node add
blockNode
solo block node add
All flag names must be written in long form with double dashes (for example,
--release-tag). Flags left empty ("") or matching their default value are
ignored by Solo at argument expansion time.
Path to a custom settings.txt file for consensus nodes.
--application-properties
string
template
Path to a custom application.properties file. Defaults to key-level merge mode; add # SOLO_ENABLE_OVERWRITE=true to the file for overwrite mode. See Custom Application Properties.
--application-env
string
template
Path to a custom application.env file.
--api-permission-properties
string
template
Path to a custom api-permission.properties file.
--bootstrap-properties
string
template
Path to a custom bootstrap.properties file.
--log4j2-xml
string
template
Path to a custom log4j2.xml file.
--genesis-throttles-file
string
—
Path to a custom throttles.json file for network genesis.
--service-monitor
boolean
false
Install a ServiceMonitor custom resource for Prometheus metrics.
--pod-log
boolean
false
Install a PodLog custom resource for node pod log monitoring.
Consensus node release tag. Must match network.--release-tag.
--local-build-path
string
—
Path to a local Hiero consensus node build (e.g. ~/hiero-consensus-node/hedera-node/data). Used for local development workflows.
--app
string
HederaNode.jar
Name of the consensus node application binary.
--app-config
string
—
Path to a JSON configuration file for the testing app.
--admin-public-keys
string
—
Comma-separated DER-encoded ED25519 public keys in node alias order.
--domain-names
string
—
Custom domain name mapping per node alias.
--debug
boolean
false
Enable debug mode. (Formerly --dev, which is deprecated — see note below.)
--quiet-mode
boolean
false
Suppress confirmation prompts.
--cache-dir
string
~/.solo/cache
Local cache directory for downloaded artifacts.
Deprecated: The --dev flag has been renamed to --debug. --dev still
works as an alias but is deprecated and prints a warning. The --dev alias
will no longer be supported once Solo 0.82.0 reaches its end of support
date.
Consensus Node Start — consensusNode
Flags passed to solo consensus node start.
Flag
Type
Default
Description
--force-port-forward
boolean
true
Force port forwarding to access network services locally.
--stake-amounts
string
—
Comma-separated stake amounts in node alias order (e.g. 100,100,100). Required for multi-node deployments that need non-default stakes.
--state-file
string
—
Path to a zipped state file to restore the network from.
--debug-node-alias
string
—
Enable JVM debug port (5005) for the specified node alias.
--app
string
HederaNode.jar
Name of the consensus node application binary.
--quiet-mode
boolean
false
Suppress confirmation prompts.
Mirror Node Add — mirrorNode
Flags passed to solo mirror node add.
Flag
Type
Default
Description
--mirror-node-version
string
current version
Mirror node Helm chart version to deploy.
--enable-ingress
boolean
false
Deploy an ingress controller for the mirror node.
--force-port-forward
boolean
true
Enable port forwarding for mirror node services.
--pinger
boolean
false
Enable the mirror node Pinger service.
--mirror-static-ip
string
—
Static IP address for the mirror node load balancer.
--domain-name
string
—
Custom domain name for the mirror node.
--ingress-controller-value-file
string
—
Path to a Helm values file for the ingress controller.
--mirror-node-chart-dir
string
—
Path to a local mirror node Helm chart directory.
--use-external-database
boolean
false
Connect to an external PostgreSQL database instead of the chart-bundled one.
--external-database-host
string
—
Hostname of the external database. Requires --use-external-database.
--external-database-owner-username
string
—
Owner username for the external database.
--external-database-owner-password
string
—
Owner password for the external database.
--external-database-read-username
string
—
Read-only username for the external database.
--external-database-read-password
string
—
Read-only password for the external database.
--storage-type
string
minio_only
Stream file storage backend for the mirror node importer.
--storage-read-access-key
string
—
Storage read access key for the mirror node importer.
--storage-read-secrets
string
—
Storage read secret key for the mirror node importer.
--storage-endpoint
string
—
Storage endpoint URL for the mirror node importer.
--storage-bucket
string
—
Storage bucket name for the mirror node importer.
--storage-bucket-prefix
string
—
Storage bucket path prefix.
--storage-bucket-region
string
—
Storage bucket region.
--operator-id
string
—
Operator account ID for the mirror node.
--operator-key
string
—
Operator private key for the mirror node.
--quiet-mode
boolean
false
Suppress confirmation prompts.
--values-file
string
—
Comma-separated Helm chart values file paths for the mirror node chart.
Explorer Add — explorerNode
Flags passed to solo explorer node add.
Flag
Type
Default
Description
--explorer-version
string
current version
Hiero Explorer Helm chart version to deploy.
--enable-ingress
boolean
false
Deploy an ingress controller for the explorer.
--force-port-forward
boolean
true
Enable port forwarding for the explorer service.
--domain-name
string
—
Custom domain name for the explorer.
--ingress-controller-value-file
string
—
Path to a Helm values file for the ingress controller.
--explorer-chart-dir
string
—
Path to a local Hiero Explorer Helm chart directory.
--explorer-static-ip
string
—
Static IP address for the explorer load balancer.
--enable-explorer-tls
boolean
false
Enable TLS for the explorer. Requires cert-manager.
ID of the mirror node instance to connect the explorer to.
--mirror-namespace
string
—
Kubernetes namespace of the mirror node.
--solo-chart-version
string
current version
Solo chart version used for explorer cluster setup.
--quiet-mode
boolean
false
Suppress confirmation prompts.
--values-file
string
—
Comma-separated Helm chart values file paths for the explorer chart.
JSON-RPC Relay Add — relayNode
Flags passed to solo relay node add.
Flag
Type
Default
Description
--relay-release
string
current version
Hiero JSON-RPC Relay Helm chart release to deploy.
--node-aliases
string
—
Comma-separated node aliases the relay will observe (e.g. node1 or node1,node2).
--replica-count
number
1
Number of relay replicas to deploy.
--chain-id
string
298
EVM chain ID exposed by the relay (Hedera testnet default).
--force-port-forward
boolean
true
Enable port forwarding for the relay service.
--domain-name
string
—
Custom domain name for the relay.
--relay-chart-dir
string
—
Path to a local Hiero JSON-RPC Relay Helm chart directory.
--operator-id
string
—
Operator account ID for relay transaction signing.
--operator-key
string
—
Operator private key for relay transaction signing.
--mirror-node-id
number
—
ID of the mirror node instance the relay will query.
--mirror-namespace
string
—
Kubernetes namespace of the mirror node.
--quiet-mode
boolean
false
Suppress confirmation prompts.
--values-file
string
—
Comma-separated Helm chart values file paths for the relay chart.
Block Node Add — blockNode
Flags passed to solo block node add.
Important: The blockNode section is only read when ONE_SHOT_WITH_BLOCK_NODE=true
is set in the environment. Otherwise Solo skips the block node add step
regardless of whether a blockNode section is present.
Version requirements: Consensus node ≥ v0.72.0 and block node ≥ 0.29.0.
Use --force to bypass version gating during testing.
Flag
Type
Default
Description
--release-tag
string
current version
Hiero block node release tag.
--image-tag
string
—
Docker image tag to override the Helm chart default.
--enable-ingress
boolean
false
Deploy an ingress controller for the block node.
--domain-name
string
—
Custom domain name for the block node.
--debug
boolean
false
Enable debug mode for the block node. (Formerly --dev, which is deprecated — see note below.)
--block-node-chart-dir
string
—
Path to a local Hiero block node Helm chart directory.
--quiet-mode
boolean
false
Suppress confirmation prompts.
--values-file
string
—
Comma-separated Helm chart values file paths for the block node chart.
Deprecated: The --dev flag has been renamed to --debug. --dev still
works as an alias but is deprecated and prints a warning. The --dev alias
will no longer be supported once Solo 0.82.0 reaches its end of support
date.
Top-Level Falcon Command Flags
The following flags are passed directly on the solo one-shot falcon deploy command
line. They are not read from the values file sections.
Flag
Type
Default
Description
--values-file
string
—
Path to the Falcon values YAML file.
--deployment
string
one-shot
Deployment name for Solo’s internal state.
--namespace
string
one-shot
Kubernetes namespace to deploy into.
--cluster-ref
string
one-shot
Cluster reference name.
--num-consensus-nodes
number
1
Number of consensus nodes to deploy.
--parallel-deploy
boolean
true
Run independent deploy stages in parallel (consensus+block, mirror+accounts, explorer+relay). Use --no-parallel-deploy for sequential execution.
--quiet-mode
boolean
false
Suppress all interactive prompts.
--force
boolean
false
Force actions that would otherwise be skipped.
Falcon Prepare — prepare
Flags accepted by solo one-shot falcon prepare, the interactive wizard that generates a Falcon values file. The wizard prompts for nearly every values-file field, but the following CLI flags control its output behavior directly.
Flag
Type
Default
Description
--output-values-file
string
~/.solo/cache/falcon-values.yaml
Path to the generated values file. Absolute paths are written as-is. Relative paths are resolved against the current working directory.
--quiet-mode
boolean
false
Generate a values file using all defaults without prompting.
All other prepare-time flags correspond directly to the per-section values shown in the tables above and are documented under their respective network, setup, consensusNode, mirrorNode, explorerNode, relayNode, and blockNode sections.
2.2.3 - Step-by-Step Manual Deployment
Deploy each Solo network component individually for maximum control over configuration and debugging. Execute each step manually through the Solo CLI and integrate Solo into bespoke automation pipelines.
Overview
Manual deployment lets you deploy each Solo network component individually,
giving you full control over configuration, sequencing, and troubleshooting.
Use this approach when you need to customise specific steps, debug a component
in isolation, or integrate Solo into a bespoke automation pipeline.
Prerequisites
Before proceeding, ensure you have completed the following:
System Readiness — your local environment
meets all hardware and software requirements (Docker, kind, kubectl, helm, Solo).
Note: The expected output blocks below are fetched from the latest published Solo release
at build time and will always reflect the current version.
1. Connect Cluster and Create Deployment
Connect Solo to the Kind cluster and create a new deployment configuration:
# Connect to the Kind clustersolo cluster-ref config connect \
--cluster-ref kind-${SOLO_CLUSTER_NAME}\
--context kind-${SOLO_CLUSTER_NAME}# Create a new deploymentsolo deployment config create \
-n "${SOLO_NAMESPACE}"\
--deployment "${SOLO_DEPLOYMENT}"
Expected Output:
******************************* Solo *********************************************
  Version			: 0.90.0
  Kubernetes Context	: kind-solo
  Kubernetes Cluster	: kind-solo
  Current Command		: cluster-ref config connect --cluster-ref kind-solo --context kind-solo
  **********************************************************************************

  ***************************************************************************************
  Note: solo stores various artifacts (config, logs, keys etc.) in its home directory: /home/runner/.solo
  If a full reset is needed, delete the directory or relevant sub-directories before running 'solo'.
  ***************************************************************************************
  ❯ Initialize
  ✔ Initialize
  ❯ Validating cluster ref:
  ✔ Validating cluster ref: kind-solo
  ❯ Test connection to cluster:
  ✔ Test connection to cluster: kind-solo
  ❯ Associate a context with a cluster reference:
  ✔ Associate a context with a cluster reference: kind-solo
******************************* Solo *********************************************
Version : 0.90.0
Kubernetes Context : kind-solo
Kubernetes Cluster : kind-solo
Current Command : deployment config create --namespace solo --realm 0 --shard 0Kubernetes Namespace : solo
**********************************************************************************
❯ Initialize
✔ Initialize
❯ Add deployment to local config
✔ Adding deployment: solo-deployment with namespace: solo to local config
2. Add Cluster to Deployment
Attach the cluster to your deployment and specify the number of consensus nodes:
Deploy the Solo network Helm chart, which provisions the consensus node pods,
HAProxy, Envoy, and MinIO:
solo consensus network deploy --deployment "${SOLO_DEPLOYMENT}"
To provide a custom consensus node application.properties file, pass
--application-properties <path>. Solo merges custom files with its generated
defaults unless the file includes the overwrite marker. See
Custom Application Properties
for merge and overwrite examples.
Download the consensus node platform software and configure each node:
exportCONSENSUS_NODE_VERSION=v0.66.0
solo consensus node setup \
--deployment "${SOLO_DEPLOYMENT}"\
--consensus-node-version "${CONSENSUS_NODE_VERSION}"
On native Windows (PowerShell), set the version with $env:CONSENSUS_NODE_VERSION = 'v0.66.0' and reference variables as $env:SOLO_DEPLOYMENT / $env:CONSENSUS_NODE_VERSION.
Example output:
******************************* Solo *********************************************
Version : 0.90.0
Kubernetes Context : kind-solo
Kubernetes Cluster : kind-solo
Current Command : consensus node setup --consensus-node-version v0.76.4
**********************************************************************************
❯ Load configuration
✔ Load configuration [0.2s]❯ Initialize
✔ Initialize [0.1s]❯ Validate nodes states
❯ Validating state for node node1
✔ Validating state for node node1 - valid state: requested
✔ Validate nodes states
❯ Identify network pods
❯ Check network pod: node1
✔ Check network pod: node1
✔ Identify network pods
❯ Fetch platform software into network nodes
❯ Update node: node1 [platformVersion= v0.76.4, context= kind-solo ]✔ Update node: node1 [platformVersion= v0.76.4, context= kind-solo ][3s]✔ Fetch platform software into network nodes [5s]❯ Setup network nodes
❯ Node: node1
❯ Copy configuration files
✔ Copy configuration files [0.5s]❯ Set file permissions
✔ Set file permissions [0.4s]✔ Node: node1 [1s]✔ Setup network nodes [1s]❯ Update block-nodes.json
✔ Update block-nodes.json [0.8s]❯ setup network node folders
✔ setup network node folders [0.1s]❯ Change node state to configured in remote config
✔ Change node state to configured in remote config
7. Start Consensus Nodes
Start all configured nodes and wait for them to reach ACTIVE status:
solo consensus node start --deployment "${SOLO_DEPLOYMENT}"
Expected output:
******************************* Solo *********************************************
Version : 0.90.0
Kubernetes Context : kind-solo
Kubernetes Cluster : kind-solo
Current Command : consensus node start
**********************************************************************************
❯ Pre-flight: check Docker Desktop containerd setting
✔ Pre-flight: check Docker Desktop containerd setting
❯ Check dependencies
❯ Check dependency: helm [OS: linux, Release: 6.8.0-134-generic, Arch: x64]❯ Check dependency: kind [OS: linux, Release: 6.8.0-134-generic, Arch: x64]❯ Check dependency: kubectl [OS: linux, Release: 6.8.0-134-generic, Arch: x64]✔ Check dependency: kind v0.29.0 (/home/runner/.solo/bin/kind)[OS: linux, Release: 6.8.0-134-generic, Arch: x64]✔ Check dependency: helm vv3.14.2 (/home/runner/.solo/bin/helm)[OS: linux, Release: 6.8.0-134-generic, Arch: x64][0.1s]✔ Check dependency: kubectl v1.32.2 (/home/runner/.solo/bin/kubectl)[OS: linux, Release: 6.8.0-134-generic, Arch: x64][0.1s]✔ Check dependencies [0.1s]❯ Setup chart manager
✔ Setup chart manager [0.8s]❯ Load configuration
✔ Load configuration [0.3s]❯ Initialize
✔ Initialize
❯ Validate nodes states
❯ Validating state for node node1
✔ Validating state for node node1 - valid state: configured
✔ Validate nodes states
❯ Identify existing network nodes
❯ Check network pod: node1
✔ Check network pod: node1
✔ Identify existing network nodes
❯ Upload state files network nodes
↓ Upload state files network nodes [SKIPPED: Upload state files network nodes]❯ Install override-network.json
↓ Install override-network.json [SKIPPED: Install override-network.json]❯ Starting nodes
❯ Start node: node1
✔ Start node: node1 [1s]✔ Starting nodes [1s]❯ Enable port forwarding for JVM debugger
↓ Enable port forwarding for JVM debugger [SKIPPED: Enable port forwarding for JVM debugger]❯ Check all nodes are ACTIVE or FREEZE_COMPLETE
↓ Check all nodes are ACTIVE or FREEZE_COMPLETE [SKIPPED: No state file supplied]❯ Check node proxies are ACTIVE
↓ Check node proxies are ACTIVE [SKIPPED: Nodes did not come up frozen]❯ Change node state to frozen in remote config
↓ Change node state to frozen in remote config [SKIPPED: Nodes did not come up frozen]❯ Check nodes are ACTIVE and proxies are ready
❯ Check all nodes are ACTIVE
❯ Check node proxies are ACTIVE
❯ Check proxy for node: node1
❯ Check network pod: node1
✔ Check proxy for node: node1
✔ Check node proxies are ACTIVE
Using requested port 30212Stopping port-forward for port [30212]Using requested port 30212Stopping port-forward for port [30212]Using requested port 30212✔ Check network pod: node1 - gRPC readiness 3/3, attempt: 2/20 [38s]✔ Check all nodes are ACTIVE [38s]✔ Check nodes are ACTIVE and proxies are ready [38s]❯ Enable port forwarding for debug port and/or GRPC port
Using requested port 35211✔ Enable port forwarding for debug port and/or GRPC port
❯ Emit node started event
✔ Emit node started event
❯ Wait for TSS
❯ Waiting for node: node1
✔ Waiting for node: node1, attempt 1/60 [10s]✔ Wait for TSS [10s]❯ set gRPC Web endpoint
Stopping port-forward for port [30212]Using requested port 30212✔ set gRPC Web endpoint [3s]❯ Change node state to started in remote config
✔ Change node state to started in remote config
❯ Add node stakes
❯ Adding stake for node: node1
✔ Adding stake for node: node1 [2s]✔ Add node stakes [2s]Stopping port-forward for port [30212]
8. Deploy Mirror Node
Deploy the Hedera Mirror Node, which indexes all transaction data and exposes a
REST API and gRPC endpoint:
The --pinger flag keeps the mirror node’s importer active by regularly
submitting record files. The --enable-ingress flag installs the HAProxy
ingress controller for the mirror node REST API.
Expected output:
******************************* Solo *********************************************
Version : 0.90.0
Kubernetes Context : kind-solo
Kubernetes Cluster : kind-solo
Current Command : mirror node add --cluster-ref kind-solo --enable-ingress --quiet-mode
**********************************************************************************
❯ Pre-flight: check Docker Desktop containerd setting
✔ Pre-flight: check Docker Desktop containerd setting
❯ Check dependencies
❯ Check dependency: helm [OS: linux, Release: 6.8.0-134-generic, Arch: x64]❯ Check dependency: kind [OS: linux, Release: 6.8.0-134-generic, Arch: x64]❯ Check dependency: kubectl [OS: linux, Release: 6.8.0-134-generic, Arch: x64]✔ Check dependency: kind v0.29.0 (/home/runner/.solo/bin/kind)[OS: linux, Release: 6.8.0-134-generic, Arch: x64]✔ Check dependency: helm vv3.14.2 (/home/runner/.solo/bin/helm)[OS: linux, Release: 6.8.0-134-generic, Arch: x64][0.1s]✔ Check dependency: kubectl v1.32.2 (/home/runner/.solo/bin/kubectl)[OS: linux, Release: 6.8.0-134-generic, Arch: x64][0.1s]✔ Check dependencies [0.1s]❯ Setup chart manager
✔ Setup chart manager [0.8s]❯ Initialize
❯ Acquire lock
✔ Acquire lock - lock acquired successfully, attempt: 1/10
✔ Initialize [0.5s]❯ Add mirror node to remote config
✔ Add mirror node to remote config
❯ load node client
Using requested port 30212✔ load node client [1s]❯ Deploy charts
❯ Enable shared resources
❯ Install Shared Resources chart
✔ Install Shared Resources chart [2s]❯ Load redis credentials
✔ Load redis credentials
❯ Initialize Postgres pod
❯ Wait for Postgres pod to be ready
✔ Wait for Postgres pod to be ready [11s]✔ Initialize Postgres pod [11s]❯ Add shared resource components to remote config
✔ Add shared resource components to remote config
✔ Enable shared resources [13s]❯ Prime mirror-node postgres secret
✔ Prime mirror-node postgres secret [0.9s]❯ Delete stale mirror redis secret
✔ Delete stale mirror redis secret
❯ Run database initialization script
✔ Run database initialization script [1s]❯ Enable mirror-node
❯ Prepare address book
✔ Prepare address book
❯ Install mirror ingress controller
- Installed haproxy-ingress-1 chart, version: 0.14.5
✔ Install mirror ingress controller [0.6s]❯ Deploy mirror-node
- Installed mirror chart, version: v0.161.0
✔ Deploy mirror-node [2s]❯ Wait for mirror node database schema
✔ Wait for mirror node database schema [18s]✔ Enable mirror-node [21s]✔ Deploy charts [37s]❯ Check pods are ready
❯ Check Grpc
❯ Check Importer
❯ Check Rest
❯ Check Rest Java
❯ Check Web3
✔ Check Rest Java
✔ Check Grpc
✔ Check Rest
✔ Check Web3
✔ Check Importer
✔ Check pods are ready
❯ Enable port forwarding for mirror ingress controller
Using requested port 38081✔ Enable port forwarding for mirror ingress controller
❯ Show user messages
*** Port forwarding enabled: ***
-------------------------------------------------------------------------------
- Mirror ingress controller port forward enabled on 127.0.0.1:38081
-------------------------------------------------------------------------------
✔ Show user messages
Stopping port-forward for port [30212]
9. Deploy Explorer
Deploy the Hiero Explorer, a web UI for browsing transactions and accounts:
solo explorer node add \
--deployment "${SOLO_DEPLOYMENT}"\
--cluster-ref kind-${SOLO_CLUSTER_NAME}\
--force-port-forward
Expected output:
******************************* Solo *********************************************
Version : 0.90.0
Kubernetes Context : kind-solo
Kubernetes Cluster : kind-solo
Current Command : explorer node add --cluster-ref kind-solo --quiet-mode
**********************************************************************************
❯ Pre-flight: check Docker Desktop containerd setting
✔ Pre-flight: check Docker Desktop containerd setting
❯ Check dependencies
❯ Check dependency: helm [OS: linux, Release: 6.8.0-134-generic, Arch: x64]❯ Check dependency: kind [OS: linux, Release: 6.8.0-134-generic, Arch: x64]❯ Check dependency: kubectl [OS: linux, Release: 6.8.0-134-generic, Arch: x64]✔ Check dependency: kind v0.29.0 (/home/runner/.solo/bin/kind)[OS: linux, Release: 6.8.0-134-generic, Arch: x64]✔ Check dependency: helm vv3.14.2 (/home/runner/.solo/bin/helm)[OS: linux, Release: 6.8.0-134-generic, Arch: x64][0.1s]✔ Check dependency: kubectl v1.32.2 (/home/runner/.solo/bin/kubectl)[OS: linux, Release: 6.8.0-134-generic, Arch: x64][0.1s]✔ Check dependencies [0.1s]❯ Setup chart manager
✔ Setup chart manager [0.7s]❯ Initialize
❯ Acquire lock
✔ Acquire lock - lock acquired successfully, attempt: 1/10
✔ Initialize [0.5s]❯ Load remote config
✔ Load remote config [0.2s]❯ Add explorer to remote config
✔ Add explorer to remote config
❯ Install cert manager
↓ Install cert manager [SKIPPED: Install cert manager]❯ Install explorer
- Installed hiero-explorer-1 chart, version: 26.2.0
✔ Install explorer [1s]❯ Install explorer ingress controller
↓ Install explorer ingress controller [SKIPPED: Install explorer ingress controller]❯ Check explorer pod is ready
✔ Check explorer pod is ready [4s]❯ Check haproxy ingress controller pod is ready
↓ Check haproxy ingress controller pod is ready [SKIPPED: Check haproxy ingress controller pod is ready]❯ Check load balancer is assigned
↓ Check load balancer is assigned [SKIPPED: Check load balancer is assigned]❯ Enable port forwarding for explorer
No port forward config found for Explorer
Using requested port 38080✔ Enable port forwarding for explorer
❯ Show user messages
*** Port forwarding enabled: ***
-------------------------------------------------------------------------------
- Explorer port forward enabled on 127.0.0.1:38080
-------------------------------------------------------------------------------
✔ Show user messages
10. Deploy JSON-RPC Relay
Deploy the Hiero JSON-RPC Relay to expose an Ethereum-compatible JSON-RPC
endpoint for EVM tooling (MetaMask, Hardhat, Foundry, etc.).
The -i flag (short for --node-aliases) specifies which consensus nodes the relay serves. Pass a comma-separated list for multi-node deployments. Omitting the flag covers all nodes.
1. Single node:
solo relay node add \
  -i node1 \
  --deployment "${SOLO_DEPLOYMENT}"
2. Multiple nodes (e.g., 3 nodes):
solo relay node add \
  --node-aliases node1,node2,node3 \
  --deployment "${SOLO_DEPLOYMENT}"
Expected output:
******************************* Solo *********************************************
Version : 0.90.0
Kubernetes Context : kind-solo
Kubernetes Cluster : kind-solo
Current Command : relay node add --node-aliases node1 --cluster-ref kind-solo --relay-version 0.78.1
**********************************************************************************
❯ Pre-flight: check Docker Desktop containerd setting
✔ Pre-flight: check Docker Desktop containerd setting
❯ Check dependencies
❯ Check dependency: helm [OS: linux, Release: 6.8.0-134-generic, Arch: x64]❯ Check dependency: kind [OS: linux, Release: 6.8.0-134-generic, Arch: x64]❯ Check dependency: kubectl [OS: linux, Release: 6.8.0-134-generic, Arch: x64]✔ Check dependency: kind v0.29.0 (/home/runner/.solo/bin/kind)[OS: linux, Release: 6.8.0-134-generic, Arch: x64]✔ Check dependency: helm vv3.14.2 (/home/runner/.solo/bin/helm)[OS: linux, Release: 6.8.0-134-generic, Arch: x64][0.1s]✔ Check dependency: kubectl v1.32.2 (/home/runner/.solo/bin/kubectl)[OS: linux, Release: 6.8.0-134-generic, Arch: x64][0.1s]✔ Check dependencies [0.1s]❯ Setup chart manager
✔ Setup chart manager [0.7s]❯ Initialize
❯ Acquire lock
✔ Acquire lock - lock acquired successfully, attempt: 1/10
✔ Initialize [0.6s]❯ Add relay component in remote config
✔ Add relay component in remote config
❯ Check chart is installed
✔ Check chart is installed [0.2s]❯ Create relay operator credentials secret
✔ Create relay operator credentials secret
❯ Prepare chart values
✔ Prepare chart values
❯ Deploy JSON RPC Relay
- Installed relay-1 chart, version: 0.78.1
✔ Deploy JSON RPC Relay [1s]❯ Check relay is running
✔ Check relay is running [5s]❯ Check relay is ready
✔ Check relay is ready [3s]❯ Check load balancer is assigned
↓ Check load balancer is assigned [SKIPPED: Check load balancer is assigned]❯ Enable port forwarding for relay node
No port forward config found for JSON RPC Relay
Using requested port 37546✔ Enable port forwarding for relay node [0.1s]❯ Show user messages
*** Port forwarding enabled: ***
-------------------------------------------------------------------------------
- JSON RPC Relay port forward enabled on 127.0.0.1:37546
-------------------------------------------------------------------------------
✔ Show user messages
Cleanup
When you are done, destroy components in the reverse order of deployment.
Important: Always destroy components before destroying the network. Skipping
this order can leave orphaned Helm releases and PVCs in your cluster.
1. Destroy JSON-RPC Relay
Pass the same node aliases you used when deploying the relay. For a multi-node deployment, use --node-aliases node1,node2,node3 (or omit the flag to destroy all).
solo explorer node destroy \
--deployment "${SOLO_DEPLOYMENT}"\
--force
3. Destroy Mirror Node
solo mirror node destroy \
--deployment "${SOLO_DEPLOYMENT}"\
--force
4. Destroy the Network
solo consensus network destroy \
--deployment "${SOLO_DEPLOYMENT}"\
--force
2.2.4 - Custom Application Properties
Configure consensus node application.properties with Solo’s default merge mode or full overwrite mode.
Overview
Solo lets you provide a custom application.properties file for consensus nodes
with the --application-properties flag. By default, Solo merges your file with
its generated defaults. If you need complete control over the final file, add an
overwrite marker to your custom file.
Use the default merge mode when you only need to change or add a few properties.
Use overwrite mode only when you want your file to replace Solo’s generated
application.properties content.
Default merge mode
Pass your file to solo consensus network deploy:
solo consensus network deploy \
--deployment "${SOLO_DEPLOYMENT}"\
--application-properties ./config/application.properties
In merge mode, Solo starts with its generated application.properties, then
applies your file as key-level overrides:
If your file contains a key that already exists in Solo’s generated file, Solo
replaces that key’s value.
If your file contains a new key, Solo appends it to the final file.
Blank lines and comments in your file are ignored during the merge.
Solo-generated keys that you do not mention remain in the final file.
Example custom file for merge mode:
# Override only the properties that need to change.contracts.chainId=298hedera.recordStream.logPeriod=1
This is the recommended mode for most deployments because Solo keeps its
generated defaults while still applying your overrides.
Overwrite mode
To replace Solo’s generated application.properties file, add the overwrite
marker as a comment in your custom file:
# SOLO_ENABLE_OVERWRITE=truecontracts.chainId=298hedera.recordStream.logPeriod=1# Include every other property your consensus nodes require.
Then deploy with the same flag:
solo consensus network deploy \
--deployment "${SOLO_DEPLOYMENT}"\
--application-properties ./config/application.properties
The marker must be on a comment line that starts with #. Solo looks for the
exact text SOLO_ENABLE_OVERWRITE=true inside a comment. If the marker is
missing, or if it is written as a normal property instead of a comment, Solo
uses default merge mode.
In overwrite mode, your file becomes the full application.properties content.
Solo does not carry over defaults that are missing from your file, so include
all properties required by the consensus node version and deployment topology
you are running.
Falcon values file
For One-shot Falcon deployments, put the same flag under the network section:
The merge or overwrite behavior is still controlled by the contents of the
referenced application.properties file. Add # SOLO_ENABLE_OVERWRITE=true to
that file only when you want overwrite mode.
2.2.5 - Dynamically add, update, and remove Consensus Nodes
Learn how to dynamically add, update, and remove consensus nodes in a running Solo network without taking the network offline. Execute operations independently while the network remains operational.
Overview
This guide covers how to dynamically manage consensus nodes in a running Solo
network - adding new nodes, updating existing ones, and removing nodes that
are no longer needed. All three operations can be performed without taking
the network offline.
Prerequisites
Before proceeding, ensure you have:
A running Solo network. If you don’t have one, deploy using one of the
following methods:
Quickstart - single command deployment using
solo one-shot single deploy.
Manual Deployment - step-by-step
deployment with full control over each component.
Set the required environment variables as described below:
Before running any node operation, it helps to understand two concepts that
appear in the prepare step.
Cryptographic Keys
Solo generates two types of keys for each consensus node:
Gossip keys — used for encrypted node-to-node communication within the
network. Stored as s-private-node*.pem and s-public-node*.pem under
~/.solo/cache/keys/.
TLS keys — used to secure gRPC connections to the node. Stored as
hedera-node*.crt and hedera-node*.key under ~/.solo/cache/keys/.
When adding a new node, Solo generates a fresh key pair and stores it
alongside the keys for existing nodes in the same directory. For more detail, see Where are my keys stored?.
Persistent Volume Claims (PVCs)
By default, consensus node storage is ephemeral - data stored by a node
is lost if its pod crashes or is restarted. This is intentional for
lightweight local testing where persistence is not required.
The --pvcs true flag creates
Persistent Volume Claims (PVCs)
for the node, ensuring its state survives pod restarts. Enable this flag for
any node that needs to persist across restarts or that will participate in
longer-running test scenarios.
Note: PVCs are not enabled by default. Enable them only if your node
needs to persist state across pod restarts.
Staging Directory
The --output-dir context flag specifies a local staging directory where Solo
writes all artifacts produced during prepare. Solo’s working files are stored
under ~/.solo/ — if you use a relative path like context, the directory is
created in your current working directory. Do not delete it until execute has
completed successfully.
Adding a Node to an Existing Network
You can dynamically add a new consensus node to a running network without taking the network offline.
This process involves three stages: preparing the node’s keys and configuration, submitting the on-chain transaction, and executing the addition.
Step 1: Prepare the new node
Generate the new node’s gossip and TLS keys, create its persistent volumes, and stage its configuration into an output directory:
You can update an existing consensus node - for example, to upgrade its software version or modify its configuration - without removing it from the network.
Step 1: Prepare the update
Stage the updated configuration and any new software version for the target node:
You can dynamically remove a consensus node from a running network without taking the remaining nodes offline.
Note: Removing a node permanently reduces the number of consensus nodes in the network.
Ensure the remaining nodes meet the minimum threshold required for consensus before proceeding.
Pass environment variables to the consensus node JVM with an application.env file and the –application-env flag.
Overview
Solo lets you define environment variables for consensus nodes with an
application.env file, passed through the --application-env flag. The
consensus node start script loads this file when it launches the JVM, so every
variable defined in it is visible to the Java process.
Variables that are only set on the node container, for example through custom
Helm chart values, are not forwarded to the Java process. If you need a variable
such as MALLOC_ARENA_MAX to be present in the running JVM environment, define
it in application.env.
The application.env file
Write the variables as plain KEY=VALUE lines. Blank lines and lines starting
with # are ignored:
# Limit glibc malloc arenas to reduce memory fragmentation.MALLOC_ARENA_MAX=4JAVA_OPTS=-XX:+UseG1GC -XX:MaxDirectMemorySize=128M
Pass the file to solo consensus network deploy:
solo consensus network deploy \
--deployment "${SOLO_DEPLOYMENT}"\
--application-env ./config/application.env
Solo stages your file as the application.env ConfigMap for the consensus
nodes. The file replaces Solo’s default application.env content, so include
every variable your nodes require.
Solo also sets the same variables on the node container, so the container
environment and the JVM environment stay consistent without any extra
configuration.
Verifying the JVM environment
To confirm a variable reached the running Java process, inspect the process
environment inside the root container:
How Solo decides which environment variables reach the external commands it runs (helm, kubectl, kind, container engines), how to tell when a variable was withheld, and how to forward an additional variable when a platform requires one.
Overview
Solo runs external commands on your behalf — helm, kubectl, kind, docker/podman,
npm, gh and brew. It does not hand those commands your whole environment. Each
command receives only the variables it is known to need, built from an allowlist.
The reason is that Solo is frequently run from a shell or CI runner holding credentials that
have nothing to do with deploying a network — registry tokens, cloud keys, SSH agent sockets.
Passing the whole environment would forward all of it to every tool, and onward to anything
those tools spawn: Helm plugins, kubectl credential plugins, package lifecycle scripts.
Filtering is deliberately deny-by-default. A variable that is not on the allowlist is not
forwarded, even if it looks harmless.
Checking whether a variable was withheld
Solo records what it filtered. Search your Solo log for the variable name:
Solo writes a summary line followed by one or more lines carrying the names, so your variable
appears on a withheld from line rather than in the summary:
[19:45:49.621] INFO: Withheld 83 environment variable(s) from 'helm' commands because they are not on the allowlist for that command:
[19:45:49.621] INFO:   withheld from 'helm': AI_AGENT, APPLICATION_INSIGHTS_NO_STATSBEAT, ..., MY_VARIABLE, ...
Searching for the variable name finds the second line, which also tells you which command withheld
it. To see everything withheld from one command instead, search for withheld from 'helm'.
This is logged at info, so it is present in the log by default — you do not need to re-run
with --debug. It is emitted once per command type per run, and long lists are split across
several lines so that every name remains searchable.
Two bounds apply, so that a hostile or unusual environment cannot forge log entries or fill your
disk:
Names are only listed if they look like ordinary identifiers (letters, digits, _, ., -,
(), up to 64 characters). Anything else is counted rather than printed — the line ends with
something like (3 with non-identifier names omitted).
At most 2000 names are listed per command type. Beyond that the line ends with
(N further name(s) omitted). No ordinary environment comes close to this; if you hit it, the
variable is still filtered exactly as described, it is simply not enumerated.
If your variable is not listed but also is not reaching the tool, forward it explicitly as
below — the two bounds above affect only what is reported, never what is forwarded.
If your config file is present but unusable — malformed YAML, unreadable, or with permissions
Solo will not trust — Solo fails with an error naming the file rather than starting up as if the
file were not there. A setting you believe is applied but silently is not would be worse than a
clear failure.
If your variable is in that list and the tool needs it, forward it explicitly as below.
Forwarding an additional variable
Add the exact variable name to subprocess.additionalEnvironmentVariables in your Solo
config file — ~/.solo/solo-config.yaml — under the command that needs it:
Recognised command keys are generic, kubectl, helm, kind, containerEngine, brew,
npm and githubCli.
The file is solo-config.yaml in your Solo home directory. It is optional — if you do not have
one, nothing changes. Create it if it is not already there.
The default location is ~/.solo (%USERPROFILE%\.solo on Windows). Override it with
SOLO_HOME:
exportSOLO_HOME=/path/to/solo-home
ls -l "$SOLO_HOME/solo-config.yaml"
The similarly named ~/.solo/solo.yaml is a leftover from older Solo versions and holds an
unrelated flags: structure. Some test tooling deletes it automatically, so settings placed
there would be lost. Use solo-config.yaml.
Scope and syntax rules
Exact names only. Wildcards and prefixes are not supported. AWS_* will not work; list
each name.
Per command. A variable listed under helm reaches helm only. There is no “all
commands” list — a variable a credential plugin needs has no business reaching npm or a
container engine.
Config file only. Unlike every other Solo setting, this one cannot be set through a
SOLO_* environment variable. A setting that relaxes environment filtering must not itself
be controllable by the environment being filtered. Attempts to set it via the environment are
ignored, with a warning.
Names that are always refused
Some variables are refused no matter what the config file says, because they change how a
spawned tool loads code, whom it trusts, or where it fetches credentials. Solo logs a warning
naming each refused entry rather than ignoring it silently.
AWS_ENDPOINT_URL and every AWS_ENDPOINT_URL_<SERVICE> form such as AWS_ENDPOINT_URL_STS, AWS_CONFIG_FILE, AWS_SHARED_CREDENTIALS_FILE, AZURE_CLIENT_SECRET
Matching is case-insensitive, and the LD_, DYLD_ and AWS_ENDPOINT_URL families are refused
by prefix rather than by exact name — AWS_ENDPOINT_URL_STS in particular takes precedence over
the global endpoint setting and would otherwise redirect the EKS credential exchange.
These would let anyone able to write your Solo config file run arbitrary code inside a process
holding cluster-admin, or silently intercept traffic to your Kubernetes API server.
Solo verifies the file before trusting it
subprocess.additionalEnvironmentVariables extends what Solo forwards to helm and kubectl,
so anyone able to edit the file can widen what those commands receive. Because you create
this file, Solo does not own its permissions — it checks them instead, and refuses to apply the
settings with an error if the file itself is a symbolic link, is not owned by you, or is writable
by group or other users. It applies a similar check to the directories above the file, and reads
the file through a descriptor opened without following symlinks, validating that descriptor rather
than the path.
What that does and does not guarantee, stated precisely:
The file itself — on POSIX only — is checked and read through the same descriptor, so its
contents cannot be swapped between the check and the read. On Windows there is no equivalent
no-follow open, so the symlink check is a check-then-open and carries a small race; see the
Windows note below.
The directories above it are checked for a static misconfiguration — a group-writable
SOLO_HOME, for instance. This is not race-free: someone who already has write access to one
of those directories could replace a component between the check and the open. Closing that
would require component-by-component opens, which Node’s filesystem API does not offer.
On POSIX the directory walk reaches the filesystem root, and accepts directories owned by you or
by root, plus sticky directories such as /tmp. On Windows it stops before the volume root,
because C:\ legitimately carries broad write grants.
In short: this protects you from a misconfigured or shared SOLO_HOME, not from an attacker who
already holds write access somewhere on the path to it.
Keep both owner-only:
# Secure the directory as well as the file: write access to the directory is enough to# replace the file inside it. Solo also checks every parent directory up to the filesystem root.chmod 700 ~/.solo
chmod 600 ~/.solo/solo-config.yaml
# NTFS ACLs replace POSIX mode bits. Secure the directory as well as the file: write access to# the directory is enough to replace the file inside it.icacls"$HOME\.solo"/inheritance:r /grant:r "$($env:USERNAME):(OI)(CI)F"icacls"$HOME\.solo\solo-config.yaml"/inheritance:r /grant:r "$($env:USERNAME):(F)"
On Windows, Solo reads the DACL with icacls and refuses the file if any principal other than
you, SYSTEM, Administrators or CREATOR OWNER holds write access. Inherit-only entries are
ignored, since they apply to items created later rather than to the path itself.
Windows support is not yet usable
The ACL checks described here are implemented but have not been exercised on a real Windows
machine — only reasoned about and unit-tested on POSIX. The Windows guarantee is also weaker: the
volume root is not inspected, and the symlink check on the file is a check-then-open rather than
an atomic no-follow open. Do not rely on subprocess.additionalEnvironmentVariables on Windows
yet; please report what you find if you try it.
Managed Kubernetes and workload identity
Solo forwards the variables the AWS credential plugin needs, so EKS IRSA works without any
configuration:
GKE and AKS are not yet covered. The variables their credential plugins need have not been
verified against a real cluster, and adding unverified names risks both breakage and security
holes, so they are not in the built-in allowlist. Until they are verified, forward them
yourself:
If you confirm the required set for GKE or AKS on a real cluster, please open an issue on
hiero-ledger/solo so it can be added to the
built-in allowlist.
Note that AZURE_AUTHORITY_HOST and AWS_ENDPOINT_URL are intentionally excluded from the
built-in list: they redirect which authority or endpoint the credential plugin contacts.
Sovereign clouds that genuinely need a non-default authority can add AZURE_AUTHORITY_HOST
explicitly, which makes it a deliberate local decision rather than something inherited silently
from the surrounding environment.
See also
Using Environment Variables — variables
that configure Solo itself, as opposed to the ones Solo passes on to external tools.
2.4 - Attach JVM Debugger and Retrieve Logs
Learn how to attach a JVM debugger to a running Hiero Consensus Node, retrieve logs for analysis, and save and restore network state files along with essential tools for developers and deep-level troubleshooting.
Overview
This guide covers three debugging workflows:
Retrieve logs from a running consensus node using k9s or the Solo CLI
Attach a JVM debugger in IntelliJ IDEA to a running or restarting node
Save and restore network state files to replay scenarios across sessions
Prerequisites
Before proceeding, ensure you have completed the following:
System Readiness — your local environment
meets all hardware and software requirements.
Quickstart — you have a running Solo cluster and
are familiar with the basic Solo workflow.
IntelliJ IDEA with a Remote JVM Debug
run configuration (for JVM debugging only)
A local checkout of
hiero-consensus-node
that has been built with assemble or build (for JVM debugging only)
1. Retrieve Consensus Node Logs
Using k9s
Run k9s -A in your terminal to open the cluster dashboard, then select one
of the network node pods.
Select the root-container and press s to open a shell inside the container.
Navigate to the Hedera application directory to browse logs and configuration:
cd /opt/hgcapp/services-hedera/HapiApp2.0/
From there you can inspect logs and configuration files:
[root@network-node1-0 HapiApp2.0]# ls -ltr data/config/total 0lrwxrwxrwx 1 root root 27 Dec 4 02:05 bootstrap.properties -> ..data/bootstrap.properties
lrwxrwxrwx 1 root root 29 Dec 4 02:05 application.properties -> ..data/application.properties
lrwxrwxrwx 1 root root 32 Dec 4 02:05 api-permission.properties -> ..data/api-permission.properties
[root@network-node1-0 HapiApp2.0]# ls -ltr output/total 1148-rw-r--r-- 1 hedera hedera 0 Dec 4 02:06 hgcaa.log
-rw-r--r-- 1 hedera hedera 0 Dec 4 02:06 queries.log
drwxr-xr-x 2 hedera hedera 4096 Dec 4 02:06 transaction-state
drwxr-xr-x 2 hedera hedera 4096 Dec 4 02:06 state
-rw-r--r-- 1 hedera hedera 190 Dec 4 02:06 swirlds-vmap.log
drwxr-xr-x 2 hedera hedera 4096 Dec 4 16:01 swirlds-hashstream
-rw-r--r-- 1 hedera hedera 1151446 Dec 4 16:07 swirlds.log
Using the Solo CLI (Alternative option)
To download hgcaa.log and swirlds.log as a zip archive without entering
the container shell, run:
# Downloads logs to ~/.solo/logs/<namespace>/<timestamp>solo deployment diagnostics all --deployment solo-deployment
2. Attach a JVM Debugger in IntelliJ IDEA
Solo supports pausing node startup at a JDWP debug port so you can attach
IntelliJ IDEA before the node begins processing transactions.
Configure IntelliJ IDEA
Create a Remote JVM Debug run configuration in IntelliJ IDEA.
For the Hedera Node application:
If you are working on the Platform test application instead:
Set any breakpoints you need before launching the Solo command in the next step.
Note: The local-build-path in the commands below references
../hiero-consensus-node/hedera-node/data. Adjust this path to match your
local checkout location. Ensure the directory is up to date by running
./gradlew assemble in the hiero-consensus-node repo before proceeding.
Example 1 — Debug a node during initial network deployment
This example deploys a three-node network and pauses node2 for debugger
attachment.
You can snapshot the state of a running network and restore it later. This is
useful for replaying specific scenarios or sharing reproducible test cases with
the team.
Save state
Stop the nodes first, then download the state archives:
# Stop all nodes before downloading statesolo consensus node stop --deployment "${SOLO_DEPLOYMENT}"# Download state files to ~/.solo/logs/<namespace>/solo consensus state download -i node1,node2,node3 --deployment "${SOLO_DEPLOYMENT}"
2.5 - One-Shot Deploy with Custom Component Versions
Use the –edge flag and *_EDGE_VERSION environment variables to deploy a Solo network against arbitrary component versions — release candidates, pre-releases, or local builds — without modifying Solo source or rebuilding the CLI.
Overview
Solo’s one-shot single deploy and one-shot multi deploy commands accept
an --edge flag that switches every component from its built-in stable
default to a separate set of “edge” versions. Each edge version is read from
an environment variable at startup, so you can pin any component to any tag
the container registry exposes — including release candidates and unreleased
builds — without editing Solo source or rebuilding the CLI.
Use this guide when you need to:
Test a Hiero Consensus Node release candidate against the rest of the
Solo-managed stack.
Reproduce a specific component version combination for a bug report or
regression test.
Iterate on a single component (Mirror Node, Relay, Explorer, …) while the
other components stay on stable defaults.
For the canonical list of *_EDGE_VERSION variables, see
Edge Component Versions
in the environment variables reference.
Local binary builds vs published version overrides:--edge and
*_EDGE_VERSION variables pin components to published container image
tags — they require the image to exist in the registry. If you need to
deploy a binary you compiled locally (before any tag or release exists), use
--local-build-path instead.
How It Works
*_EDGE_VERSION env var (e.g. CONSENSUS_NODE_EDGE_VERSION)
      │
      ▼
solo one-shot ... deploy --edge
      │
      ▼
Each component is pinned to its edge version for this deploy.
Components without an explicit override fall back to the compiled-in
edge defaults, which themselves fall back to the stable defaults.
Without --edge, Solo uses the stable defaults compiled into the CLI.
With --edge, Solo reads the *_EDGE_VERSION constants — and any matching
environment variable you set in the shell overrides those constants.
You only need to set variables for the components you want to override. All
others fall back to their compiled-in defaults.
Image cache: Because you pin versions with environment variables, Solo’s
image cache pulls the matching image
versions automatically. Pinning a version with a --*-version CLI flag (or in
solo.config.yaml) instead does not update the cache — it would pull the
default versions and cause a cache miss on first deploy. Use the environment
variables shown here to keep the cache aligned with the deployed versions.
Quick Start
Deploy a single-node network with a custom Consensus Node release candidate:
CONSENSUS_NODE_EDGE_VERSION=v0.74.0-rc.1 \
solo one-shot single deploy --edge --debug
What this does:
CONSENSUS_NODE_EDGE_VERSION=v0.74.0-rc.1 overrides the consensus node
version for this command invocation.
--edge tells Solo to read *_EDGE_VERSION variables instead of stable
defaults.
--debug enables Solo’s debug mode — appropriate for local development,
not for production-shaped deployments.
Mirror Node, Relay, Explorer, Block Node, and the Solo chart keep their
compiled-in edge defaults because no *_EDGE_VERSION was set for them.
Note: Every successive solo one-shot single deploy command will remove the
existing components and will create a new deployment.
Deprecated: The --dev flag has been renamed to --debug. --dev still
works as an alias but is deprecated and prints a warning; update your scripts
to use --debug. The --dev alias will no longer be supported once Solo
0.82.0 reaches its end of support date.
Where to Find Version Tags
Each *_EDGE_VERSION value is a published release tag from the component’s
GitHub release page. Pick a tag from the appropriate page below, and match
the format the component publishes — a missing or extra v prefix is the
most common cause of image-pull failures.
Note: Consensus Node, Mirror Node, and Block Node tags are prefixed
with v; Relay, Explorer, and Solo Chart tags are not. The tag must exist
in the component’s container registry, otherwise the deploy fails with an
image-pull error — see Troubleshooting.
Command Reference
In Solo v0.72.0, --edge is accepted by the single and multi one-shot
deploy variants. solo one-shot falcon deploy does not currently accept
--edge — use one of the two variants below to test custom component
versions.
Single-node deploy
CONSENSUS_NODE_EDGE_VERSION=<version> \
MIRROR_NODE_EDGE_VERSION=<version> \
solo one-shot single deploy --edge [--debug][other flags]
Multi-node deploy
CONSENSUS_NODE_EDGE_VERSION=<version> \
MIRROR_NODE_EDGE_VERSION=<version> \
solo one-shot multi deploy --edge --num-consensus-nodes 3[--debug][other flags]
Examples
Override Consensus Node and Mirror Node
CONSENSUS_NODE_EDGE_VERSION=v0.73.0 \
MIRROR_NODE_EDGE_VERSION=v0.153.1 \
solo one-shot single deploy --edge --debug
Override every component
CONSENSUS_NODE_EDGE_VERSION=v0.73.0 \
MIRROR_NODE_EDGE_VERSION=v0.153.1 \
RELAY_EDGE_VERSION=0.77.0 \
EXPLORER_EDGE_VERSION=27.0.0 \
BLOCK_NODE_EDGE_VERSION=v0.32.0 \
SOLO_CHART_EDGE_VERSION=0.64.0 \
solo one-shot single deploy --edge --debug
Export once, reuse across a development session
If you are iterating and running deploy/destroy/deploy cycles, export the
variables so every one-shot command in the shell session picks them up:
exportCONSENSUS_NODE_EDGE_VERSION=v0.74.0-rc.1
exportMIRROR_NODE_EDGE_VERSION=v0.153.1
solo one-shot single deploy --edge --debug
# Destroy and redeploy without re-typing the variablessolo one-shot single destroy
solo one-shot single deploy --edge --debug
Verifying the Versions in Use
After the deploy starts, confirm the resolved versions in the structured Solo
log:
Note: Use solo.ndjson (newline-delimited JSON, machine-readable) for
jq pipes. The companion solo.log is pino-pretty formatted text and will
not parse as JSON.
Inspect the deployed Helm releases and their chart versions:
helm list -A
helm get values <release-name> -n <namespace>
Confirm the consensus node container image tag:
kubectl get pods -n <namespace> -o jsonpath='{range .items[*]}{.metadata.name}{"\t"}{.spec.containers[*].image}{"\n"}{end}'
Omitting --edge uses the stable defaults compiled into the Solo CLI you are
running — any *_EDGE_VERSION variables you have set are ignored for that
invocation.
# Stable defaults — *_EDGE_VERSION variables are ignored.solo one-shot single deploy --debug
If you want to pin versions without using --edge (for example, to test a
specific stable release of one component), see
Pinning Component Versions
in the environment variables reference.
Troubleshooting
The version I set is not being used.
Confirm you passed --edge. Without it, Solo ignores every *_EDGE_VERSION
variable and uses the compiled-in stable defaults.
Solo is ignoring my environment variable.
The variable must be exported in (or prefixed to) the same shell process that
runs Solo. Verify with:
echo$CONSENSUS_NODE_EDGE_VERSION# should print your value
If you set the variable inline (FOO=bar solo ...), double-check the variable
name is spelled exactly as listed in
Edge Component Versions
— the names are case-sensitive.
The deploy fails with an image-pull error.
The tag you supplied does not exist in the component’s container registry, or
the format is wrong (missing v prefix, extra spaces, …). Cross-check the tag
against the official release list for that component before retrying.
The deploy starts but a component crashes immediately.
Different component versions are not guaranteed to be mutually compatible.
When mixing edge versions, prefer combinations Solo’s CI already exercises
(see the Version Compatibility Reference).
2.6 - Customizing Solo with Tasks
Use the Task runner to deploy and customize Solo networks, then explore maintained GitHub example projects for common workflows.
Overview
The Task tool (task) is a task runner that enables you to deploy and customize Solo networks using infrastructure-as-code patterns. Rather than running individual Solo CLI commands, you can use predefined Taskfile targets to orchestrate complex deployment workflows with a single command.
This guide covers installing the Task tool, understanding available Taskfile targets, and using them to deploy networks with various configurations. It also points to maintained example projects that demonstrate common Solo workflows.
Note: This guide assumes you have cloned the Solo repository and have basic familiarity with command-line interfaces and Docker.
Prerequisites
Before you begin, ensure you have completed the following:
System Readiness: Prepare your local environment (Docker, Kind, Kubernetes, and related tooling).
Quickstart: You are familiar with the basic Solo workflow and the solo one-shot single deploy command.
Tip: Task-based workflows are ideal for developers who want to:
Use version control to track deployment configurations.
Integrate Solo deployments into CI/CD pipelines.
Install the Task Tool
The Task tool is a dependency for using Taskfile targets in the Solo repository. Install it using one of the following methods:
Using Homebrew (macOS/Linux) (recommended)
brew install go-task/tap/go-task
Using npm
npm install -g @go-task/cli
Verify the installation:
task --version
Expected output:
Task version: v3.X.X
Using package managers
Visit the Task installation guide for additional installation methods for your operating system.
Understanding the Task Structure
The Solo repository uses a modular Task architecture located in the scripts/ directory:
scripts/
├── Taskfile.yml                    # Main entry point (includes other Taskfiles)
├── Taskfile.scripts.yml            # Core deployment and management tasks
├── Taskfile.examples.yml           # Example project tasks
├── Taskfile.release.yml            # Package publishing tasks
└── [other helper scripts]
How to Run Tasks
From the root directory or any example directory, run:
# Run the default tasktask
# Run a specific tasktask <task-name>
# Run tasks with variablestask <task-name> -- VAR_NAME=value
Deploy Network Configurations
Basic Network Deployment
Deploy a standalone Hiero Consensus Node network with a single command:
# From the repository root, navigate to scripts directorycd scripts
# Deploy default network (2 consensus nodes)task default
This command performs the following actions:
Initializes Solo and downloads required dependencies.
Creates a local Kubernetes cluster using Kind.
Deploys 2 consensus nodes.
Sets up gRPC and JSON-RPC endpoints for client access.
Deploy Network with Mirror Node
Deploy a network with a consensus node, mirror node, and Hiero Explorer:
cd scripts

task default-with-mirror
This configuration includes:
Component
Description
Consensus Node
2 consensus nodes running Hiero
Mirror Node
Stores and serves historical transaction data
Explorer UI
Web interface for viewing accounts
Access the Explorer at: http://localhost:38080/localnet/dashboard (Solo 0.63+) or http://localhost:8080/localnet/dashboard (Solo 0.62 and earlier). See Port availability if the port is in use.
Deploy Network with Relay and Explorer
Deploy a network with consensus nodes, mirror node, explorer, and JSON-RPC relay for Ethereum-compatible access:
cd scripts

task default-with-relay
This configuration includes:
Component
Description
Consensus Node
2 consensus nodes running Hiero
Mirror Node
Stores and serves historical transaction data
Explorer UI
Web interface for viewing accounts
JSON-RPC Relay
Ethereum-compatible JSON-RPC interface
Access the services at (Solo 0.63+ defaults; for Solo 0.62 and earlier use the legacy ports in parentheses):
The Taskfile includes a comprehensive set of targets for deploying and managing Solo networks. Below are the most commonly used targets, organized by category.
Core Deployment Targets
These targets handle the primary deployment lifecycle:
Task
Description
default
Complete deployment workflow for Solo
install
Initialize cluster, create deployment, and setup consensus net
destroy
Tear down the consensus network
clean
Full cleanup: destroy network, remove cache, logs, and files
start
Start all consensus nodes
stop
Stop all consensus nodes
Example: Deploy, then clean up
cd scripts
# Deploy the networktask default
# ... (use the network)# Stop the networktask stop
# Remove all traces of the deploymenttask clean
Cache and Log Cleanup
When cleaning up, you can selectively remove specific components:
Task
Description
clean:cache
Remove the Solo cache directory (~/.solo/cache)
clean:logs
Remove the Solo logs directory (~/.solo/logs)
clean:tmp
Remove temporary deployment files
Mirror Node Management
Add, configure, or remove mirror nodes from an existing deployment:
Task
Description
solo:mirror-node
Add a mirror node to the current deployment
solo:destroyer-mirror-node
Remove the mirror node from the deployment
Example: Add mirror node to running network
cd scripts
# Start with a basic networktask default
# Add mirror node latertask solo:mirror-node
# Remove mirror nodetask solo:destroyer-mirror-node
Explorer UI Management
Deploy or remove the Hiero Explorer for transaction/account viewing:
Task
Description
solo:explorer
Add explorer UI to the current deployment
solo:destroy-explorer
Remove explorer UI from the deployment
Example: Deploy network with explorer
cd scripts

task default
task solo:explorer

# Access at http://localhost:38080/localnet/dashboard (Solo 0.63+) or http://localhost:8080/localnet/dashboard (Solo 0.62 and earlier)
JSON-RPC Relay Management
Deploy or remove the Relay for Ethereum-compatible access:
Task
Description
solo:relay
Add JSON-RPC relay to the current deployment
solo:destroy-relay
Remove JSON-RPC relay from the deployment
Example: Add relay to running network
cd scripts

task default-with-mirror
task solo:relay

# Access JSON-RPC at http://localhost:37546 (Solo 0.63+) or http://localhost:7546 (Solo 0.62 and earlier)
Block Node Management
Deploy or remove block nodes for streaming block data:
Task
Description
solo:block:add
Add a block node to the current deployment
solo:block:destroy
Remove the block node from the deployment
Example: Deploy network with block node
cd scripts

task default
task solo:block:add

# Block node will stream block data
Infrastructure Tasks
Low-level tasks for managing clusters and network infrastructure:
Task
Description
cluster:create
Create a Kind (Kubernetes in Docker) cluster
cluster:destroy
Delete the Kind cluster
solo:cluster:setup
Setup cluster infrastructure and prerequisites
solo:deployment:create
Create a new deployment configuration
solo:deployment:attach
Attach an existing cluster to a deployment
solo:network:deploy
Deploy the consensus network to the cluster
solo:network:destroy
Destroy the consensus network
Tip: Unless you need custom cluster management, use the higher-level tasks like default, install, or destroy which orchestrate these infrastructure tasks automatically.
Utility Tasks
Helpful tasks for inspecting and managing running networks:
Task
Description
show:ips
Display the external IPs of all network nodes
solo:node:logs
Retrieve logs from consensus nodes
solo:freeze:restart
Execute a freeze/restart upgrade workflow for testing version upgrades
Example: View network IPs and logs
cd scripts
# See which nodes are running and their IPstask show:ips
# Retrieve node logs for debuggingtask solo:node:logs
Database Tasks
Deploy external databases for specialized configurations:
Task
Description
solo:external-database
Setup external PostgreSQL database with Helm
Advanced Configuration with Environment Variables
You can customize Task behavior by setting environment variables before running tasks. Common variables include:
cd scripts
# Deploy with specific component versionsCONSENSUS_NODE_VERSION=v0.66.0 \
MIRROR_NODE_VERSION=v0.139.0 \
task default-with-mirror
Example Projects
The Solo repository includes 14+ maintained example projects that demonstrate common Solo workflows. These examples serve as templates and starting points for custom implementations.
Getting Started with Examples
Each example is located in the examples/ directory and includes:
Pre-configured Taskfile.yml with deployment settings.
init-containers-values.yaml for customization.
Example-specific README with detailed instructions.
To run an example:
cd examples/<example-name>
# Deploy the exampletask
# Clean up when donetask clean
Available Examples
Network Setup Examples
Address Book: Use Yahcli to pull ledger and mirror node address books for querying network state
Network with Domain Names: Setup a network with custom domain names for nodes instead of IP addresses
Network with Block Node: Deploy a network with block node for streaming block data (example coming soon)
Rapid-Fire: Rapid-fire deployment and teardown commands for stress testing the deployment workflow
Running Solo Inside Cluster: Deploy Solo within an existing Kubernetes cluster instead of creating a new one
Practical Workflows
Workflow 1: Quick Development Network with Logging
Deploy a network for development and debugging:
cd scripts
# Set logging level (PowerShell: $env:SOLO_LOG_LEVEL = 'debug')exportSOLO_LOG_LEVEL=debug
# Deploy with mirror and relaytask default-with-relay
# Retrieve logs if neededtask solo:node:logs
# View network endpointstask show:ips
# Clean uptask clean
Workflow 2: Test Configuration Changes
Iterate on network configuration using any example with a Taskfile.yml:
cd examples/local-build-with-custom-config
# Edit the Taskfile or init-containers-values.yaml# Deploy with your changestask
# Test your configuration# Clean up and try againtask clean
Workflow 3: Upgrade Network Components
Test upgrading Solo components:
cd examples/version-upgrade-test
# Deploy with current versionstask
# The example automatically tests the upgrade path# Clean uptask clean
Workflow 4: Backup and Restore Network State
Test disaster recovery and state migration:
cd examples/state-save-and-restore
# Deploy initial network with statetask
# The example includes backup/restore operations# Clean uptask clean
Troubleshooting
Common Issues
Task command not found
Ensure Task is installed and on your PATH:
which task
task --version
Taskfile not found
Run Task commands from the scripts/ directory or an examples/ subdirectory where a Taskfile.yml exists:
cd scripts
task default
Insufficient resources
Some deployments require significant resources. Verify your Docker has at least 12 GB of memory and 6 CPU cores allocated:
docker info --format 'CPU: {{.NCPU}}, Memory: {{.MemTotal | div 1000000000}}GB'
Cluster cleanup issues
If the cluster becomes unstable, perform a full cleanup:
cd scripts
# Remove all tracestask clean
# As a last resort, manually delete the Kind clusterkind delete cluster --name solo-e2e
Integrate Solo into a GitHub Actions CI pipeline. Covers GitHub-hosted runners (ubuntu-latest) and self-hosted runners, including runner requirements, tool installation, and automated network deployment.
Overview
solo one-shot single deploy is self-contained and runs the same way in CI as
it does locally. It creates a Kind cluster if one does not already exist,
installs all required tools internally, and exits once every component is healthy.
Which runner type do you need?
GitHub-hosted (ubuntu-latest) - GitHub provides and manages the
machine. Most common for open-source and public repos. Choose this if your
workflow uses runs-on: ubuntu-latest.
Self-hosted runners - you manage the machine (your own server, cloud VM,
or on-prem hardware). Choose this if your workflow uses runs-on: self-hosted
or a custom runner label, or if you need explicit control over Kind version
and resource allocation.
Not sure which type you have? If you’re using a standard GitHub account without
dedicated runner infrastructure, you’re on GitHub-hosted runners.
GitHub-Hosted Runners
If your workflow has runs-on: ubuntu-latest, this is your section.
Solo handles Kind cluster creation internally - you do not need to pre-create a cluster.
The workflow steps are:
Checkout your repository code.
Install Node.js (v22) and Solo CLI (pinned version).
Deploy the network with solo one-shot single deploy.
Verify the Mirror REST API is reachable - Solo exits when components are
healthy, but the Mirror Node REST API may need a few extra seconds to become
reachable from the host. This step polls until it is ready before your tests run.
Run your tests against the live network.
Destroy the network (if: always() ensures cleanup runs even on failure).
Upload logs for post-run debugging.
Important: Pin @hiero-ledger/solo@<version> to a specific release.
Unpinned (@latest) installs may pick up breaking changes and cause unexpected
workflow failures.
Example Workflow
name:"Integration Tests"on:pull_request:types:[opened, reopened, synchronize, ready_for_review]defaults:run:shell:bashpermissions:contents:readjobs:integration-tests:name:Integration Testsruns-on:ubuntu-latesttimeout-minutes:20steps:- name:Checkout Codeuses:actions/checkout@v4- name:Set up Node.jsuses:actions/setup-node@v4with:node-version:'22'- name:Install Solo CLIrun:| npm install -g @hiero-ledger/solo@<version>
solo --version- name:One-Shot Single Deployrun:solo one-shot single deploy- name:Verify Mirror REST APItimeout-minutes:5run:| echo "Waiting for mirror node REST API..."
for i in $(seq 1 30); do
response=$(curl -sf http://localhost:38081/api/v1/accounts 2>/dev/null || true)
if echo "${response}" | grep -q '"accounts"'; then
echo "Mirror REST API is up."
exit 0
fi
echo "Attempt ${i}/30: not ready, retrying in 10s..."
sleep 10
done
echo "ERROR: Mirror REST API did not become available."
exit 1# Add your integration test steps here- name:One-Shot Single Destroyif:always()run:solo one-shot single destroy --quiet-mode || true- name:Upload Logsif:always()uses:actions/upload-artifact@v4with:name:solo-logspath:~/.solo/logs/*overwrite:trueif-no-files-found:warn
Self-Hosted Runners
If your workflow has runs-on: self-hosted or a custom runner label, this is your section.
Use this setup when you manage the runner machine yourself and need explicit
control over Kind version, cluster name, or resource allocation.
Runner Requirements
Solo requires a minimum of 6 CPU cores and 12 GB of memory on the runner.
If these requirements are not met, Solo components may hang or fail during deployment.
Note: The Kubernetes cluster does not have full access to all host memory.
Setting Docker to 12 GB means Kind will have access to less than 12 GB.
Memory and CPU utilisation also increase over time as transaction load grows.
To verify that your runner meets the requirements, add this step to your workflow:
Important: Kind v0.29.0 or later and Kubernetes v1.32.2 or later
are required. Solo enforces these minimum versions at runtime.
Step 2: Install Node.js
- name:Set up Node.jsuses:actions/setup-node@49933ea5288caeca8642d1e84afbd3f7d6820020with:node-version:22.12.0
Step 3: Install Solo CLI
Important: Always pin the CLI version. Unpinned installs may pick up
breaking changes from newer releases and cause unexpected workflow failures.
- name:Install Solo CLIrun:| set -euo pipefail
npm install -g @hiero-ledger/solo@<version>
solo --version
kind --version
Step 4: Deploy Solo
- name:Deploy Soloenv:SOLO_CLUSTER_NAME:soloSOLO_DEPLOYMENT:solo-deploymentrun:| set -euo pipefail
kind create cluster -n "${SOLO_CLUSTER_NAME}"
solo one-shot single deploy --deployment "${SOLO_DEPLOYMENT}" | tee solo-deploy.log
Cleanup
After the workflow completes, destroy the Solo deployment and delete the Kind
cluster. Use if: always() on the destroy step so cleanup runs even when an
earlier step fails.
- name:Destroy Solo deploymentif:always()env:SOLO_DEPLOYMENT:solo-deploymentrun:| set -euo pipefail
solo one-shot single destroy --deployment "${SOLO_DEPLOYMENT}"- name:Delete Kind clusterif:always()env:SOLO_CLUSTER_NAME:solorun:| set -euo pipefail
kind delete cluster -n "${SOLO_CLUSTER_NAME}"
Complete Example Workflow
name:Solo CI Exampleon:pull_request:types:[opened, reopened, synchronize, ready_for_review]jobs:test:runs-on:self-hostedtimeout-minutes:30steps:- name:Checkout Codeuses:actions/checkout@v4- name:Check Docker Resourcesrun:| read cpus mem <<<"$(docker info --format '{{.NCPU}} {{.MemTotal}}')"
mem_gb=$(awk -v m="$mem" 'BEGIN{printf "%.1f", m/1000000000}')
echo "CPU cores: $cpus"
echo "Memory: ${mem_gb} GB"- name:Setup Kinduses:helm/kind-action@a1b0e391336a6ee6713a0583f8c6240d70863de3with:install_only:truenode_image:kindest/node:v1.32.2@sha256:3966f21e12b760f6585bde7140cae5e8cdc0e52b37a6f90ce39834b6e72e3f49version:v0.29.0kubectl_version:v1.32.2verbosity:3wait:120s- name:Set up Node.jsuses:actions/setup-node@49933ea5288caeca8642d1e84afbd3f7d6820020with:node-version:22.12.0- name:Install Solo CLIrun:| set -euo pipefail
npm install -g @hiero-ledger/solo@<version>
solo --version
kind --version- name:Deploy Soloenv:SOLO_CLUSTER_NAME:soloSOLO_DEPLOYMENT:solo-deploymentrun:| set -euo pipefail
kind create cluster -n "${SOLO_CLUSTER_NAME}"
solo one-shot single deploy --deployment "${SOLO_DEPLOYMENT}" | tee solo-deploy.log# Add your integration test steps here- name:Destroy Solo deploymentif:always()env:SOLO_DEPLOYMENT:solo-deploymentrun:| set -euo pipefail
solo one-shot single destroy --deployment "${SOLO_DEPLOYMENT}"- name:Delete Kind clusterif:always()env:SOLO_CLUSTER_NAME:solorun:| set -euo pipefail
kind delete cluster -n "${SOLO_CLUSTER_NAME}"- name:Upload Logsif:always()uses:actions/upload-artifact@v4with:name:solo-logspath:~/.solo/logs/*overwrite:trueif-no-files-found:warn
Resetting Between Tests
If your job runs multiple test suites that each need a clean genesis ledger,
you do not need to destroy and redeploy between them. Reset the ledger to
genesis after each suite to return to a known starting state without
recreating the cluster:
- name:Reset ledger to genesisenv:SOLO_DEPLOYMENT:solo-deploymentrun:| set -euo pipefail
solo ledger system reset --deployment "${SOLO_DEPLOYMENT}"
This applies to both runner types and is significantly faster than a
destroy-and-redeploy cycle. See
Reset the ledger to genesis
for details and available flags.
2.8 - Run Performance Tests Locally
Run Solo E2E performance tests locally, including setup, execution, optional local build path configuration, and branch workflow triggering.
Overview
This guide shows how to run the Solo E2E performance test on a local machine.
Prerequisites
task, node, npm, kubectl, and kind installed
Docker running
Solo dependencies installed (npm ci)
Run the Performance Test
From the repository root:
task test-setup
task test-e2e-performance
The test uses one-shot single deploy/destroy flow and then runs rapid-fire load
tests.
What Gets Tested
The test suite runs four sequential load tests using the Network Load Generator
(NLG), each for 5 minutes by default (controlled by
ONE_SHOT_METRICS_TEST_DURATION_IN_MINUTES):
Load Test
What it submits
TokenTransferLoadTest
Fungible token transfers
NftTransferLoadTest
NFT transfers
CryptoTransferLoadTest
HBAR crypto transfers
HCSLoadTest
Hedera Consensus Service (HCS) messages
All four tests target a max of 100 TPS with 5 concurrent threads and 1,000
accounts. After all load tests complete, the suite sleeps for one additional
metrics-collection window to capture steady-state resource usage.
Metrics Measured
The test collects two categories of metrics:
Workload metrics (per load test)
Metric
Unit
Description
TPS
transactions/second
Throughput achieved by the NLG during the load window
Transaction count
count
Total transactions submitted in the load window
End-to-end mirror RTT
milliseconds
Time from transaction submission to visibility in the Mirror Node REST API
RTT percentiles (p50, p95, max)
milliseconds
Distribution of 5 RTT probe samples taken concurrently during each load test
Kubernetes resource metrics (polled every 5 seconds)
Metric
Unit
Description
CPU
millicores
Aggregate CPU across all pods in the test namespace
Memory
MiB
Aggregate memory across all pods in the test namespace
Peak CPU
millicores
Highest CPU snapshot recorded across the full test run
Peak memory
MiB
Highest memory snapshot recorded across the full test run
Per-pod breakdowns are included in the JSON output for post-run analysis.
Expected Output
Console output (per load test)
A healthy run prints a green result line after each load test:
TokenTransferLoadTest: TPS 100 (30000 transactions in 300 sec), RTT 450 ms
TokenTransferLoadTest: end-to-end mirror RTT max 499 ms (p50 320 ms, p95 480 ms, 5 samples)
During the post-test metrics collection window you will see:
performance-tests: sleeping for metrics collection, 1 of 5 minutes
performance-tests: sleeping for metrics collection, 2 of 5 minutes
...
performance-tests: sleeping for metrics collection, 5 of 5 minutes
Summary JSON
After the test completes, a summary is written to
~/.solo/logs/<namespace>.json. The example below shows the structure and
fields — actual values will differ based on your hardware and Solo version:
{"snapshotName":"performance-tests-3712495","date":"2026-07-28T10:15:42.123Z","gitHubSha":"","soloVersion":"0.85.0","soloChartVersion":"0.65.0","consensusNodeVersion":"v0.74.0","mirrorNodeVersion":"0.159.0","blockNodeVersion":"0.38.0","relayVersion":"0.77.0","explorerVersion":"26.1.0","cpuInMillicores":1842,"memoryInMebibytes":2331,"runtimeInMinutes":62,"transactionCount":120000,"events":["Starting TokenTransferLoadTest","Starting NftTransferLoadTest","Starting CryptoTransferLoadTest","Starting HCSLoadTest","Completed all performance tests"],"peakCpuInMillicores":2100,"peakCpuSnapshot":"performance-tests-3712495","peakMemoryInMebibytes":2331,"peakMemorySnapshot":"performance-tests-3712495","clusterMetrics":["..."]}
A full timeline of all 5-second snapshots is written to
~/.solo/logs/<namespace>/timeline-metrics.json for trend analysis.
Interpreting Results
Healthy indicators
Signal
What to look for
All four load tests print a green result line
TPS reported as non-zero
events array ends with "Completed all performance tests"
All tests ran to completion
memoryInMebibytes under 3,000 MiB
CI threshold — above this indicates a regression
End-to-end mirror RTT under 600 ms
RTT probe target; values near or above this indicate mirror node lag
Problem indicators
Signal
Likely cause
A load test prints no result line or exits with NO_RESULT
NLG pod failed to start or crashed mid-run
TPS is 0 with 0 transactions
Consensus node was unreachable or rejected all transactions
memoryInMebibytes above 3,000 MiB
Memory regression — compare per-pod breakdown in clusterMetrics to identify the culprit
RTT consistently above 600 ms
Mirror node importer lag; check importer pod logs
events array is missing later entries
Test timed out or threw before completing all load tests
Note: The SmartContractLoadTest is currently disabled (it.skip) pending
an upstream fix and will not appear in results.
Optional: Use a Local Consensus Node Build
If you already have a local consensus node build, set SOLO_LOCAL_BUILD_PATH so
commands that consume --local-build-path can use it by default:
You can run the repository performance workflow against any pushed Solo branch.
Option 1: Using gh CLI
exportSOLO_BRANCH="<your-branch-name>"gh workflow run "Performance Test Solo Deployment" --ref "${SOLO_BRANCH}" --repo hiero-ledger/solo
Watch the latest run for that branch:
RUN_ID=$(gh run list --workflow "Performance Test Solo Deployment" --branch "${SOLO_BRANCH}" --limit 1 --json databaseId -q '.[0].databaseId')gh run watch "${RUN_ID}" --repo hiero-ledger/solo
Option 2: Using GitHub Web UI
Open
https://github.com/hiero-ledger/solo/actions/workflows/flow-performance-test.yaml.
Click Run workflow.
Select your branch in the branch dropdown.
Click Run workflow to start the run.
2.9 - CLI Reference
Canonical Solo CLI command and flag reference, including migration guidance from legacy command paths. Use this section to look up Solo commands, subcommands, and flags.
2.9.1 - Solo CLI Reference
Canonical Solo CLI command and flag reference for end users.
Overview
This page is the canonical command reference for the Solo CLI.
Use it to look up command paths, subcommands, and flags.
Use solo <command> --help and solo <command> <subcommand> --help for runtime help on your installed version.
Solo supports machine-readable output for version output and for command execution flows that honor the output format flag.
solo --version -o json
solo --version -o yaml
solo --version -o wide
Expected formats:
json: JSON object output.
yaml: YAML output.
wide: plain text value-oriented output.
Global Flags
Global flags shown in root help:
--dev: enable developer mode.
--force-port-forward: force port forwarding for network services.
-v, --version: print Solo version.
Deprecated Features
Deprecated flags are also marked inline in the help output below as [deprecated], and deprecated commands as [DEPRECATED: ...]. The version window and replacement for each are listed in the table.
Feature
Type
Deprecated since
Planned removal
Replacement
--image-tag
flag
v0.85.0
v0.91.0
--component-image
--relay-release
flag
v0.85.0
v0.91.0
--relay-version
--release-tag
flag
v0.85.0
v0.91.0
--consensus-node-version
--chart-version
flag
v0.85.0
v0.91.0
--block-node-version
init
command
v0.85.0
v0.91.0
—
Command and Flag Reference
The sections below are generated from Solo CLI help output using the implementation on hiero-ledger/solo.
Version Output
******************************* Solo *********************************************
Version			: 0.90.0
**********************************************************************************
 config

Backup and restore component configurations for Solo deployments. These commands display what would be backed up or restored without performing actual operations.

Commands:
  config ops   Configuration backup and restore operations

Options:


     --debug               ,  --dev         Enable debug   [boolean] [default: false]
                           mode
     --force-port-forward  Force port forward to access    [boolean] [default: true]
                           the network services
-v,  --version             Show version number             [boolean]
config ops
 config ops

Configuration backup and restore operations

Commands:
  config ops backup              Create a backup for all component configurations of a deployment. Create a zip file with configuration and log data.Export states, configmaps and secrets
  config ops restore-config      Restore component configurations from backup. Imports ConfigMaps, Secrets, logs, and state files for a running deployment.
  config ops restore-clusters    Restore Kind clusters from backup directory structure. Creates clusters, sets up Docker network, installs MetalLB, and initializes cluster configurations. Does not deploy network components.
  config ops restore-network     Deploy network components to existing clusters from backup. Deploys consensus nodes, block nodes, mirror nodes, explorers, and relay nodes. Requires clusters to be already created (use restore-clusters first).
  config ops restore-db          Restore the external database dump independently of restore-config. Run this before restore-network so mirror, relay, and explorer deploy against an already-populated database.
  config ops bridge-import-gap   Bridge a mirror importer record_file gap after restore and restart the importer.

Options:


     --debug               ,  --dev         Enable debug   [boolean] [default: false]
                           mode
     --force-port-forward  Force port forward to access    [boolean] [default: true]
                           the network services
-v,  --version             Show version number             [boolean]
 block

Block Node operations for creating, modifying, and destroying resources. These commands require the presence of an existing deployment.

Commands:
  block node   Create, manage, or destroy block node instances. Operates on a single block node instance at a time.

Options:


     --debug               ,  --dev         Enable debug   [boolean] [default: false]
                           mode
     --force-port-forward  Force port forward to access    [boolean] [default: true]
                           the network services
-v,  --version             Show version number             [boolean]
 cluster-ref

Manages the relationship between Kubernetes context names and Solo cluster references which are an alias for a kubernetes context.

Commands:
  cluster-ref config   List, create, manage, and remove associations between Kubernetes contexts and Solo cluster references.

Options:


     --debug               ,  --dev         Enable debug   [boolean] [default: false]
                           mode
     --force-port-forward  Force port forward to access    [boolean] [default: true]
                           the network services
-v,  --version             Show version number             [boolean]
cluster-ref config
 cluster-ref config

List, create, manage, and remove associations between Kubernetes contexts and Solo cluster references.

Commands:
  cluster-ref config connect      Creates a new internal Solo cluster name to a Kubernetes context or maps a Kubernetes context to an existing internal Solo cluster reference
  cluster-ref config disconnect   Removes the Kubernetes context associated with an internal Solo cluster reference.
  cluster-ref config list         Lists the configured Kubernetes context to Solo cluster reference mappings.
  cluster-ref config info         Displays the status information and attached deployments for a given Solo cluster reference mapping.
  cluster-ref config setup        Setup cluster with shared components
  cluster-ref config reset        Uninstall shared components from cluster

Options:


     --debug               ,  --dev         Enable debug   [boolean] [default: false]
                           mode
     --force-port-forward  Force port forward to access    [boolean] [default: true]
                           the network services
-v,  --version             Show version number             [boolean]
cluster-ref config connect
 cluster-ref config connect

Creates a new internal Solo cluster name to a Kubernetes context or maps a Kubernetes context to an existing internal Solo cluster reference

Options:

-c,  --cluster-ref         The cluster reference that      [string] [required]
                           will be used for referencing
                           the Kubernetes cluster and
                           stored in the local and remote
                           configuration for the
                           deployment.  For commands that
                           take multiple clusters they
                           can be separated by commas.
     --context             The Kubernetes context name to  [string] [required]
                           be used

     --debug               ,  --dev ,  --dev   Enable      [boolean] [default: false]
                           debug mode
     --force-port-forward  Force port forward to access    [boolean] [default: true]
                           the network services
-q,  --quiet-mode          Quiet mode, do not prompt for   [boolean] [default: false]
                           confirmation
-v,  --version             Show version number             [boolean]
cluster-ref config disconnect
 cluster-ref config disconnect

Removes the Kubernetes context associated with an internal Solo cluster reference.

Options:

-c,  --cluster-ref         The cluster reference that      [string] [required]
                           will be used for referencing
                           the Kubernetes cluster and
                           stored in the local and remote
                           configuration for the
                           deployment.  For commands that
                           take multiple clusters they
                           can be separated by commas.

     --debug               ,  --dev ,  --dev   Enable      [boolean] [default: false]
                           debug mode
     --force-port-forward  Force port forward to access    [boolean] [default: true]
                           the network services
-q,  --quiet-mode          Quiet mode, do not prompt for   [boolean] [default: false]
                           confirmation
-v,  --version             Show version number             [boolean]
cluster-ref config list
 cluster-ref config list

Lists the configured Kubernetes context to Solo cluster reference mappings.

Options:


     --debug               ,  --dev ,  --dev   Enable      [boolean] [default: false]
                           debug mode
     --force-port-forward  Force port forward to access    [boolean] [default: true]
                           the network services
-q,  --quiet-mode          Quiet mode, do not prompt for   [boolean] [default: false]
                           confirmation
-v,  --version             Show version number             [boolean]
cluster-ref config info
 cluster-ref config info

Displays the status information and attached deployments for a given Solo cluster reference mapping.

Options:

-c,  --cluster-ref         The cluster reference that      [string] [required]
                           will be used for referencing
                           the Kubernetes cluster and
                           stored in the local and remote
                           configuration for the
                           deployment.  For commands that
                           take multiple clusters they
                           can be separated by commas.

     --debug               ,  --dev ,  --dev   Enable      [boolean] [default: false]
                           debug mode
     --force-port-forward  Force port forward to access    [boolean] [default: true]
                           the network services
-q,  --quiet-mode          Quiet mode, do not prompt for   [boolean] [default: false]
                           confirmation
-v,  --version             Show version number             [boolean]
cluster-ref config setup
 cluster-ref config setup

Setup cluster with shared components

Options:


     --chart-dir                Local chart directory path      [string]
                                (e.g. ~/solo-charts/charts)
-c,  --cluster-ref              The cluster reference that      [string]
                                will be used for referencing
                                the Kubernetes cluster and
                                stored in the local and remote
                                configuration for the
                                deployment.  For commands that
                                take multiple clusters they
                                can be separated by commas.
-s,  --cluster-setup-namespace  Cluster Setup Namespace         [string] [default: "solo-setup"]
     --debug                    ,  --dev              Enable    [boolean] [default: false]
                                debug mode
     --force-port-forward       Force port forward to access    [boolean] [default: true]
                                the network services
     --metrics-server           Deploy metrics server to        [boolean] [default: false]
                                enable kubectl top for CPU and
                                memory usage monitoring
     --minio                    Deploy minio operator           [boolean] [default: true]
     --prometheus-stack         Deploy prometheus stack         [boolean] [default: false]
-q,  --quiet-mode               Quiet mode, do not prompt for   [boolean] [default: false]
                                confirmation
     --solo-chart-version       Solo testing chart version      [string] [default: "0.66.1"]
-v,  --version                  Show version number             [boolean]
cluster-ref config reset
 cluster-ref config reset

Uninstall shared components from cluster

Options:

-c,  --cluster-ref              The cluster reference that      [string] [required]
                                will be used for referencing
                                the Kubernetes cluster and
                                stored in the local and remote
                                configuration for the
                                deployment.  For commands that
                                take multiple clusters they
                                can be separated by commas.

-s,  --cluster-setup-namespace  Cluster Setup Namespace         [string] [default: "solo-setup"]
     --debug                    ,  --dev              Enable    [boolean] [default: false]
                                debug mode
     --force                    Force actions even if those     [boolean] [default: false]
                                can be skipped
     --force-port-forward       Force port forward to access    [boolean] [default: true]
                                the network services
-q,  --quiet-mode               Quiet mode, do not prompt for   [boolean] [default: false]
                                confirmation
-v,  --version                  Show version number             [boolean]
 consensus network

Ledger/network wide consensus operations such as freeze, upgrade, and deploy. Operates on the entire ledger and all consensus node instances.

Commands:
  consensus network deploy    Installs and configures all consensus nodes for the deployment.
  consensus network destroy   Removes all consensus network components from the deployment.
  consensus network freeze    Initiates a network freeze for scheduled maintenance or upgrades
  consensus network upgrade   Upgrades the software version running on all consensus nodes.

Options:


     --debug               ,  --dev         Enable debug   [boolean] [default: false]
                           mode
     --force-port-forward  Force port forward to access    [boolean] [default: true]
                           the network services
-v,  --version             Show version number             [boolean]
 consensus node

List, create, manage, or destroy consensus node instances. Operates on a single consensus node instance at a time.

Commands:
  consensus node setup         Setup node with a specific version of Hedera platform
  consensus node start         Start a node
  consensus node stop          Stop a node
  consensus node restart       Restart all nodes of the network
  consensus node refresh       Reset and restart a node
  consensus node add           Adds a node with a specific version of Hedera platform
  consensus node update        Update a node with a specific version of Hedera platform
  consensus node destroy       Delete a node with a specific version of Hedera platform
  consensus node collect-jfr   Collect Java Flight Recorder (JFR) files from a node for diagnostics and performance analysis. Requires the node to be running with Java Flight Recorder enabled.

Options:


     --debug               ,  --dev         Enable debug   [boolean] [default: false]
                           mode
     --force-port-forward  Force port forward to access    [boolean] [default: true]
                           the network services
-v,  --version             Show version number             [boolean]
consensusnodestartStartanodeOptions:--appTestingappname[string][default:"HederaNode.jar"]--debug,--devEnable[boolean][default:false]debugmode--debug-node-aliasEnabledefaultjvmdebugport[string](5005)forthegivennodeid-d,--deploymentThenametheuserwill[string]referencelocallytolinktoadeployment.FallsbacktotheSOLO_DEPLOYMENTenvironmentvariable,orisselectedautomaticallywhenthelocalconfigurationcontainsexactlyonedeployment--domain-namesCustomdomainnamesfor[string]consensusnodesmappingforthe(e.g.node0=domain.namewherekeyisnodealiasandvalueisdomainname)withmultiplenodescommaseparated--external-addressBindaddressforkubectl[string]port-forward(forexample127.0.0.1or0.0.0.0)--force-port-forwardForceportforwardtoaccess[boolean][default:true]thenetworkservices--gossip-endpoint-portPortusedwhenbuildingthe[Format:<port>toapplythesameporttoeverynode,or<alias>=<port>[,<alias>=<port>]pernode][string]consensusnodegossipendpointspublishedtothenetwork(Defaultport:50111)--grpc-web-endpointsConfiguregRPCWebendpoints[Format:<alias>=<address>[:<port>][,<alias>=<address>[:<port>]]][string]mapping,commaseparated(Defaultport:8080)(Aliasescanbeprovidedexplicitly,orinferredbynodeidorder)Examples:node1=127.0.0.1:8080,node2=127.0.0.1:8081node1=localhost,node2=localhost:8081localhost,127.0.0.2:8081-i,--node-aliasesCommaseparatednodealiases[string](emptymeansallnodes)-q,--quiet-modeQuietmode,donotpromptfor[boolean][default:false]confirmation--service-endpoint-portPortusedwhenbuildingthe[Format:<port>toapplythesameporttoeverynode,or<alias>=<port>[,<alias>=<port>]pernode][string]consensusnodegRPCserviceendpointspublishedtothenetwork(Defaultport:50211)--skip-grpc-web-endpointSkipsubmittingthe[boolean][default:false]NodeUpdateTransactionthatsetsthegRPCwebproxyendpoint.UseduringrestorewhentheendpointisalreadycorrectintherestoredstatetoavoidtriggeringTSSre-evaluation.--stake-amountsTheamounttobestakedinthe[string]sameorderyoulistthenodealiaseswithmultiplenodestakedvaluescommaseparated--state-fileAzippedstatefiletobeused[string]forthenetwork--transplantTreatthesuppliedstatefile[boolean][default:false]ascapturedonadifferentnetwork.Installsthisnetwork's address book as override-network.jsonsotheconsensusnodeadoptsitinsteadoftherostercarriedbythestate.Leaveunsetwhenrestoringanetwork's own state.-v,--versionShowversionnumber[boolean]--wraps-key-pathPathtoalocaldirectory[string]containingpre-existingWRAPsprovingkeyfiles(.bin)
 consensus dev-node-add

Dev operations for adding consensus nodes.

Commands:
  consensus dev-node-add prepare               Prepares the addition of a node with a specific version of Hedera platform
  consensus dev-node-add submit-transactions   Submits NodeCreateTransaction and Upgrade transactions to the network nodes
  consensus dev-node-add execute               Executes the addition of a previously prepared node

Options:


     --debug               ,  --dev         Enable debug   [boolean] [default: false]
                           mode
     --force-port-forward  Force port forward to access    [boolean] [default: true]
                           the network services
-v,  --version             Show version number             [boolean]
consensus dev-node-add prepare
consensusdev-node-addpreparePreparestheadditionofanodewithaspecificversionofHederaplatformOptions:--output-dirPathtothedirectorywhere[string][required]thecommandcontextwillbesavedto--admin-keyAdminkey[string][default:"302e020100300506032b65700422042091132178e72057a1d7528025956fe39b0b847f200ab59b2fdd367017f3087137"]--appTestingappname[string][default:"HederaNode.jar"]--block-node-mappingConfigureblock-nodepriority[string]mapping.Default:allblock-nodeincluded,first's priorityis2.Unlistedblock-nodewillnotroutedtotheconsensusnodenode.Example:--block-node-mapping1=2,2=1--cache-dirLocalcachedirectory[string][default:"/home/runner/.solo/cache"]-l,--chain-idChainID[string][default:"298"]--chart-dirLocalchartdirectorypath[string](e.g.~/solo-charts/charts)-c,--cluster-refTheclusterreferencethat[string]willbeusedforreferencingtheKubernetesclusterandstoredinthelocalandremoteconfigurationforthedeployment.Forcommandsthattakemultipleclusterstheycanbeseparatedbycommas.--consensus-node-versionConsensusnodeversionto[string]deploy(e.g.v0.73.0or0.73.0).--debug,--dev,--dev[boolean][default:false]Enabledebugmode--debug-node-aliasEnabledefaultjvmdebugport[string](5005)forthegivennodeid-d,--deploymentThenametheuserwill[string]referencelocallytolinktoadeployment.FallsbacktotheSOLO_DEPLOYMENTenvironmentvariable,orisselectedautomaticallywhenthelocalconfigurationcontainsexactlyonedeployment--domain-namesCustomdomainnamesfor[string]consensusnodesmappingforthe(e.g.node0=domain.namewherekeyisnodealiasandvalueisdomainname)withmultiplenodescommaseparated--endpoint-typeEndpointtype(IPorFQDN)[string][default:"FQDN"]--external-block-node-mappingConfigureexternal-block-node[string]prioritymapping.Default:allexternal-block-nodeincluded,first's priority is 2. Unlistedexternal-block-nodewillnotroutedtotheconsensusnodenode.Example:--external-block-node-mapping1=2,2=1--forceForceactionsevenifthose[boolean][default:false]canbeskipped--force-port-forwardForceportforwardtoaccess[boolean][default:true]thenetworkservices--gossip-endpoint-portPortusedwhenbuildingthe[Format:<port>toapplythesameporttoeverynode,or<alias>=<port>[,<alias>=<port>]pernode][string]consensusnodegossipendpointspublishedtothenetwork(Defaultport:50111)--gossip-endpointsCommaseparatedgossip[string]endpointsofthenode(e.g.firstoneisinternal,secondoneisexternal)--gossip-keysGenerategossipkeysfornodes[boolean][default:false]--grpc-endpointsCommaseparatedgRPCendpoints[string]ofthenode(atmost8)--grpc-tls-certTLSCertificatepathforthe[string]gRPC(e.g."node1=/Users/username/node1-grpc.cert"withmultiplenodescommaseparated)--grpc-tls-keyTLSCertificatekeypathfor[string]thegRPC(e.g."node1=/Users/username/node1-grpc.key"withmultiplenodescommaseparated)--grpc-web-endpointConfiguregRPCWebendpoint[Format:<address>[:<port>]][string](Defaultport:8080)--grpc-web-tls-certTLSCertificatepathforgRPC[string]Web(e.g."node1=/Users/username/node1-grpc-web.cert"withmultiplenodescommaseparated)--grpc-web-tls-keyTLCCertificatekeypathfor[string]gRPCWeb(e.g."node1=/Users/username/node1-grpc-web.key"withmultiplenodescommaseparated)--local-build-pathpathofhederalocalrepo[string]--pvcsEnablepersistentvolume[boolean][default:false]claimstostoredataoutsidethepod,requiredforconsensusnodeadd-q,--quiet-modeQuietmode,donotpromptfor[boolean][default:false]confirmation-t,--release-tagConsensusnodereleasetag[deprecated][string][default:"v0.76.4"](e.g.v0.76.4)--service-endpoint-portPortusedwhenbuildingthe[Format:<port>toapplythesameporttoeverynode,or<alias>=<port>[,<alias>=<port>]pernode][string]consensusnodegRPCserviceendpointspublishedtothenetwork(Defaultport:50211)--solo-chart-versionSolotestingchartversion[string][default:"0.66.1"]--tls-keysGenerategRPCTLSkeysfor[boolean][default:false]nodes-v,--versionShowversionnumber[boolean]--wraps-key-pathPathtoalocaldirectory[string]containingpre-existingWRAPsprovingkeyfiles(.bin)
consensus dev-node-add submit-transactions
consensusdev-node-addsubmit-transactionsSubmitsNodeCreateTransactionandUpgradetransactionstothenetworknodesOptions:--input-dirPathtothedirectorywhere[string][required]thecommandcontextwillbeloadedfrom--appTestingappname[string][default:"HederaNode.jar"]--block-node-mappingConfigureblock-nodepriority[string]mapping.Default:allblock-nodeincluded,first's priorityis2.Unlistedblock-nodewillnotroutedtotheconsensusnodenode.Example:--block-node-mapping1=2,2=1--cache-dirLocalcachedirectory[string][default:"/home/runner/.solo/cache"]-l,--chain-idChainID[string][default:"298"]--chart-dirLocalchartdirectorypath[string](e.g.~/solo-charts/charts)-c,--cluster-refTheclusterreferencethat[string]willbeusedforreferencingtheKubernetesclusterandstoredinthelocalandremoteconfigurationforthedeployment.Forcommandsthattakemultipleclusterstheycanbeseparatedbycommas.--consensus-node-versionConsensusnodeversionto[string]deploy(e.g.v0.73.0or0.73.0).--debug,--dev,--dev[boolean][default:false]Enabledebugmode--debug-node-aliasEnabledefaultjvmdebugport[string](5005)forthegivennodeid-d,--deploymentThenametheuserwill[string]referencelocallytolinktoadeployment.FallsbacktotheSOLO_DEPLOYMENTenvironmentvariable,orisselectedautomaticallywhenthelocalconfigurationcontainsexactlyonedeployment--domain-namesCustomdomainnamesfor[string]consensusnodesmappingforthe(e.g.node0=domain.namewherekeyisnodealiasandvalueisdomainname)withmultiplenodescommaseparated--endpoint-typeEndpointtype(IPorFQDN)[string][default:"FQDN"]--external-block-node-mappingConfigureexternal-block-node[string]prioritymapping.Default:allexternal-block-nodeincluded,first's priority is 2. Unlistedexternal-block-nodewillnotroutedtotheconsensusnodenode.Example:--external-block-node-mapping1=2,2=1--forceForceactionsevenifthose[boolean][default:false]canbeskipped--force-port-forwardForceportforwardtoaccess[boolean][default:true]thenetworkservices--gossip-endpoint-portPortusedwhenbuildingthe[Format:<port>toapplythesameporttoeverynode,or<alias>=<port>[,<alias>=<port>]pernode][string]consensusnodegossipendpointspublishedtothenetwork(Defaultport:50111)--gossip-endpointsCommaseparatedgossip[string]endpointsofthenode(e.g.firstoneisinternal,secondoneisexternal)--gossip-keysGenerategossipkeysfornodes[boolean][default:false]--grpc-endpointsCommaseparatedgRPCendpoints[string]ofthenode(atmost8)--grpc-tls-certTLSCertificatepathforthe[string]gRPC(e.g."node1=/Users/username/node1-grpc.cert"withmultiplenodescommaseparated)--grpc-tls-keyTLSCertificatekeypathfor[string]thegRPC(e.g."node1=/Users/username/node1-grpc.key"withmultiplenodescommaseparated)--grpc-web-endpointConfiguregRPCWebendpoint[Format:<address>[:<port>]][string](Defaultport:8080)--grpc-web-tls-certTLSCertificatepathforgRPC[string]Web(e.g."node1=/Users/username/node1-grpc-web.cert"withmultiplenodescommaseparated)--grpc-web-tls-keyTLCCertificatekeypathfor[string]gRPCWeb(e.g."node1=/Users/username/node1-grpc-web.key"withmultiplenodescommaseparated)--local-build-pathpathofhederalocalrepo[string]--pvcsEnablepersistentvolume[boolean][default:false]claimstostoredataoutsidethepod,requiredforconsensusnodeadd-q,--quiet-modeQuietmode,donotpromptfor[boolean][default:false]confirmation-t,--release-tagConsensusnodereleasetag[deprecated][string][default:"v0.76.4"](e.g.v0.76.4)--service-endpoint-portPortusedwhenbuildingthe[Format:<port>toapplythesameporttoeverynode,or<alias>=<port>[,<alias>=<port>]pernode][string]consensusnodegRPCserviceendpointspublishedtothenetwork(Defaultport:50211)--solo-chart-versionSolotestingchartversion[string][default:"0.66.1"]--tls-keysGenerategRPCTLSkeysfor[boolean][default:false]nodes-v,--versionShowversionnumber[boolean]--wraps-key-pathPathtoalocaldirectory[string]containingpre-existingWRAPsprovingkeyfiles(.bin)
consensus dev-node-add execute
consensusdev-node-addexecuteExecutestheadditionofapreviouslypreparednodeOptions:--input-dirPathtothedirectorywhere[string][required]thecommandcontextwillbeloadedfrom--admin-keyAdminkey[string][default:"302e020100300506032b65700422042091132178e72057a1d7528025956fe39b0b847f200ab59b2fdd367017f3087137"]--appTestingappname[string][default:"HederaNode.jar"]--block-node-mappingConfigureblock-nodepriority[string]mapping.Default:allblock-nodeincluded,first's priorityis2.Unlistedblock-nodewillnotroutedtotheconsensusnodenode.Example:--block-node-mapping1=2,2=1--cache-dirLocalcachedirectory[string][default:"/home/runner/.solo/cache"]-l,--chain-idChainID[string][default:"298"]--chart-dirLocalchartdirectorypath[string](e.g.~/solo-charts/charts)-c,--cluster-refTheclusterreferencethat[string]willbeusedforreferencingtheKubernetesclusterandstoredinthelocalandremoteconfigurationforthedeployment.Forcommandsthattakemultipleclusterstheycanbeseparatedbycommas.--consensus-node-versionConsensusnodeversionto[string]deploy(e.g.v0.73.0or0.73.0).--debug,--dev,--dev[boolean][default:false]Enabledebugmode--debug-node-aliasEnabledefaultjvmdebugport[string](5005)forthegivennodeid-d,--deploymentThenametheuserwill[string]referencelocallytolinktoadeployment.FallsbacktotheSOLO_DEPLOYMENTenvironmentvariable,orisselectedautomaticallywhenthelocalconfigurationcontainsexactlyonedeployment--domain-namesCustomdomainnamesfor[string]consensusnodesmappingforthe(e.g.node0=domain.namewherekeyisnodealiasandvalueisdomainname)withmultiplenodescommaseparated--endpoint-typeEndpointtype(IPorFQDN)[string][default:"FQDN"]--envoy-ipsIPmappingwherekey=value[string]isnodealiasandstaticipforenvoyproxy,(e.g.:--envoy-ipsnode1=127.0.0.1,node2=127.0.0.1)--external-block-node-mappingConfigureexternal-block-node[string]prioritymapping.Default:allexternal-block-nodeincluded,first's priority is 2. Unlistedexternal-block-nodewillnotroutedtotheconsensusnodenode.Example:--external-block-node-mapping1=2,2=1--forceForceactionsevenifthose[boolean][default:false]canbeskipped--force-port-forwardForceportforwardtoaccess[boolean][default:true]thenetworkservices--gossip-endpoint-portPortusedwhenbuildingthe[Format:<port>toapplythesameporttoeverynode,or<alias>=<port>[,<alias>=<port>]pernode][string]consensusnodegossipendpointspublishedtothenetwork(Defaultport:50111)--gossip-endpointsCommaseparatedgossip[string]endpointsofthenode(e.g.firstoneisinternal,secondoneisexternal)--gossip-keysGenerategossipkeysfornodes[boolean][default:false]--grpc-endpointsCommaseparatedgRPCendpoints[string]ofthenode(atmost8)--grpc-tls-certTLSCertificatepathforthe[string]gRPC(e.g."node1=/Users/username/node1-grpc.cert"withmultiplenodescommaseparated)--grpc-tls-keyTLSCertificatekeypathfor[string]thegRPC(e.g."node1=/Users/username/node1-grpc.key"withmultiplenodescommaseparated)--grpc-web-endpointConfiguregRPCWebendpoint[Format:<address>[:<port>]][string](Defaultport:8080)--grpc-web-tls-certTLSCertificatepathforgRPC[string]Web(e.g."node1=/Users/username/node1-grpc-web.cert"withmultiplenodescommaseparated)--grpc-web-tls-keyTLCCertificatekeypathfor[string]gRPCWeb(e.g."node1=/Users/username/node1-grpc-web.key"withmultiplenodescommaseparated)--haproxy-ipsIPmappingwherekey=value[string]isnodealiasandstaticipforhaproxy,(e.g.:--haproxy-ipsnode1=127.0.0.1,node2=127.0.0.1)--local-build-pathpathofhederalocalrepo[string]--pvcsEnablepersistentvolume[boolean][default:false]claimstostoredataoutsidethepod,requiredforconsensusnodeadd-q,--quiet-modeQuietmode,donotpromptfor[boolean][default:false]confirmation-t,--release-tagConsensusnodereleasetag[deprecated][string][default:"v0.76.4"](e.g.v0.76.4)--service-endpoint-portPortusedwhenbuildingthe[Format:<port>toapplythesameporttoeverynode,or<alias>=<port>[,<alias>=<port>]pernode][string]consensusnodegRPCserviceendpointspublishedtothenetwork(Defaultport:50211)--solo-chart-versionSolotestingchartversion[string][default:"0.66.1"]--tls-keysGenerategRPCTLSkeysfor[boolean][default:false]nodes-v,--versionShowversionnumber[boolean]--wraps-key-pathPathtoalocaldirectory[string]containingpre-existingWRAPsprovingkeyfiles(.bin)
consensus dev-node-update
 consensus dev-node-update

Dev operations for updating consensus nodes

Commands:
  consensus dev-node-update prepare               Prepare the deployment to update a node with a specific version of Hedera platform
  consensus dev-node-update submit-transactions   Submit transactions for updating a node with a specific version of Hedera platform
  consensus dev-node-update execute               Executes the updating of a node with a specific version of Hedera platform

Options:


     --debug               ,  --dev         Enable debug   [boolean] [default: false]
                           mode
     --force-port-forward  Force port forward to access    [boolean] [default: true]
                           the network services
-v,  --version             Show version number             [boolean]
 consensus dev-node-upgrade

Dev operations for upgrading consensus nodes

Commands:
  consensus dev-node-upgrade prepare               Prepare for upgrading network
  consensus dev-node-upgrade submit-transactions   Submit transactions for upgrading network
  consensus dev-node-upgrade execute               Executes the upgrading the network

Options:


     --debug               ,  --dev         Enable debug   [boolean] [default: false]
                           mode
     --force-port-forward  Force port forward to access    [boolean] [default: true]
                           the network services
-v,  --version             Show version number             [boolean]
 consensus dev-node-delete

Dev operations for delete consensus nodes

Commands:
  consensus dev-node-delete prepare               Prepares the deletion of a node with a specific version of Hedera platform
  consensus dev-node-delete submit-transactions   Submits transactions to the network nodes for deleting a node
  consensus dev-node-delete execute               Executes the deletion of a previously prepared node

Options:


     --debug               ,  --dev         Enable debug   [boolean] [default: false]
                           mode
     --force-port-forward  Force port forward to access    [boolean] [default: true]
                           the network services
-v,  --version             Show version number             [boolean]
consensus dev-freeze
Dev operations for freezing consensus nodes
Commands:
consensus dev-freeze prepare-upgrade Prepare the network for a Freeze Upgrade operation
consensus dev-freeze freeze-upgrade Performs a Freeze Upgrade operation with on the network after it has been prepared with prepare-upgrade
Options:
--debug , --dev Enable debug [boolean] [default: false]
mode
--force-port-forward Force port forward to access [boolean] [default: true]
the network services
-v, --version Show version number [boolean]
deployment
Create, modify, and delete deployment configurations. Deployments are required for most of the other commands.
Commands:
deployment cluster View and manage Solo cluster references used by a deployment.
deployment config List, view, create, delete, and import deployments. These commands affect the local configuration only.
deployment state View the actual state of the deployment on the Kubernetes clusters or teardown/destroy all remote and local configuration for a given deployment.
deployment refresh [DEPRECATED] Use 'solo deployment port-forwards refresh' instead. Refresh port-forward processes for all components in the deployment.
deployment port-forwards Manage the port-forward processes for all components in the deployment.
deployment diagnostics Capture diagnostic information such as logs, signed states, and ledger/network/node configurations.
Options:
--debug , --dev Enable debug [boolean] [default: false]
mode
--force-port-forward Force port forward to access [boolean] [default: true]
the network services
-v, --version Show version number [boolean]
deployment cluster
deployment cluster
View and manage Solo cluster references used by a deployment.
Commands:
deployment cluster attach Attaches a cluster reference to a deployment.
Options:
--debug , --dev Enable debug [boolean] [default: false]
mode
--force-port-forward Force port forward to access [boolean] [default: true]
the network services
-v, --version Show version number [boolean]
deployment config
List, view, create, delete, and import deployments. These commands affect the local configuration only.
Commands:
deployment config list Lists all local deployment configurations or deployments in a specific cluster.
deployment config create Creates a new local deployment configuration.
deployment config delete Removes a local deployment configuration.
deployment config info Displays the full status of a deployment including components, versions, and port-forward status.
deployment config ports List all port-forwards for a deployment. JSON and YAMl output formats, create files containing the data
deployment config import Imports a deployment into the local configuration from an existing cluster's remote config.
Options:
--debug , --dev Enable debug [boolean] [default: false]
mode
--force-port-forward Force port forward to access [boolean] [default: true]
the network services
-v, --version Show version number [boolean]
deployment config list
deployment config list
Lists all local deployment configurations or deployments in a specific cluster.
Options:
-c, --cluster-ref The cluster reference that [string]
will be used for referencing
the Kubernetes cluster and
stored in the local and remote
configuration for the
deployment. For commands that
take multiple clusters they
can be separated by commas.
--debug , --dev Enable debug [boolean] [default: false]
mode
--force-port-forward Force port forward to access [boolean] [default: true]
the network services
-q, --quiet-mode Quiet mode, do not prompt for [boolean] [default: false]
confirmation
-v, --version Show version number [boolean]
deployment refresh
[DEPRECATED] Use 'solo deployment port-forwards refresh' instead. Refresh port-forward processes for all components in the deployment.
Commands:
deployment refresh port-forwards [DEPRECATED] Use 'solo deployment port-forwards refresh' instead. Refresh and restore killed port-forward processes.
Options:
--debug , --dev Enable debug [boolean] [default: false]
mode
--force-port-forward Force port forward to access [boolean] [default: true]
the network services
-v, --version Show version number [boolean]
deployment port-forwards
Manage the port-forward processes for all components in the deployment.
Commands:
deployment port-forwards refresh Refresh and restore killed port-forward processes.
deployment port-forwards stop Stop (close down) all port-forwards for a deployment and remove them from the remote config.
Options:
--debug , --dev Enable debug [boolean] [default: false]
mode
--force-port-forward Force port forward to access [boolean] [default: true]
the network services
-v, --version Show version number [boolean]
deployment diagnostics
Capture diagnostic information such as logs, signed states, and ledger/network/node configurations.
Commands:
deployment diagnostics all Captures logs, configs, and diagnostics artifacts for all deployments by default, or only the selected deployment when --deployment is provided.
deployment diagnostics debug Same scope as diagnostics all, but creates a zip archive for easy sharing.
deployment diagnostics connections Tests connections to Consensus, Relay, Explorer, Mirror and Block nodes for all deployments by default, or only the selected deployment when --deployment is provided.
deployment diagnostics logs Gets logs and configuration files for all deployments by default, or only the selected deployment when --deployment is provided.
deployment diagnostics analyze Analyze a previously collected diagnostics logs directory for common failure signatures.
deployment diagnostics report Collects diagnostics (scoped by --deployment when provided) and creates a GitHub issue using the gh CLI.
Options:
--debug , --dev Enable debug [boolean] [default: false]
mode
--force-port-forward Force port forward to access [boolean] [default: true]
the network services
-v, --version Show version number [boolean]
explorer
Explorer Node operations for creating, modifying, and destroying resources.These commands require the presence of an existing deployment.
Commands:
explorer node List, create, manage, or destroy explorer node instances. Operates on a single explorer node instance at a time.
Options:
--debug , --dev Enable debug [boolean] [default: false]
mode
--force-port-forward Force port forward to access [boolean] [default: true]
the network services
-v, --version Show version number [boolean]
explorer node
explorer node
List, create, manage, or destroy explorer node instances. Operates on a single explorer node instance at a time.
Commands:
explorer node add Adds and configures a new node instance.
explorer node destroy Deletes the specified node from the deployment.
explorer node upgrade Upgrades the specified node in the deployment.
Options:
--debug , --dev Enable debug [boolean] [default: false]
mode
--force-port-forward Force port forward to access [boolean] [default: true]
the network services
-v, --version Show version number [boolean]
init
Initialize local environment [DEPRECATED: since v0.85.0, removal v0.91.0]
Options:
--cache-dir Local cache directory [string] [default: "/home/runner/.solo/cache"]
--debug , --dev Enable debug [boolean] [default: false]
mode
--force-port-forward Force port forward to access [boolean] [default: true]
the network services
-q, --quiet-mode Quiet mode, do not prompt for [boolean] [default: false]
confirmation
-v, --version Show version number [boolean]
keys
keys
Consensus key generation operations
Commands:
keys consensus Generate unique cryptographic keys (gossip or grpc TLS keys) for the Consensus Node instances.
Options:
--debug , --dev Enable debug [boolean] [default: false]
mode
--force-port-forward Force port forward to access [boolean] [default: true]
the network services
-v, --version Show version number [boolean]
keys consensus
keys consensus
Generate unique cryptographic keys (gossip or grpc TLS keys) for the Consensus Node instances.
Commands:
keys consensus generate Generates TLS keys required for consensus node communication.
Options:
--debug , --dev Enable debug [boolean] [default: false]
mode
--force-port-forward Force port forward to access [boolean] [default: true]
the network services
-v, --version Show version number [boolean]
ledger system
Perform a full ledger initialization on a new deployment, rekey privileged/system accounts, or setup network staking parameters.
Commands:
ledger system init Re-keys ledger system accounts and consensus node admin keys with uniquely generated ED25519 private keys and will stake consensus nodes.
ledger system reset Resets the ledger system to genesis by clearing saved states and ledger-related secrets.
Options:
--debug , --dev Enable debug [boolean] [default: false]
mode
--force-port-forward Force port forward to access [boolean] [default: true]
the network services
-v, --version Show version number [boolean]
ledger account
View, list, create, update, delete, and import ledger accounts.
Commands:
ledger account update Updates an existing ledger account.
ledger account create Creates a new ledger account.
ledger account info Gets the account info including the current amount of HBAR
ledger account predefined Creates predefined accounts used by one-shot deployments.
Options:
--debug , --dev Enable debug [boolean] [default: false]
mode
--force-port-forward Force port forward to access [boolean] [default: true]
the network services
-v, --version Show version number [boolean]
mirror
Mirror Node operations for creating, modifying, and destroying resources. These commands require the presence of an existing deployment.
Commands:
mirror node List, create, manage, or destroy mirror node instances. Operates on a single mirror node instance at a time.
Options:
--debug , --dev Enable debug [boolean] [default: false]
mode
--force-port-forward Force port forward to access [boolean] [default: true]
the network services
-v, --version Show version number [boolean]
mirrornodeaddAddsandconfiguresanewnodeinstance.Options:--cache-dirLocalcachedirectory[string][default:"/home/runner/.solo/cache"]--chart-dirLocalchartdirectorypath[string](e.g.~/solo-charts/charts)-c,--cluster-refTheclusterreferencethat[string]willbeusedforreferencingtheKubernetesclusterandstoredinthelocalandremoteconfigurationforthedeployment.Forcommandsthattakemultipleclusterstheycanbeseparatedbycommas.--component-image,--relay-imageDocker[string]imageoverride.Supportsapublishedregistryreference(e.g.ghcr.io/hiero-ledger/component:1.2.3),alocallybuiltimage(e.g.component:1.2.3),oraKind-attachedlocalregistry(e.g.localhost:5001/component:1.2.3).LocallyavailableimagesareloadedintoeverytargetKindclusterandusepullPolicy:Never.Fornon-Kindtargets,publishtheimagetoaregistryreachablebythecluster.--component-image-archivePathtoadockersaveimage[string]archive.Requires--component-imagetoidentifythearchivedimage.ThearchiveisloadedintoeverytargetKindclusterandusespullPolicy:Never.--debug,--dev[boolean][default:false]Enabledebugmode-d,--deploymentThenametheuserwill[string]referencelocallytolinktoadeployment.FallsbacktotheSOLO_DEPLOYMENTenvironmentvariable,orisselectedautomaticallywhenthelocalconfigurationcontainsexactlyonedeployment--domain-nameCustomdomainname[string]--enable-ingressenableingressonthe[boolean][default:false]component/pod--external-addressBindaddressforkubectl[string]port-forward(forexample127.0.0.1or0.0.0.0)--external-database-hostUsetoprovidetheexternal[string]databasehostifthe' --use-external-database' is passed--external-database-owner-passwordUsetoprovidetheexternal[string]databaseowner's password if the' --use-external-database ' is passed --external-database-owner-usernameUsetoprovidetheexternal[string]databaseowner's username if the' --use-external-database ' is passed --external-database-read-passwordUsetoprovidetheexternal[string]databasereadonlyuser's passwordifthe' --use-external-database' is passed--external-database-read-usernameUsetoprovidetheexternal[string]databasereadonlyuser's usernameifthe' --use-external-database' is passed--forceForceenableblocknode[boolean][default:false]integrationbypassingtheversionrequirementsCN>=v0.72.0,BN>=0.29.0,CN>=0.150.0--force-port-forwardForceportforwardtoaccess[boolean][default:true]thenetworkservices--ingress-controller-value-fileThevaluefiletousefor[string]ingresscontroller,defaultsto""--mirror-node-chart-dirMirrornodelocalchart[string]directorypath(e.g.~/hiero-mirror-node/charts).NOTE:ThisonlyprovidestheHelmcharttemplates—itdoesNOTmakethechartimagesavailabletothecluster.Allcontainerimagesreferencedbythechartmustalreadybepullable(e.g.publishedtoaregistryorloadedintotheclusterwith`kindloaddocker-image`).UsingalocalbranchchartwithSNAPSHOTimagetagswillcausepodstofailwithImagePullBackOffunlessthoseimageshavebeenbuiltandpushedtoaregistryorloadedintothecluster.--mirror-node-versionMirrornodechartversion[string][default:"v0.161.0"]--mirror-static-ipstaticIPaddressforthe[string]mirrornode--operator-idOperatorID[string]--operator-keyOperatorKey[string]--parallel-deployRunindependentone-shot[boolean][default:true]deploystagesinparallel(consensus+block,mirror+accounts,explorer+relay).Disablewith--no-parallel-deployforsequentialexecution(usefulfordebuggingorresource-constrainedenvironments).--pingerEnablePingerserviceinthe[boolean][default:false]Mirrornodemonitor-q,--quiet-modeQuietmode,donotpromptfor[boolean][default:false]confirmation--solo-chart-versionSolotestingchartversion[string][default:"0.66.1"]--storage-bucketnameofstoragebucketfor[string]mirrornodeimporter--storage-bucket-prefixpathprefixofstoragebucket[string]mirrornodeimporter--storage-bucket-regionregionofstoragebucket[string]mirrornodeimporter--storage-endpointstorageendpointURLfor[string]mirrornodeimporter--storage-read-access-keystoragereadaccesskeyfor[string]mirrornodeimporter--storage-read-secretsstorageread-secretkeyfor[string]mirrornodeimporter--storage-typestoragetypeforsavingstream[default:"minio_only"]files,availableoptionsareminio_only,aws_only,gcs_only,aws_and_gcs--use-external-databaseSettotrueifyouhavean[boolean][default:false]externaldatabasetouseinsteadofthedatabasethattheMirrorNodeHelmchartsupplies-f,--values-fileCommaseparatedchartvalues[string]files,eachinYAMLorJSONformat-v,--versionShowversionnumber[boolean]
mirrornodeupgradeUpgradesthespecifiednodefromthedeployment.Options:--cache-dirLocalcachedirectory[string][default:"/home/runner/.solo/cache"]--chart-dirLocalchartdirectorypath[string](e.g.~/solo-charts/charts)-c,--cluster-refTheclusterreferencethat[string]willbeusedforreferencingtheKubernetesclusterandstoredinthelocalandremoteconfigurationforthedeployment.Forcommandsthattakemultipleclusterstheycanbeseparatedbycommas.--component-image,--relay-imageDocker[string]imageoverride.Supportsapublishedregistryreference(e.g.ghcr.io/hiero-ledger/component:1.2.3),alocallybuiltimage(e.g.component:1.2.3),oraKind-attachedlocalregistry(e.g.localhost:5001/component:1.2.3).LocallyavailableimagesareloadedintoeverytargetKindclusterandusepullPolicy:Never.Fornon-Kindtargets,publishtheimagetoaregistryreachablebythecluster.--component-image-archivePathtoadockersaveimage[string]archive.Requires--component-imagetoidentifythearchivedimage.ThearchiveisloadedintoeverytargetKindclusterandusespullPolicy:Never.--debug,--dev[boolean][default:false]Enabledebugmode-d,--deploymentThenametheuserwill[string]referencelocallytolinktoadeployment.FallsbacktotheSOLO_DEPLOYMENTenvironmentvariable,orisselectedautomaticallywhenthelocalconfigurationcontainsexactlyonedeployment--domain-nameCustomdomainname[string]--enable-ingressenableingressonthe[boolean][default:false]component/pod--external-addressBindaddressforkubectl[string]port-forward(forexample127.0.0.1or0.0.0.0)--external-database-hostUsetoprovidetheexternal[string]databasehostifthe' --use-external-database' is passed--external-database-owner-passwordUsetoprovidetheexternal[string]databaseowner's password if the' --use-external-database ' is passed --external-database-owner-usernameUsetoprovidetheexternal[string]databaseowner's username if the' --use-external-database ' is passed --external-database-read-passwordUsetoprovidetheexternal[string]databasereadonlyuser's passwordifthe' --use-external-database' is passed--external-database-read-usernameUsetoprovidetheexternal[string]databasereadonlyuser's usernameifthe' --use-external-database' is passed--forceForceenableblocknode[boolean][default:false]integrationbypassingtheversionrequirementsCN>=v0.72.0,BN>=0.29.0,CN>=0.150.0--force-port-forwardForceportforwardtoaccess[boolean][default:true]thenetworkservices--idThenumericidentifierforthe[number]component--ingress-controller-value-fileThevaluefiletousefor[string]ingresscontroller,defaultsto""--mirror-node-chart-dirMirrornodelocalchart[string]directorypath(e.g.~/hiero-mirror-node/charts).NOTE:ThisonlyprovidestheHelmcharttemplates—itdoesNOTmakethechartimagesavailabletothecluster.Allcontainerimagesreferencedbythechartmustalreadybepullable(e.g.publishedtoaregistryorloadedintotheclusterwith`kindloaddocker-image`).UsingalocalbranchchartwithSNAPSHOTimagetagswillcausepodstofailwithImagePullBackOffunlessthoseimageshavebeenbuiltandpushedtoaregistryorloadedintothecluster.--mirror-node-versionMirrornodechartversion[string][default:"v0.161.0"]--mirror-static-ipstaticIPaddressforthe[string]mirrornode--operator-idOperatorID[string]--operator-keyOperatorKey[string]--pingerEnablePingerserviceinthe[boolean][default:false]Mirrornodemonitor-q,--quiet-modeQuietmode,donotpromptfor[boolean][default:false]confirmation--solo-chart-versionSolotestingchartversion[string][default:"0.66.1"]--storage-bucketnameofstoragebucketfor[string]mirrornodeimporter--storage-bucket-prefixpathprefixofstoragebucket[string]mirrornodeimporter--storage-bucket-regionregionofstoragebucket[string]mirrornodeimporter--storage-endpointstorageendpointURLfor[string]mirrornodeimporter--storage-read-access-keystoragereadaccesskeyfor[string]mirrornodeimporter--storage-read-secretsstorageread-secretkeyfor[string]mirrornodeimporter--storage-typestoragetypeforsavingstream[default:"minio_only"]files,availableoptionsareminio_only,aws_only,gcs_only,aws_and_gcs--use-external-databaseSettotrueifyouhavean[boolean][default:false]externaldatabasetouseinsteadofthedatabasethattheMirrorNodeHelmchartsupplies-f,--values-fileCommaseparatedchartvalues[string]files,eachinYAMLorJSONformat-v,--versionShowversionnumber[boolean]
relay
RPC Relay Node operations for creating, modifying, and destroying resources. These commands require the presence of an existing deployment.
Commands:
relay node List, create, manage, or destroy relay node instances. Operates on a single relay node instance at a time.
Options:
--debug , --dev Enable debug [boolean] [default: false]
mode
--force-port-forward Force port forward to access [boolean] [default: true]
the network services
-v, --version Show version number [boolean]
relay node
relay node
List, create, manage, or destroy relay node instances. Operates on a single relay node instance at a time.
Commands:
relay node add Adds and configures a new node instance.
relay node destroy Deletes the specified node from the deployment.
relay node upgrade Upgrades the specified node from the deployment.
Options:
--debug , --dev Enable debug [boolean] [default: false]
mode
--force-port-forward Force port forward to access [boolean] [default: true]
the network services
-v, --version Show version number [boolean]
cache
Manage solo cached items.
Commands:
cache image Manage image archives used by solo.
cache chart Manage helm chart archives used by solo.
Options:
--debug , --dev Enable debug [boolean] [default: false]
mode
--force-port-forward Force port forward to access [boolean] [default: true]
the network services
-v, --version Show version number [boolean]
cache image list
Lists all cached image archives.
Options:
--cache-dir Local cache directory [string] [default: "/home/runner/.solo/cache"]
--debug , --dev , --dev Enable [boolean] [default: false]
debug mode
--force-port-forward Force port forward to access [boolean] [default: true]
the network services
-q, --quiet-mode Quiet mode, do not prompt for [boolean] [default: false]
confirmation
-v, --version Show version number [boolean]
cache image clear
cache image clear
Clears the image archives.
Options:
--cache-dir Local cache directory [string] [default: "/home/runner/.solo/cache"]
--debug , --dev , --dev Enable [boolean] [default: false]
debug mode
--force-port-forward Force port forward to access [boolean] [default: true]
the network services
-q, --quiet-mode Quiet mode, do not prompt for [boolean] [default: false]
confirmation
-v, --version Show version number [boolean]
cache image prune
cache image prune
Prune the image archives.
Options:
--cache-dir Local cache directory [string] [default: "/home/runner/.solo/cache"]
--debug , --dev , --dev Enable [boolean] [default: false]
debug mode
--force-port-forward Force port forward to access [boolean] [default: true]
the network services
-q, --quiet-mode Quiet mode, do not prompt for [boolean] [default: false]
confirmation
-v, --version Show version number [boolean]
cache image status
cache image status
Lists all images, displays data about them and all missing images.
Options:
--cache-dir Local cache directory [string] [default: "/home/runner/.solo/cache"]
-c, --cluster-ref The cluster reference that [string]
will be used for referencing
the Kubernetes cluster and
stored in the local and remote
configuration for the
deployment. For commands that
take multiple clusters they
can be separated by commas.
--debug , --dev , --dev Enable [boolean] [default: false]
debug mode
--force-port-forward Force port forward to access [boolean] [default: true]
the network services
-q, --quiet-mode Quiet mode, do not prompt for [boolean] [default: false]
confirmation
-v, --version Show version number [boolean]
cache chart
cache chart
Manage helm chart archives used by solo.
Commands:
cache chart pull Pulls and caches the helm charts used by solo so deploys can install them from the local cache.
cache chart list Lists all cached helm chart archives.
cache chart clear Clears the cached helm chart archives.
cache chart prune Prunes the cached helm chart archives.
cache chart status Lists all cached helm charts, their total size, and any missing chart archives.
Options:
--debug , --dev Enable debug [boolean] [default: false]
mode
--force-port-forward Force port forward to access [boolean] [default: true]
the network services
-v, --version Show version number [boolean]
cache chart pull
cache chart pull
Pulls and caches the helm charts used by solo so deploys can install them from the local cache.
Options:
--cache-dir Local cache directory [string] [default: "/home/runner/.solo/cache"]
--debug , --dev , --dev Enable [boolean] [default: false]
debug mode
--force-port-forward Force port forward to access [boolean] [default: true]
the network services
-q, --quiet-mode Quiet mode, do not prompt for [boolean] [default: false]
confirmation
-v, --version Show version number [boolean]
cache chart list
cache chart list
Lists all cached helm chart archives.
Options:
--cache-dir Local cache directory [string] [default: "/home/runner/.solo/cache"]
--debug , --dev , --dev Enable [boolean] [default: false]
debug mode
--force-port-forward Force port forward to access [boolean] [default: true]
the network services
-q, --quiet-mode Quiet mode, do not prompt for [boolean] [default: false]
confirmation
-v, --version Show version number [boolean]
cache chart clear
cache chart clear
Clears the cached helm chart archives.
Options:
--cache-dir Local cache directory [string] [default: "/home/runner/.solo/cache"]
--debug , --dev , --dev Enable [boolean] [default: false]
debug mode
--force-port-forward Force port forward to access [boolean] [default: true]
the network services
-q, --quiet-mode Quiet mode, do not prompt for [boolean] [default: false]
confirmation
-v, --version Show version number [boolean]
cache chart prune
cache chart prune
Prunes the cached helm chart archives.
Options:
--cache-dir Local cache directory [string] [default: "/home/runner/.solo/cache"]
--debug , --dev , --dev Enable [boolean] [default: false]
debug mode
--force-port-forward Force port forward to access [boolean] [default: true]
the network services
-q, --quiet-mode Quiet mode, do not prompt for [boolean] [default: false]
confirmation
-v, --version Show version number [boolean]
cache chart status
cache chart status
Lists all cached helm charts, their total size, and any missing chart archives.
Options:
--cache-dir Local cache directory [string] [default: "/home/runner/.solo/cache"]
--debug , --dev , --dev Enable [boolean] [default: false]
debug mode
--force-port-forward Force port forward to access [boolean] [default: true]
the network services
-q, --quiet-mode Quiet mode, do not prompt for [boolean] [default: false]
confirmation
-v, --version Show version number [boolean]
one-shot
one-shot
One Shot commands for new and returning users who need a preset environment type. These commands use reasonable defaults to provide a single command out of box experience.
Commands:
one-shot single Creates a uniquely named deployment with a single consensus node, mirror node, block node, relay node, and explorer node.
one-shot multi Creates a uniquely named deployment with multiple consensus nodes, mirror node, block node, relay node, and explorer node.
one-shot falcon Creates a uniquely named deployment with optional chart values override using --values-file.
one-shot show Display information about one-shot deployments.
Options:
--debug , --dev Enable debug [boolean] [default: false]
mode
--force-port-forward Force port forward to access [boolean] [default: true]
the network services
-v, --version Show version number [boolean]
one-shot single
one-shot single
Creates a uniquely named deployment with a single consensus node, mirror node, block node, relay node, and explorer node.
Commands:
one-shot single deploy Deploys all required components for the selected one shot configuration.
one-shot single destroy Removes the deployed resources for the selected one shot configuration.
Options:
--debug , --dev Enable debug [boolean] [default: false]
mode
--force-port-forward Force port forward to access [boolean] [default: true]
the network services
-v, --version Show version number [boolean]
one-shot multi
Creates a uniquely named deployment with multiple consensus nodes, mirror node, block node, relay node, and explorer node.
Commands:
one-shot multi deploy Deploys all required components for the selected multiple node one shot configuration.
one-shot multi destroy Removes the deployed resources for the selected multiple node one shot configuration.
Options:
--debug , --dev Enable debug [boolean] [default: false]
mode
--force-port-forward Force port forward to access [boolean] [default: true]
the network services
-v, --version Show version number [boolean]
one-shot falcon
Creates a uniquely named deployment with optional chart values override using --values-file.
Commands:
one-shot falcon deploy Deploys all required components for the selected one shot configuration (with optional values file).
one-shot falcon destroy Removes the deployed resources for the selected one shot configuration (with optional values file).
one-shot falcon prepare Generates a falcon values file for use with one-shot falcon deploy. Writes to /home/runner/.solo/cache/falcon-values.yaml by default.
Options:
--debug , --dev Enable debug [boolean] [default: false]
mode
--force-port-forward Force port forward to access [boolean] [default: true]
the network services
-v, --version Show version number [boolean]
one-shot show
Display information about one-shot deployments.
Commands:
one-shot show deployment Display information about the last one-shot deployment including name, versions, and deployed components.
one-shot show accounts Display the contents of the one-shot deployment accounts.json file (supports --output json|yaml|wide).
Options:
--debug , --dev Enable debug [boolean] [default: false]
mode
--force-port-forward Force port forward to access [boolean] [default: true]
the network services
-v, --version Show version number [boolean]
rapid-fire destroy
Uninstall the Network Load Generator Helm chart and clean up resources.
Commands:
rapid-fire destroy all Uninstall the Network Load Generator Helm chart and remove all related resources.
Options:
--debug , --dev Enable debug [boolean] [default: false]
mode
--force-port-forward Force port forward to access [boolean] [default: true]
the network services
-v, --version Show version number [boolean]
No direct equivalent. Use deployment diagnostics all or deployment diagnostics debug based on intent.
node states
consensus state download
Notes
Current command tree includes additional commands not present in legacy CLI (for example ledger account predefined, rapid-fire load start, and consensus node collect-jfr).
2.10 - Solo Image Cache
Speed up deployments by pre-pulling and reusing the container images Solo needs. Manage the local image cache with the solo cache image commands, and control automatic caching during install and one-shot deployments.
Overview
A Solo network runs roughly 29 container images (consensus node, mirror node,
JSON-RPC relay, Explorer, MinIO, and supporting services).
The image cache pre-pulls those images and stores them as local .tar
archives, so repeat deployments load them from disk instead of re-downloading
them from their registries.
Solo populates and uses the cache automatically in two places:
At install time - Homebrew and npm installs pre-pull the default images.
During solo one-shot deploys - Solo pulls and loads the cached images
as pipeline phases before the network is deployed.
You can also manage the cache directly with the solo cache image commands.
Prerequisites
Solo CLI v0.73.0 or later installed - the image cache was introduced in
Solo v0.73.0; earlier versions have no solo cache image command. See
Quickstart.
Where the cache lives
Cached image archives are stored under your Solo home directory, in
~/.solo/cache/images/ (one archive per image).
Managing the cache
All commands live under solo cache image.
Pull images
Download the default (stable) images and write them to the cache. This is a
prerequisite for load.
solo cache image pull
Pass --edge to cache the edge (pre-release) component versions instead of the
stable defaults:
solo cache image pull --edge
You can also pin individual components with the per-component version flags
--mirror-node-version, --block-node-version, --relay-version, and
--explorer-version.
Load images into a cluster
Load the cached archives into a cluster. This step needs a prior pull and a
running cluster with a configured cluster reference (pull itself needs
neither a running cluster nor a Docker daemon).
solo cache image load --cluster-ref <cluster-ref>
<cluster-ref> is a Solo cluster reference: an alias Solo maps to a Kubernetes
context.
solo one-shot deployments create one named one-shot.
List the references you already have with solo cluster-ref config list.
Create a new one with
solo cluster-ref config connect --cluster-ref <name> --context <kube-context>.
List cached archives
solo cache image list
Show cache status
Report which images are cached and which are missing. Pass --cluster-ref to
also compare against the images already loaded in a cluster.
solo cache image status --cluster-ref <cluster-ref>
Clear or prune the cache
Remove cached image archives with clear, or with prune (Solo v0.78.0 and
later):
solo cache image clear
solo cache image prune
Disabling the cache
The image cache is enabled by default. Each install/deploy path has its own
opt-out:
Context
Opt-out
Notes
solo one-shot deploy
ENABLE_IMAGE_CACHE=false
Requires Solo v0.78.0 or later.
npm global install
SOLO_NO_CACHE=true
Skips the post-install image pull.
Homebrew install
HOMEBREW_NO_SOLO_CACHE
Set to any value (presence-based). Skips both the brew-level pull and the npm post-install pull.
Caching a specific component version
Solo resolves the component versions it caches from environment variables,
not from CLI flags or solo.config.yaml. To cache a non-default version, set
the version environment variable on the deploy command:
MIRROR_NODE_VERSION=v0.150.0 solo one-shot single deploy
Note: Passing the version with the --mirror-node-version CLI flag (or in
solo.config.yaml) changes the deployed component but not the cached
images - the cache still uses the default versions, which can cause a cache
miss on first deploy. Use the environment variable to keep the cache aligned
with the deployed versions.
Troubleshooting
[SOLO-4049] Cache has not been materialized yet — the load, list,
status, clear, and prune commands require a populated cache. Run
solo cache image pull first, then retry the command.
The cache is empty after installing Solo. The install-time pull is
best-effort and can be skipped by a network hiccup. Populate it manually with
solo cache image pull.
load cannot find the target cluster. Confirm the cluster reference with
solo cluster-ref config list, then re-run load with the correct
--cluster-ref.
2.11 - Solo Helm Chart Cache
Speed up deployments by pre-pulling and reusing the Helm charts Solo installs. Manage the local chart cache with the solo cache chart commands, and let deploys install charts from disk instead of the network.
Overview
A Solo network deployment installs a number of Helm charts (the Solo deployment
charts, mirror node, JSON-RPC relay, Explorer, block node, MinIO, Prometheus,
and the ingress controller). The chart cache pre-pulls those chart tarballs
and stores them on disk, so deployments install them from the local cache
instead of fetching them from their chart repositories or OCI registries.
The cache is used automatically: whenever Solo installs or upgrades a chart, it
first checks the cache for a tarball matching the exact chart name and version
being installed. On a match, the chart is installed from the local archive (no
network fetch); otherwise Solo falls back to the normal network install.
You populate and manage the cache with the solo cache chart commands.
Prerequisites
Solo CLI v0.82.0 or later installed - the chart cache was introduced in
Solo v0.82.0; earlier versions have no solo cache chart command. See
Quickstart.
Where the cache lives
Cached chart tarballs are stored under your Solo home directory, in
~/.solo/cache/charts/ - one archive per chart and version, named
<chart-name>__<version>.tar. This sits alongside the
image cache (~/.solo/cache/images/);
the two caches are managed independently.
What gets cached
solo cache chart pull caches the charts below. Each chart is pulled at the
version pinned in your Solo release, and each version can be overridden with an
environment variable (see
Using environment variables
for the current defaults):
Chart
Version environment variable
Source
solo-deployment
SOLO_CHART_VERSION
oci://ghcr.io/hashgraph/solo-charts
solo-cert-manager
SOLO_CHART_VERSION
oci://ghcr.io/hashgraph/solo-charts
solo-shared-resources
SOLO_CHART_VERSION
oci://ghcr.io/hashgraph/solo-charts
hedera-mirror (mirror node)
MIRROR_NODE_VERSION
MIRROR_NODE_CHART_URL
hedera-json-rpc (JSON-RPC relay)
RELAY_VERSION
JSON_RPC_RELAY_CHART_URL
block-node-server (block node)
BLOCK_NODE_VERSION
BLOCK_NODE_CHART_URL
hiero-explorer-chart (Explorer)
EXPLORER_VERSION
EXPLORER_CHART_URL
kube-prometheus-stack
PROMETHEUS_STACK_VERSION
PROMETHEUS_STACK_CHART_URL
prometheus-operator-crds
PROMETHEUS_OPERATOR_CRDS_VERSION
PROMETHEUS_OPERATOR_CRDS_CHART_URL
operator (MinIO operator)
MINIO_OPERATOR_VERSION
MINIO_OPERATOR_CHART_URL
haproxy-ingress (ingress controller)
INGRESS_CONTROLLER_VERSION
INGRESS_CONTROLLER_CHART_URL
The Source column names the environment variable holding the chart repository
or OCI registry URL; those can be overridden too, for example to pull through an
internal mirror.
Not cached: the network load generator and metrics-server charts are
intentionally excluded (metrics-server has no pinned version) and always install
from the network.
Managing the cache
All commands live under solo cache chart. They accept the shared --quiet,
--cache-dir, and --dev-mode flags; no other flags are needed.
Pull charts
Download every chart in the table above and write it to the cache:
solo cache chart pull
The pull is incremental and safe to re-run: charts already in the cache are
skipped. A chart that fails to download is reported and skipped, and the
remaining charts still pull - re-run the command to retry the failed ones.
To cache a non-default version of a component, set its version environment
variable on the pull:
MIRROR_NODE_VERSION=v0.150.0 solo cache chart pull
List cached charts
Show the cached charts (name and version):
solo cache chart list
Show cache status
Report how many charts are cached, their total size on disk, and which expected
charts are missing:
solo cache chart status
Clear or prune the cache
Both remove the cached chart archives; neither touches the image cache. clear
deletes the archives Solo expects for the current versions, while prune
deletes the whole ~/.solo/cache/charts/ directory (including archives left
behind by other versions):
solo cache chart clear
solo cache chart prune
How deployments use the cache
When Solo installs or upgrades a chart (for example during
solo one-shot single deploy or solo cluster-ref config setup), it looks for
a cached tarball matching the exact chart name and version being installed:
Cache hit - the chart installs from the local archive. No network fetch is
made, and Helm receives the local tarball path instead of the repository
reference. The debug log records the install with the message
from cached chart archive.
Cache miss - the chart installs from its repository or OCI registry over
the network, exactly as it would without a cache. An empty or partial cache
never breaks a deployment.
Because the lookup is an exact version match, keep the versions you pull and the
versions you deploy aligned. If you deploy a non-default component version (via
an environment variable or a CLI flag such as --mirror-node-version), pull the
cache with the matching environment variable first:
MIRROR_NODE_VERSION=v0.150.0 solo cache chart pull
MIRROR_NODE_VERSION=v0.150.0 solo one-shot single deploy
Otherwise the deployment simply misses the cache for that component and falls
back to a network install.
Local chart directories win over the cache. If you point Solo at a local
chart directory (dev mode, e.g. --chart-dir), that directory is used and the
cache is bypassed for that chart.
Troubleshooting
A chart failed to pull. Failures are per-chart: the failed chart is
reported and the rest of the pull continues. Re-run solo cache chart pull -
already-cached charts are skipped and only the missing ones are retried.
How do I confirm a deploy used the cache? Run solo cache chart status
before deploying to confirm the charts are cached, and look for
from cached chart archive in the debug log (~/.solo/logs/solo.log) after
deploying.
A component still downloads its chart. Check that the cached version
matches the deployed version (solo cache chart list); an exact-match lookup
means any version drift falls back to the network. Also note the network load
generator and metrics-server are never cached.
3 - Using Solo
Explore practical applications and integrations for Solo. This section covers using Solo networks with the JavaScript SDK, integrating with external tools, building applications on Hiero consensus nodes, and deploying locally built consensus node binaries for development and testing.
3.1 - Accessing Solo Services
Learn how to locate and connect to ancillary services deployed alongside Solo networks, including Mirror Node Explorer, Block Nodes, and JSON-RPC Relay services.
3.1.1 - Using Solo with Mirror Node
Add Mirror Node to a Solo network to stream and query transaction records, account history, and token data via the Hiero Mirror Node REST API.
Overview
The Hiero Mirror Node stores the full transaction history of your local Solo network
and exposes it through several interfaces:
A web-based block explorer (Hiero Mirror Node Explorer) at http://localhost:38080/localnet/dashboard (Solo 0.63+) or http://localhost:8080/localnet/dashboard (Solo 0.62 and earlier).
A REST API via the mirror-ingress service at http://localhost:38081 (Solo 0.63+) or http://localhost:8081 (Solo 0.62 and earlier)
(recommended entry point — routes to the correct REST implementation).
A gRPC endpoint for mirror node subscriptions.
Important: The port numbers in this document are Solo’s default targets. If any port is already in use on your machine when Solo starts, Solo automatically selects the next available port. If an endpoint does not work, check the actual ports assigned to your deployment — see Port Reference below.
This guide walks you through adding Mirror Node and the Hiero Explorer to a
Solo network, and shows you how to query transaction data and create accounts.
Prerequisites
Before proceeding, ensure you have completed the following:
System Readiness - your
local environment meets all hardware and software requirements, including Docker and Solo.
Quickstart - you have a running Solo
network deployed using solo one-shot single deploy.
If you are building a custom network or adding the mirror node to an existing
deployment, run the following commands in sequence.
On native Windows (PowerShell), set the environment variables with $env: instead of export (and reference them as $env:SOLO_CLUSTER_NAME, etc., in the commands that follow):
Note: The --pinger flag in solo mirror node add starts a background
service that sends transactions to the network at regular intervals. This is
required because mirror node record files are only imported when a new
record file is created - without it, the mirror node will appear empty until
the next transaction occurs naturally.
Step 2: Access the Mirror Node Explorer
Once Mirror Node is running, open the Hiero Explorer in your browser at:
http://localhost:38080/localnet/dashboard
Note: If you are using Solo 0.62 or earlier, the Explorer is at http://localhost:8080/localnet/dashboard.
If that port does not work, check the actual port assigned to your deployment — see Port Reference.
The Explorer lets you browse accounts, transactions, tokens, and contracts on
your Solo network in real time.
Step 3: Create Accounts and View Transactions
Create test accounts and observe them appearing in the Explorer:
Open the Explorer at http://localhost:38080/localnet/dashboard (Solo 0.63+) or http://localhost:8080/localnet/dashboard (Solo 0.62 and earlier) to see the new accounts and their transactions recorded by the Mirror Node. If the port does not work, check your actual port assignments — see Port Reference.
You can also use the Hiero JavaScript SDK
to create a topic, submit a message, and subscribe to it.
Step 4: Access Mirror Node APIs
Option A: Mirror-Ingress (localhost:38081)
Use localhost:38081 (Solo 0.63+) for all Mirror Node REST API access. The mirror-ingress
service routes requests to the correct REST implementation automatically. This
is important because certain endpoints are only supported in the newer
rest-java version.
# List recent transactionscurl -s "http://localhost:38081/api/v1/transactions?limit=5"# Get account detailscurl -s "http://localhost:38081/api/v1/accounts/0.0.2"
Note: If you are using Solo 0.62 or earlier, use localhost:8081 instead of localhost:38081.
localhost:5551 (the legacy Mirror Node REST API direct endpoint) is being phased
out. Always use the mirror-ingress port to ensure compatibility with all endpoints.
In most cases you should use localhost:38081 (Solo 0.63+) or localhost:8081 (Solo 0.62 and earlier) instead.
Port Reference
For the full network endpoint reference (consensus gRPC, Mirror Node REST,
JSON-RPC Relay, and Explorer), see Service Endpoints.
The table below covers mirror-node-specific ports, including those accessible
only via manual kubectl port-forward.
The ports listed below are Solo’s default targets. Solo checks each port before opening a tunnel - if the port is already in use, Solo picks the next available one and logs Using available port <port>. If an endpoint is not reachable, check the actual ports your deployment is using with solo deployment config ports --deployment <deployment-name> - see Port availability for the full set of commands.
The default local ports depend on your Solo version:
Solo 0.63 and later (current defaults):
Service
Local Port
Access Method
Hiero Explorer
38080
Browser (--enable-ingress)
Mirror Node (all-in-one)
38081
HTTP (--enable-ingress)
Mirror Node REST API
5551
kubectl port-forward (manual)
Mirror Node gRPC
5600
kubectl port-forward
Mirror Node REST Java
8084
kubectl port-forward
Solo 0.62 and earlier:
Service
Local Port
Access Method
Hiero Explorer
8080
Browser (--enable-ingress)
Mirror Node (all-in-one)
8081
HTTP (--enable-ingress)
Mirror Node REST API
5551
kubectl port-forward
Mirror Node gRPC
5600
kubectl port-forward
Mirror Node REST Java
8084
kubectl port-forward
Restoring Port-Forwards
If port-forwards are interrupted — for example after a system restart — restore
them by re-running the relevant component add commands. These commands are
idempotent and will reattach port-forwards without redeploying:
solo mirror node add --deployment "${SOLO_DEPLOYMENT}"solo explorer node add --deployment "${SOLO_DEPLOYMENT}"
Tearing Down
To remove the Mirror Node from a running deployment:
solo mirror node destroy --deployment "${SOLO_DEPLOYMENT}" --force
To remove the Hiero Mirror Node Explorer:
solo explorer node destroy --deployment "${SOLO_DEPLOYMENT}" --force
Default service endpoints for a Solo one-shot deployment. Quick reference for the Hiero consensus gRPC address, Mirror Node REST URL, JSON-RPC Relay port, and Explorer URL — for both Solo 0.63+ and Solo 0.62 and earlier.
Overview
After a successful solo one-shot single deploy, Solo sets up port-forwards to
the following local services. Use these endpoints to connect your application,
SDK, or tooling to the running network.
Note: The ports below are Solo’s default targets. If a port is already in
use on your machine, Solo automatically selects the next available port and
logs Using available port <port>. See Port availability
for how to look up the ports your deployment is actually using.
macOS note: Running nc -zv localhost 35211 may print two lines:
nc: connectx to localhost port 35211 (tcp) failed: Connection refused
Connection to localhost port 35211 [tcp/*] succeeded!
The first line is a failed IPv6 attempt — this is expected on macOS.
The second line confirms the IPv4 connection succeeded. The port is reachable.
Note: In PowerShell, curl is an alias for Invoke-WebRequest, so bash
curl flags will not work. Use curl.exe explicitly if you prefer the
bash-style syntax.
Solo 0.62 and earlier
If you are using Solo 0.62 or earlier, the default port-forward targets differ:
Service
Endpoint
Description
Explorer UI
http://localhost:8080
Web UI for inspecting accounts and transactions.
Consensus node (gRPC)
localhost:50211
gRPC endpoint for submitting transactions.
Mirror node REST API
http://localhost:8081
REST API for querying historical data (via mirror-ingress).
JSON-RPC relay
http://localhost:7546
Ethereum-compatible JSON-RPC endpoint.
Note:localhost:5551 is the direct Mirror Node REST service, accessible
only via manual kubectl port-forward, and is being phased out. Always use
the ingress-based port (8081 for Solo 0.62 and earlier, 38081 for
Solo 0.63+).
Connecting your application
Quick reference for SDK and tooling configuration (Solo 0.63 and later):
Hiero SDK (gRPC): localhost:35211, node account ID 0.0.3
Solo uses kubectl port-forward to tunnel traffic from your machine to services
running inside Kubernetes. Before opening each tunnel, Solo tries the configured
port:
If the port is free, Solo logs: Using requested port <port>.
If the port is already occupied (by another process, or by a previous Solo
session that did not clean up its port-forwards), Solo finds the next
available port and logs: Using available port <port>.
The actual ports used are printed at the end of solo one-shot single deploy.
You can also look them up at any time with the Solo CLI, using your deployment
name (see Capture your deployment name).
To view the active port assignments:
solo deployment config ports --deployment <deployment-name>
The output directory is one-shot-<deployment-name>, and the default deployment
name is one-shot. So the default output directory is ~/.solo/one-shot-one-shot/.
To restore port-forwards after a system restart without redeploying:
solo deployment port-forwards refresh --deployment one-shot
Note:solo deployment refresh port-forwards still works but is
deprecated in favor of solo deployment port-forwards refresh and will be
removed in a future release.
To stop all port-forwards for a deployment (for example, before shutting down
your machine):
solo deployment port-forwards stop --deployment one-shot
This closes the underlying kubectl port-forward processes and removes them
from the deployment’s remote config, so they are not restored automatically.
Run solo deployment port-forwards refresh --deployment one-shot afterward to
re-establish them.
3.3 - Using Solo with Hiero SDKs
Walk through submitting your first transaction to a local Solo network using the Hiero JavaScript, Java, or Go SDK.
Overview
The Hiero SDKs let you build and test applications on the Hiero network using
JavaScript / TypeScript,
Java, or
Go. This guide walks you
through launching a local Solo network, locating its bootstrap operator
account, setting up a project for your chosen SDK, and running example
transactions. The Solo-side steps are identical across all three SDKs;
the language-specific steps appear in tabs you can switch between.
Prerequisites
Before proceeding, ensure you have completed the following:
Note: Solo uses Docker Desktop to spin up local Hiero consensus and mirror nodes.
Ensure Docker Desktop is running before deploying the local network.
Step 1: Launch a Local Solo Network
Deploy a local Solo network by following the Solo Quickstart. Once it’s running, retrieve your deployment name with solo one-shot show deployment - the rest of this guide refers to it as <your-deployment-name>.
Step 2: Install the SDK
Install the Hiero SDK for your language.
Initialize a Node.js project and install the SDK from npm:
For the full SDK source tree (with the bundled examples/ directory), follow the Hiero JavaScript SDK README. The repository uses pnpm workspaces + go-task to build.
Follow the Hiero Java SDK quickstart to set up a Gradle (or Maven) project. The minimum dependency set:
mkdir solo-go-demo &&cd solo-go-demo
go mod init solo-go-demo
go get github.com/hiero-ledger/hiero-sdk-go/v2@v2.80.0
Go 1.25 or higher is required (per go.mod in the SDK). See the Hiero Go SDK README for the full setup walkthrough.
Step 3: Locate Your Operator Credentials
solo one-shot single deploy provisions pre-funded accounts and writes their
credentials to accounts.json. Any account from this file can
serve as your SDK operator — 0.0.2 is used as the example throughout this
guide, but it is not required. You do not need to call
solo ledger account create for the examples in this guide.
Tip: Account credentials are also printed to the terminal at the end of
solo one-shot single deploy. If you missed the output, use the steps below
to retrieve them from disk.
The systemAccounts[0] entry (0.0.2) holds an Ed25519 key in DER format
and is used as the operator example in this guide. The createdAccounts array
contains additional pre-funded ECDSA accounts (0.0.1002–0.0.1011) useful
for EVM workflows — any of these can also be used as an operator.
Save the accountId and privateKey values from systemAccounts[0] — you will configure the SDK with them in the next step.
EVM tooling note: For ethers.js, Hardhat, or Foundry, use one of the
createdAccounts entries; their privateKey values are already in
0x-prefixed hex form. See
Using Solo with EVM Tools for
the full EVM-side workflow.
Step 4: Configure the SDK to Connect to Solo
Each SDK reads operator credentials and the network endpoint differently.
Pick your language tab below.
The Hiero JavaScript SDK uses environment variables to authenticate the operator account. Create a .env file at the root of the hiero-sdk-js directory:
cd hiero-sdk-js
cat > .env <<EOF
# Operator account ID (systemAccounts[0].accountId from Step 3)
OPERATOR_ID="0.0.2"
# Operator private key (systemAccounts[0].privateKey from Step 3)
OPERATOR_KEY="302e020100300506032b65700422042091132178e72057a1d7528025956fe39b0b847f200ab59b2fdd367017f3087137"
# Required by LocalProvider in the SDK example scripts (Step 5).
# Not used by the Client.fromConfig() snippet below, but harmless to include.
HEDERA_NETWORK="local-node"
EOFsource .env
Important:OPERATOR_KEY must be set to the privateKey value, not the publicKey. The private key is the longer DER-encoded string beginning with 302e.... The example scripts also require HEDERA_NETWORK - they throw “LocalProvider requires the HEDERA_NETWORK environment variable to be set” if it is missing.
Security: Never commit .env to source control - the file holds the operator’s private key. Add .env to your repository’s .gitignore.
Configure the client with the Solo 0.63+ port-forwards using Client.fromConfig(). The SDK’s built-in Client.forLocalNode() preset is hardcoded to localhost:50211, which does not match Solo 0.63+ defaults (localhost:35211 for consensus gRPC, localhost:38081 for the mirror node ingress). Use the explicit network map shown below instead:
import{Client,AccountId}from"@hiero-ledger/sdk";constnetwork={"127.0.0.1:35211":AccountId.fromString("0.0.3")};constmirrorNetwork="127.0.0.1:38081";constclient=Client.fromConfig({network,mirrorNetwork,// Required: the SDK's address-book refresh otherwise pulls in the
// hardcoded 50211/50212 ports, which Solo 0.63+ does not expose.
scheduleNetworkUpdate: false,});client.setOperator(process.env.OPERATOR_ID!,process.env.OPERATOR_KEY!);
Create a .env file at the project root to hold your operator credentials:
cat > .env <<EOF
# Operator account ID (systemAccounts[0].accountId from Step 3)
OPERATOR_ID=0.0.2
# Operator private key (systemAccounts[0].privateKey from Step 3)
OPERATOR_KEY=302e020100300506032b65700422042091132178e72057a1d7528025956fe39b0b847f200ab59b2fdd367017f3087137
EOF
Important:OPERATOR_KEY must be the privateKey value, not the publicKey. The private key is the longer DER-encoded string beginning with 302e....
Security: Never commit .env to source control - the file holds the operator’s private key. Add .env to your repository’s .gitignore.
Load the env variables:
set -a;source .env;set +a
Configure the client in src/main/java/Main.java. Unlike the JavaScript SDK (which ships a LocalProvider / Client.forName("local-node") preset), the Hiero Java SDK has no local-node preset - Client.forName(...) only accepts "mainnet", "testnet", or "previewnet" and throws IllegalArgumentException otherwise. Build the network map explicitly using Client.forNetwork(Map) against Solo’s auto-forwarded ports:
importcom.hedera.hashgraph.sdk.AccountId;importcom.hedera.hashgraph.sdk.AccountInfoQuery;importcom.hedera.hashgraph.sdk.Client;importcom.hedera.hashgraph.sdk.PrivateKey;importjava.util.HashMap;importjava.util.List;importjava.util.Map;publicclassMain{publicstaticvoidmain(String[]args)throwsException{StringoperatorId=System.getenv("OPERATOR_ID");StringoperatorKey=System.getenv("OPERATOR_KEY");if(operatorId==null||operatorKey==null){thrownewIllegalStateException("Set OPERATOR_ID and OPERATOR_KEY env vars before running.");}Map<String,AccountId>network=newHashMap<>();network.put("127.0.0.1:35211",AccountId.fromString("0.0.3"));Clientclient=Client.forNetwork(network);client.setMirrorNetwork(List.of("127.0.0.1:38081"));client.setOperator(AccountId.fromString(operatorId),PrivateKey.fromString(operatorKey));// ... transactions and queries go here ...client.close();}}
Client.setMirrorNetwork(List<String>) declares throws InterruptedException, and queries/transactions throw TimeoutException / PrecheckStatusException. Declaring throws Exception on main keeps the example readable; wrap with explicit try/catch in production code.
The Hiero Go SDK reads operator credentials and the target network from environment variables.
Create a .env file at the project root:
cat > .env <<'EOF'
# Operator account ID (systemAccounts[0].accountId from Step 3)
export OPERATOR_ID="0.0.2"
# Operator private key (systemAccounts[0].privateKey from Step 3)
export OPERATOR_KEY="302e020100300506032b65700422042091132178e72057a1d7528025956fe39b0b847f200ab59b2fdd367017f3087137"
# Network name. "localhost" is the SDK's local-node preset; only used by
# ClientForName(...) - the explicit ClientForNetworkV2 path below ignores it.
export HEDERA_NETWORK="localhost"
EOFsource .env
Important:OPERATOR_KEY must be the privateKey value, not the publicKey. The private key is the longer DER-encoded string beginning with 302e....
Security: Never commit .env to source control. Add it to .gitignore.
Configure the client in main.go. The Hiero Go SDK ships a ClientForName preset that recognizes "local" and "localhost", but the preset is hardcoded to 127.0.0.1:50211 (consensus gRPC) and 127.0.0.1:5600 (mirror gRPC) - ports Solo does not expose by default (Solo’s auto-port-forwards use 35211 and 38081). The simplest path that works out of the box is to build the network map explicitly with ClientForNetworkV2:
packagemainimport("fmt""os"hiero"github.com/hiero-ledger/hiero-sdk-go/v2/sdk")funcmain(){operatorID:=os.Getenv("OPERATOR_ID")operatorKey:=os.Getenv("OPERATOR_KEY")ifoperatorID==""||operatorKey==""{fmt.Fprintln(os.Stderr,"Set OPERATOR_ID and OPERATOR_KEY env vars before running.")os.Exit(1)}network:=map[string]hiero.AccountID{"127.0.0.1:35211":{Account:3},}client,err:=hiero.ClientForNetworkV2(network)iferr!=nil{panic(err)}deferclient.Close()client.SetMirrorNetwork([]string{"127.0.0.1:38081"})opAccID,err:=hiero.AccountIDFromString(operatorID)iferr!=nil{panic(err)}opKey,err:=hiero.PrivateKeyFromString(operatorKey)iferr!=nil{panic(err)}client.SetOperator(opAccID,opKey)// ... transactions and queries go here ...}
The network map’s value uses the struct literal hiero.AccountID{Account: 3} (matches network-node1’s 0.0.3). This is shorter than hiero.AccountIDFromString("0.0.3") and matches the form upstream examples use.
Verify your configuration
Add an AccountInfoQuery for the operator and run it to confirm the client reaches Solo.
In your TypeScript/JavaScript code, after building client:
constinfo=awaitnewAccountInfoQuery().setAccountId(AccountId.fromString(process.env.OPERATOR_ID!)).execute(client);console.log("Account ID :",info.accountId.toString());console.log("Balance :",info.balance.toString());
In Main.java, after setOperator(...):
varinfo=newAccountInfoQuery().setAccountId(AccountId.fromString(operatorId)).execute(client);System.out.println("Account ID : "+info.accountId);System.out.println("Balance : "+info.balance);
Then run gradle run.
Expected output:
Account ID : 0.0.2
Balance : 49989999499.9946 ℏ
In main.go, after SetOperator(...):
info,err:=hiero.NewAccountInfoQuery().SetAccountID(opAccID).Execute(client)iferr!=nil{panic(err)}fmt.Printf("Account ID : %s\n",info.AccountID)fmt.Printf("Balance : %s\n",info.Balance)
Then run go run ..
Expected output:
Account ID : 0.0.2
Balance : 4.99899994792001e+10 ℏ
The Hbar value is printed in scientific notation by default; format it with info.Balance.As(hiero.HbarUnits.Hbar) or info.Balance.AsTinybar() for decimal HBAR or tinybars.
The exact balance differs slightly between deployments; what matters is that an AccountInfo returns at all - that proves the gRPC pipe to the consensus node is alive and the operator credentials are valid.
Step 5: Run Transactions Against Solo
Heads up (JavaScript and Go only): The SDK example programs use the
SDK’s local-node preset (LocalProvider in JS, ClientForName("localhost")
in Go), which is hardcoded to 127.0.0.1:50211 (consensus gRPC) and
127.0.0.1:5600 (mirror gRPC). Solo doesn’t expose those ports by default,
so the upstream example programs cannot reach the network out of the box.
Either follow Make the examples reachable
below, or rewrite the example to use the Client.fromConfig (JS) /
ClientForNetworkV2 (Go) pattern from
Step 4. The Java SDK has no
local-node preset, so this caveat does not apply there.
Make the examples reachable
Pick one:
Option A - forward Solo’s services to the SDK’s legacy ports (run examples unchanged):
Option B - use ClientForNetworkV2 directly (the pattern shown in Step 4). No port-forwarding needed.
Try a tutorial against your Solo network
Once your client is configured (Step 4), the canonical Hiero / Hedera SDK
tutorials run against Solo the same way they run against testnet or mainnet -
only the network endpoint changes. Pick a tutorial and follow it as written:
Each SDK also ships a runnable examples/ directory with
dozens of additional patterns - token creation, smart contract deployment,
HCS pub/sub, scheduled transactions, and more.
Verifies the file exists on the network (errors if not found).
Replaces the file content and re-verifies the upload.
Automatically handles chunking for large files (>4 KB).
Note: For files larger than 4 KB, both commands split content into 4 KB chunks and display per-chunk progress during the append phase.
Inspect Transactions in Hiero Explorer
Open the Hiero Explorer to visually inspect submitted transactions, accounts, topics, and files. The Solo Quickstart’s Access your local network section lists the Explorer URL and port-availability behavior. Once it’s open, search by account ID, transaction ID, or topic ID to confirm that your transactions reached consensus.
Retrieving Logs
Solo writes logs to ~/.solo/logs/:
Log File
Contents
solo.log
Human-readable Solo CLI output and lifecycle events
solo.ndjson
Newline-delimited JSON of the same events (authoritative, machine-readable)
The Solo log is useful for debugging connectivity issues between the SDK and your local Solo network.
SDK logging
For SDK-side logs (which logger each SDK uses and how to configure it), see the upstream docs:
LocalProvider requires the HEDERA_NETWORK environment variable to be set(JS)
HEDERA_NETWORK missing from .env, or .env not sourced in this shell
Add HEDERA_NETWORK="local-node" to .env; then source .env
Dependency resolution is looking for a library compatible with JVM runtime version 17, but 'com.hedera.hashgraph:sdk:2.72.0' is only compatible with JVM runtime version 21 or newer(Java)
JDK 17 target in build.gradle.kts
Set sourceCompatibility = JavaVersion.VERSION_21 and ensure the JDK on PATH is v21+
IllegalArgumentException: Name must be one-of 'mainnet', 'testnet', or 'previewnet'(Java)
Called Client.forName("local-node")
Use Client.forNetwork(Map) + setMirrorNetwork(List); Java SDK has no local-node preset
go: module ... requires go >= 1.25(Go)
Local Go is older than the SDK’s go.mod floor
Upgrade Go to v1.25+; on macOS, brew install go
TimeoutException from query or transaction (all SDKs)
Consensus node not actually serving (deploy reported a NodesStarted timeout even though the pod is Running)
Run solo one-shot single destroy --deployment <name> then solo one-shot single deploy; the second attempt usually succeeds
SDK calls fail; 127.0.0.1:35211 shows as not listening (all SDKs)
Solo’s auto-port-forward for consensus gRPC died after deploy
Point your existing Ethereum tooling (Hardhat, ethers.js, and MetaMask) at a local Hiero network via the Hiero JSON-RPC relay. This document covers enabling the relay, creating and configuring a Hardhat project, deploying a Solidity contract, and configuring wallets.
Overview
Hiero is EVM-compatible. The Hiero JSON-RPC relay exposes a standard Ethereum
JSON-RPC interface on your local Solo network, letting you use familiar EVM tools
without modification.
This guide walks you through:
Launching a Solo network with the JSON-RPC relay enabled.
Retrieving ECDSA accounts for EVM tooling.
Creating and configuring a Hardhat project against the relay.
Deploying and interacting with a Solidity contract.
Verifying transactions via the Explorer and Mirror Node.
Configuring ethers.js and MetaMask.
Prerequisites
Before proceeding, ensure you have completed the following:
System Readiness - your local
environment meets all hardware and software requirements, including Docker
and Solo.
Quickstart - you are comfortable
running Solo deployments.
Step 1: Launch a Solo Network with the JSON-RPC Relay
The easiest way to start a Solo network with the relay pre-configured is via
one-shot single deploy, which provisions the consensus node, mirror node,
Hiero Mirror Node Explorer, and the Hiero JSON-RPC relay in a single step:
npx @hiero-ledger/solo one-shot single deploy
This command:
Creates a local Kind Kubernetes cluster.
Deploys a Hiero consensus node, mirror node, and Hiero Mirror Node Explorer.
Deploys the Hiero JSON-RPC relay and exposes it at http://localhost:37546 (Solo 0.63+).
Generates three groups of pre-funded accounts, including ECDSA (EVM-compatible) accounts.
Relay endpoint summary (Solo 0.63 and later):
Property
Value
RPC URL
http://localhost:37546
Chain ID
298
Currency symbol
HBAR
If you are using Solo 0.62 or earlier, the relay is at http://localhost:7546.
Adding the Relay to an Existing Deployment
If you already have a running Solo network without the relay, see Step 10: Deploy JSON-RPC Relay in the Step-by-Step Manual Deployment guide for full instructions, then return here once your relay is running on http://localhost:37546 (Solo 0.63+) or http://localhost:7546 (Solo 0.62 and earlier).
Step 2: Retrieve Your ECDSA Account and Private Key
one-shot single deploy creates ECDSA alias accounts, which are required for EVM tooling such as Hardhat, ethers.js, and MetaMask.
These accounts and their private keys are saved to a cache directory on completion.
Note: ED25519 accounts are not compatible with Hardhat, ethers.js, or MetaMask when used via the JSON-RPC interface.
Always use the ECDSA keys from accounts.json for EVM tooling.
Open that file to retrieve your ECDSA keys and EVM address. Each account entry contains:
An ECDSA private key - 64 hex characters with a 0x prefix (e.g. 0x105d0050...).
An ECDSA public key - the corresponding public key.
An EVM address - derived from the public key (e.g. 0x70d379d473e2005bb054f50a1d9322f45acb215a). In Hiero terminology, this means the account has an EVM address aliased from its ECDSA public key.
When prompted, choose TypeScript project or JavaScript project based on
your preference.
Install dependencies:
npm install
Configure Hardhat to Connect to the Solo Relay
Create or update hardhat.config.ts to point at the Solo JSON-RPC relay.
The chainId of 298 is required - Hardhat will reject transactions if it
does not match the network:
import{defineConfig}from"hardhat/config";importhardhatToolboxMochaEthersfrom"@nomicfoundation/hardhat-toolbox-mocha-ethers";constconfig=defineConfig({plugins:[hardhatToolboxMochaEthers],solidity:"0.8.28",networks:{my_solo_deployment:{type:"http",url:"http://127.0.0.1:37546",chainId: 298,// Load from environment - never commit private keys to source control
accounts: process.env.SOLO_EVM_PRIVATE_KEY?[process.env.SOLO_EVM_PRIVATE_KEY]:[],},},});exportdefaultconfig;
Important: This is the Hardhat v3 config format used by the bundled
example (Hardhat 3.x). Each network needs an explicit type: "http", and
chainId: 298 must be set - without type/chainId, Hardhat v3 fails with
HHE40000: No network with chain id "298" found when connecting to the relay.
The network key (my_solo_deployment) must match the --network flag you
pass to Hardhat commands.
Step 4: Deploy and Interact with a Solidity Contract
The Sample Contract
If using the pre-built Solo example, contracts/SimpleStorage.sol is included.
For a new project, create contracts/SimpleStorage.sol:
// SPDX-License-Identifier: MIT
pragma solidity^0.8.19;contractSimpleStorage{uint256privatevalue;eventValueChanged(uint256indexedoldValue,uint256indexednewValue,addressindexedchanger);constructor(uint256initial){value=initial;}functionget()externalviewreturns(uint256){returnvalue;}functionset(uint256newValue)external{uint256old=value;value=newValue;emitValueChanged(old,newValue,msg.sender);}}
For the pre-built example, the test suite covers three scenarios:
SimpleStorage
✔ deploys with initial value
✔ updates value and emits ValueChanged event
✔ allows other accounts to set value
3 passing (12s)
Deploy via a Script
To deploy SimpleStorage to your Solo network using a deploy script:
npx hardhat run scripts/deploy.ts --network my_solo_deployment
A minimal scripts/deploy.ts looks like:
Hardhat v3: The bundled example pins Hardhat 3.x, which removed the
ethers named export from the hardhat module. Obtain ethers from the
network connection with const { ethers } = await network.connect() instead
of import { ethers } from "hardhat".
Returns the five most recent transactions in JSON format. Useful for scripted
verification.
Note: localhost:5551 (the legacy Mirror Node REST API direct endpoint) is being phased out.
Use localhost:38081 (Solo 0.63+) or localhost:8081 (Solo 0.62 and earlier) to ensure compatibility with all endpoints.
Hiero JSON RPC Relay (eth_getTransactionReceipt)
curl -X POST http://localhost:37546 \
-H "Content-Type: application/json"\
-d '{"jsonrpc":"2.0","method":"eth_getTransactionReceipt","params":["0xYOUR_TX_HASH"],"id":1}'
Step 7: Configure MetaMask
To connect MetaMask to your local Solo network:
Open MetaMask and go to Settings → Networks → Add a network → Add a
network manually.
Enter the following values:
Field
Value
Network name
Solo Local
New RPC URL
http://localhost:37546
Chain ID
298
Currency symbol
HBAR
Note: If you are using Solo 0.62 or earlier, use http://localhost:7546 for the RPC URL.
Click Save and switch to the Solo Local network.
Import an account using an ECDSA private key from accounts.json:
Click the account icon → Import account.
Paste the private key (with 0x prefix).
Click Import.
Your MetaMask wallet is now connected to the local Solo network and funded with
the pre-allocated HBAR balance.
Step 8: Tear Down the Network
When finished, destroy the Solo deployment and all associated containers:
npx @hiero-ledger/solo one-shot single destroy
If you added the relay manually to an existing deployment:
solo relay node destroy --deployment "${SOLO_DEPLOYMENT}"
Reference: Running the Full Example Automatically
The hardhat-with-solo example includes a Taskfile.yml that automates all
steps - deploy network, install dependencies, compile, and test - in a single
command:
Learn how to run load tests against a Solo network using the Network Load Generator (NLG). Generate realistic transaction flows and stress-test your deployment to verify performance under load.
Using Network Load Generator with Solo
The Network Load Generator (NLG) is a benchmarking tool that stress tests Hiero networks by generating configurable transaction loads. Use it to validate the performance and
stability of your Solo network before deploying to production or running
integration tests.
Prerequisites
Before proceeding, ensure you have completed the following:
System Readiness — your local environment
meets all hardware and software requirements.
Quickstart — you have a running Solo network
and are familiar with the basic Solo workflow.
Step 1: Start a Load Test
Use the rapid-fire load start command to install the NLG Helm chart and
begin a load test against your deployment.
To stop all running load tests and uninstall the NLG Helm chart:
npx @hiero-ledger/solo@latest rapid-fire destroy all \
--deployment <deployment-name>
Complete Example
For an end-to-end walkthrough with a full configuration, see the examples/rapid-fire.
Available Tests and Arguments
A full list of all available rapid-fire commands can be found in Solo CLI Reference.
3.6 - Deploying a Local Consensus Node Build
Test unreleased hiero-consensus-node changes end-to-end using Solo’s –local-build-path flag — no Docker image rebuild or registry push required.
Overview
Solo’s --local-build-path flag lets you deploy a network using a consensus
node binary you compiled locally. Use this when you need to:
Test unreleased hiero-consensus-node code against a live Solo network.
Reproduce a bug with a specific build.
Iterate on platform changes without a full release cycle.
Solo validates the path for the expected apps/ and lib/ subdirectories,
then uses kubectl cp to push the local binaries directly into the running
node pods — no Docker image rebuild or registry push required.
Scope: This guide covers the consensus node local build workflow.
Local build support for mirror node, block node, relay, and explorer
requires additional engineering work and is not yet available as a
first-class Solo feature.
Prerequisites
Solo CLI installed — if you have not yet deployed a network, follow the
Quickstart first.
Java 25 (Temurin) — this is a hard Gradle toolchain requirement;
Java 21 will fail with a cryptic toolchain error. Install with
SDKMAN:
sdk install java 25.0.2-tem
Gradle — the repository includes the Gradle wrapper (./gradlew); no
separate Gradle install is needed.
Step 1: Build hiero-consensus-node
Clone the repository and run ./gradlew assemble. This compiles the consensus
node and populates hedera-node/data/ with the runtime artifacts Solo needs:
hedera-node/data/lib/ — runtime dependency JARs
hedera-node/data/apps/HederaNode.jar — the main consensus node binary
git clone https://github.com/hiero-ledger/hiero-consensus-node.git
cd hiero-consensus-node
./gradlew assemble
Note: The initial Gradle build downloads dependencies and compiles all
modules. Expect 10–30 minutes on a first run; subsequent incremental builds
are faster.
Note: Solo copies data/lib/ and data/apps/ from your build path but
skips data/config/ and data/keys/ — those come from the container image.
To customise consensus node configuration, see
Custom Application Properties.
Step 2: Deploy with your local build
Choose the path that matches your situation.
Option A — New cluster (Falcon deploy)
Creates a fresh Kind cluster and deploys the full Solo network from scratch,
using your local build for the consensus node.
Create a values file with the --local-build-path flag:
solo one-shot falcon deploy --values-file local-build-values.yaml
Use an absolute path — relative paths can behave unexpectedly depending on
where Solo is invoked.
For a full deployment with mirror node, explorer, and relay, add the
corresponding sections to your values file. See the
One-Shot Falcon Deployment
guide for the complete values file reference.
Option B — Existing cluster (consensus node setup)
If you already have a running Solo deployment and want to swap in a new
consensus node binary without redeploying the whole network:
solo consensus node setup \
--deployment <deployment-name> \
--local-build-path /absolute/path/to/hiero-consensus-node/hedera-node/data
Replace <deployment-name> with your deployment name. One-shot deployments use
one-shot by default; You can see it with:
solo one-shot show deployment
Step 3: Verify the local build is running
Confirm that the consensus node gRPC port is reachable:
nc -zv localhost 35211
Expected output:
Connection to localhost port 35211 [tcp/*] succeeded!
Confirm that the pods are running your local build by inspecting the container
images:
kubectl get pods -n <namespace> -o \
jsonpath='{range .items[*]}{.metadata.name}{"\t"}{.spec.containers[*].image}{"\n"}{end}'
Replace <namespace> with your deployment namespace (default: one-shot).
The consensus node pod should reference the image tag that matches your
--release-tag (or the Solo built-in default if you omitted it). The key
indicator is that the node started successfully with your local data/lib/ and
data/apps/ artifacts copied in.
Step 4: Tear down
solo one-shot falcon destroy
Reference: ready-to-run example
The Solo repository ships a Task-based example that automates the full
workflow — cloning at the correct versions, building the consensus node,
generating an absolute-path values file, and deploying:
Mirror node, relay, and explorer images pulling for the first time
Let it complete; subsequent runs reuse the image cache
4 - Troubleshooting
Solutions to common issues when using Solo, plus guidance on getting help. This document covers installation problems, pod readiness issues, resource constraints, and how to find additional support.
This guide covers common issues you may encounter when using Solo and how to
resolve them.
Quick Navigation
Use this page when something is failing and you need to diagnose or recover
quickly.
Every error Solo raises carries a structured code of the form SOLO-XXXX, an
ownership classification (User, Infrastructure, or Solo), and a retryable flag.
When a command fails with one of these codes, look it up in the
Error Codes reference for a plain-language
description of why it is thrown, along with its troubleshooting steps.
Codes are grouped by category — Configuration, Deployment, Component,
Validation, System, and Internal. Solo’s CLI also prints a documentation link
for each error (for example https://solo.hiero.org/docs/errors/SOLO-1001) that
opens its page directly.
Anatomy of a Solo error
When a command fails with a coded error, Solo prints the code and message,
suggested next steps, and a documentation link:
[SOLO-2002] A deployment named 'my-deployment' already exists. Please select a different name
→ Check existing deployments: solo deployment config list
→ Choose a different name for your deployment
Learn more: https://solo.hiero.org/docs/errors/SOLO-2002
[SOLO-NNNN] is the error code; its leading digit identifies the category.
→ lines are suggested remediation steps, shown when the error provides them.
Learn more links to that error’s online reference page.
In the terminal, this appears inside a bordered ERROR box, followed by a tip
suggesting solo deployment diagnostics logs or
solo deployment diagnostics report to gather more detail.
Note: Add --debug to a command to see the full error cause chain and stack
traces instead of the summarized form — useful when filing a bug report. (This
flag was previously named --dev. The --dev alias still works but is
deprecated and will no longer be supported once Solo 0.82.0 reaches its end
of support date.)
Common Issues and Solutions
Troubleshooting Installation and Upgrades
Installation and upgrade failures are common, especially when older installs or
previous deployments are still present.
Symptoms
You are likely hitting an installation or upgrade problem if:
solo fails to start after changing versions.
solo one-shot single deploy fails early with validation or environment
errors.
Commands report missing dependencies or incompatible versions.
A new deployment fails immediately after a previous network was not destroyed.
A global install fails with EEXIST: file already exists pointing at
.../bin/solo. This happens when Solo is already installed under the other
npm package name (@hiero-ledger/solo and @hashgraph/solo are mirrors that
share the solo binary). See
Resolving an EEXIST package-name conflict.
Quick Checks
Confirm installation method
If you previously installed Solo via Homebrew and are now migrating to npm,
remove the Homebrew install to avoid conflicts:
brew uninstall hiero-ledger/tools/solo
Then install via npm:
npm install -g @hiero-ledger/solo@latest
If you have Solo installed under both npm package names (@hiero-ledger/solo
and @hashgraph/solo), remove both before reinstalling:
Ensure your machine and Docker (or other container runtime) meet the
minimum requirements described in System readiness.
If Docker Desktop or your container runtime is configured below these
values, increase the allocations and retry the install or deploy.
Clean up previous deployments
If an upgrade or redeploy fails, first run a standard destroy:
solo one-shot single destroy
Pods not reaching Ready state
If pods remain in Pending, Init, ContainerCreating, or CrashLoopBackOff,
follow this sequence to identify the blocker.
Check readiness and restarts
# Show readiness and restart count for each podkubectl get pods -n "${SOLO_NAMESPACE}"\
-o custom-columns=NAME:.metadata.name,PHASE:.status.phase,READY:.status.containerStatuses[*].ready,RESTARTS:.status.containerStatuses[*].restartCount
Inspect pod events
# List all pods in your namespacekubectl get pods -n "${SOLO_NAMESPACE}"# Describe a specific pod to see eventskubectl describe pod -n "${SOLO_NAMESPACE}" <pod-name>
Map symptoms to likely causes
Symptom
Likely cause
Next step
Pending
Insufficient resources
Increase Docker memory/CPU allocation, then retry
Pending
Storage issues
Check disk space, free space if needed, restart Docker
CrashLoopBackOff
Container failing to start
Check pod logs: kubectl logs -n "${SOLO_NAMESPACE}" <pod-name>
ImagePullBackOff
Can’t pull container images
Check internet connectivity and Docker Hub rate limits. If the image is quay.io/minio/minio, see MinIO image pull failures
CrashLoopBackOff causes and remediation
If a pod repeatedly restarts and enters CrashLoopBackOff, inspect current
logs, previous logs, and events:
# Current container logskubectl logs -n "${SOLO_NAMESPACE}" <pod-name>
# Previous container logs (captures startup failures)kubectl logs -n "${SOLO_NAMESPACE}" <pod-name> --previous
# Pod events and failure reasonskubectl describe pod -n "${SOLO_NAMESPACE}" <pod-name>
Common causes include invalid runtime configuration, missing dependencies, and
insufficient memory.
Recommended remediation sequence:
If events mention OOMKilled or repeated liveness probe failures, increase
Docker CPU/RAM and retry.
If the issue started after a failed upgrade or deploy, run the cleanup
steps in Old installation artifacts and redeploy.
If only one node is affected, refresh or restart it:
Ensure your machine and Docker (or other container runtime) meet the minimum
requirements described in
System readiness.
On Docker Desktop, check: Settings > Resources.
MinIO image pull failures (ImagePullBackOff on the MinIO tenant pod)
MinIO stopped publishing new community-edition images as of 2025-10-23.
quay.io/minio/minio and docker.io/minio/minio now return 401 UNAUTHORIZED for every tag, including latest. Solo uses this image for the
MinIO tenant (the object storage backend for record streams and backups
deployed via the MinIO Operator), so any Solo deployment that enables MinIO
will fail with ImagePullBackOff on the tenant pod until the fix below is
applied.
Note: This affects Solo versions below v0.91.0. Starting with
v0.91.0, Solo replaces the default tenant image so this workaround is no
longer required. If you’re on an older version, use one of the two options
below: skip MinIO entirely with environment variables (simplest), or
override the tenant image with a values file if you need MinIO’s
record-stream/backup storage.
Symptoms
kubectl get pods -n "${SOLO_NAMESPACE}" -l v1.min.io/tenant=minio shows
ImagePullBackOff or ErrImagePull.
kubectl describe pod <minio-pool-pod> -n "${SOLO_NAMESPACE}" shows an event
like:
Failed to pull image "quay.io/minio/minio:RELEASE.2024-08-03T04-33-23Z":
... unexpected status from HEAD request ... 401 UNAUTHORIZED
A one-shot or network deploy run hangs or fails on the “Deploy network
node” step with [SOLO-3035] Pod readiness check failed ... for labels [v1.min.io/tenant=minio].
Easier option: skip MinIO entirely with environment variables
If you don’t need record-stream/backup storage and don’t want to deal with
Helm values files, the simplest fix is to not deploy MinIO at all by running
the network in native block-streaming mode instead:
exportONE_SHOT_WITH_BLOCK_NODE=trueexportBLOCK_STREAM_STREAM_MODE=BLOCKS
solo one-shot single deploy
This works with one-shot single deploy (no need to switch to falcon)
because it’s a plain environment variable, not a CLI flag — Solo detects it and
skips the MinIO/record-uploader setup automatically. Use this unless you
specifically need the MinIO-backed record-stream/backup path; if you do, use
the values-file override below instead.
Workaround: override the tenant image with a values file
Point the MinIO tenant at a currently-available image using Solo’s
--values-file support. Silo is a MinIO fork
maintained by PGSTY that keeps publishing dated, S3-API-compatible images
after upstream stopped; its entrypoint transparently translates the MinIO
Operator’s server/minio invocation, so it’s a drop-in replacement here.
Create a plain Helm values file:
solo network deploy -f ./minio-image-override.yaml
network deploy’s --values-file/-f passes this file straight to Helm, so
the plain values shape above is correct there.
If you are using one-shot instead
one-shot’s --values-file is a different shape — it is not a raw Helm
values file. Its top-level keys are per-command sections (network,
mirrorNode, relayNode, etc.), each holding --flag: value pairs that get
forwarded to the underlying command. To apply the same override through
one-shot, nest the Helm values file above inside a network section:
solo one-shot falcon deploy --values-file ./falcon-values.yaml
one-shot single deploy does not accept --values-file at all — the flag
is only registered on one-shot falcon deploy. If your existing workflow uses
solo one-shot single deploy, switch it to solo one-shot falcon deploy
(same underlying deploy pipeline, single is just a preset without the
values-file escape hatch) to apply this workaround.
Resource constraint errors (CPU / RAM / Disk)
Resource pressure is a common cause of Pending pods, slow startup, and
repeated restarts.
Check Kubernetes-level CPU and memory utilization:
kubectl top nodes
kubectl top pods -n "${SOLO_NAMESPACE}"
Check host and Docker disk usage:
# Host disk availabilitydf -h
# Docker disk usage (if using Docker)docker system df
Compare against the recommended local baseline:
See
System readiness
for the recommended memory, CPU, and disk values.
JSON-RPC Relay Out of Memory
If the relay or relay-ws pods are being killed (OOMKilled) or restarting due
to memory pressure, the sections below explain why this happens and how to
resolve it.
Understanding the default memory configuration
Solo ships with a default memory limit of 88Mi and an explicit V8 old-space
cap of 66MB (--max-old-space-size=66) for both the relay and WebSocket
services. These values are tuned for the one-shot development profile and may
not be sufficient for heavy workloads.
How Node.js memory works in containers
Since Node.js 12.7.0, Node.js
reads the Linux cgroup memory limit set by Kubernetes to determine the V8
old-space heap size, rather than using the host’s physical memory. Based on V8’s
internal heap sizing heuristics, this tends to be roughly ~50% of the
container memory limit on 64-bit systems, though the exact value depends on V8
internals and varies at both ends of the memory spectrum.
A couple of things to be aware of:
cgroup v2 environments: many modern Linux distributions enable cgroup v2
by default, and
Kubernetes 1.25 brought cgroup v2 support to GA.
Older Node.js versions may not correctly detect the container limit under
cgroup v2 and could silently fall back to the host’s physical memory,
allocating a much larger heap than intended. This was improved in at least
Node.js 20.3.0, which upgraded libuv to 1.45.0.
When --max-old-space-size is explicitly set (as in Solo’s default config),
it overrides the auto-sizing entirely — the cgroup-based detection only
kicks in when no explicit value is provided.
This means:
If you increase only the pod memory limit (e.g., to 256Mi) but leave
NODE_OPTIONS unchanged, old space stays at 66 MB.
If you remove NODE_OPTIONS, Node.js will attempt to auto-size old space
based on the container limit (roughly ~128 MB for a 256Mi pod on a modern
Node.js version).
Adjusting memory for heavier workloads
Create a custom values file (e.g., custom-relay-values.yaml) and pass it when
deploying:
# Option 1: Explicit old-space control (recommended for precise tuning)relay:resources:limits:memory:256Miconfig:NODE_OPTIONS:'--max-old-space-size=192'ws:resources:limits:memory:256Miconfig:NODE_OPTIONS:'--max-old-space-size=192'# Option 2: Let Node.js auto-detect (simpler, old space ≈ 50% of limit)# relay:# resources:# limits:# memory: 256Mi# config:# NODE_OPTIONS: ""# ws:# resources:# limits:# memory: 256Mi# config:# NODE_OPTIONS: ""
If automatic port forwarding (from solo commands or your environment) is
not working, forward the required services manually. The local ports below
match the Solo 0.63+ defaults — adjust to any available port if needed:
# Consensus node (gRPC) — local port 35211 → service port 50211kubectl port-forward svc/haproxy-node1-svc -n "${SOLO_NAMESPACE}" 35211:50211 &# Explorer UI — local port 38080 → service port 8080kubectl port-forward svc/hiero-explorer -n "${SOLO_NAMESPACE}" 38080:8080 &# Mirror node ingress (REST API) — local port 38081 → service port 80kubectl port-forward svc/mirror-1-rest -n "${SOLO_NAMESPACE}" 38081:80 &# Mirror node gRPCkubectl port-forward svc/mirror-1-grpc -n "${SOLO_NAMESPACE}" 5600:5600 &# JSON-RPC relay — local port 37546 → service port 7546kubectl port-forward svc/relay-node1-hedera-json-rpc-relay -n "${SOLO_NAMESPACE}" 37546:7546 &
Note: For Solo 0.62 and earlier, use local ports 50211, 8080,
5551, and 7546 respectively.
Confirm the expected endpoints and ports
After forwarding, connect to the local ports shown above (for example,
http://localhost:38080 for the explorer). For the standard exposed endpoints after a successful one-shot deployment,
see
How to access exposed services (mirror node, relay, explorer).
Node synchronization issues
If nodes are not forming consensus or transactions are not being processed,
follow these steps.
Check node state and gossip logs:
# Download state information for a nodesolo consensus state download --deployment "${SOLO_DEPLOYMENT}" --node-aliases node1
# Check logs for gossip-related issueskubectl logs -n "${SOLO_NAMESPACE}" network-node-0 | grep -i gossip
Look for repeated connection failures, timeouts, or gossip disconnection
messages.
Restart problematic nodes:
# Refresh a specific nodesolo consensus node refresh --node-aliases node1 --deployment "${SOLO_DEPLOYMENT}"# Or restart all nodessolo consensus node restart --deployment "${SOLO_DEPLOYMENT}"
After restarting, submit a small test transaction and verify that it reaches
consensus.
Mirror node not importing records
If the mirror node is not showing new transactions, first confirm that records
are being generated and imported.
Verify the pinger is running
The --pinger flag should be enabled when deploying the mirror node. The
pinger sends periodic transactions so that record files are created.
# Check if pinger pod is runningkubectl get pods -n "${SOLO_NAMESPACE}"| grep pinger
Re-run the Solo command that configures Helm after removing the conflict.
Kind cluster issues
Problems starting or accessing the Kind cluster often present as cluster
creation failures or missing nodes.
Cluster will not start or is in a bad state:
# Delete and recreate the clusterkind delete cluster -n "${SOLO_CLUSTER_NAME}"kind create cluster -n "${SOLO_CLUSTER_NAME}"
Docker context or daemon issues
Ensure Docker is running and the correct context is active:
# Check Docker is runningdocker ps
# On macOS/Windows, ensure Docker Desktop is started.# On Linux, ensure the Docker daemon is running:sudo systemctl start docker
Cleanup and reset (old installation artifacts)
Previous Solo installations can cause conflicts during new deployments. For the full teardown and full reset procedure, see the
Cleanup guide.
At a high level:
Run a standard destroy first:
solo one-shot single destroy
If destroy fails or Solo state is corrupted, perform a
full reset, which:
Deletes Solo-managed Kind clusters (names starting with solo).
Removes the Solo home directory (~/.solo).
Windows (PowerShell) issues
These issues are specific to running Solo natively from Windows PowerShell.
Paths use backslashes. Solo stores its files under $env:USERPROFILE\.solo
on Windows - the equivalent of ~/.solo on macOS and Linux. When you copy a
command that uses ~/.solo/..., replace it with $env:USERPROFILE\.solo\....
For example:
Environment variable syntax differs. PowerShell does not use export. Set a
variable for the current session, or persist it for your user:
# Current session only$env:SOLO_LOG_LEVEL='debug'# Persist for your user (all future sessions)[System.Environment]::SetEnvironmentVariable('SOLO_LOG_LEVEL','debug','User')
Removing a variable from the current session. Use Remove-Item on the
Env: drive. Setting $env:VAR = '' only blanks the value; it does not remove
the variable:
Remove-ItemEnv:\SOLO_LOG_LEVEL
Port-forwarding fails with listen EACCES. On Windows this is usually a
WinNAT reserved-port-range conflict. Solo automatically restarts the WinNAT
service and retries the port-forward. If the problem persists, restart WinNAT
manually from an elevated PowerShell prompt:
netstopwinnatnetstart winnat
Collecting diagnostic information
Before seeking help, collect the following diagnostics so issues can be
reproduced and analyzed.
Solo diagnostics
Capture comprehensive diagnostics for the deployment:
solo deployment diagnostics all --deployment "${SOLO_DEPLOYMENT}"
This creates logs and diagnostic files under ~/.solo/logs/.
Key log files
These files are often requested when reporting issues:
File
Description
~/.solo/logs/solo.log
Solo CLI command logs (human-readable, pino-pretty)
~/.solo/logs/solo.ndjson
Solo CLI command logs (machine-readable JSON, for jq)
Kubernetes diagnostics
Collect basic cluster and namespace information:
# Cluster infokubectl cluster-info
# All resources in the Solo namespacekubectl get all -n "${SOLO_NAMESPACE}"# Recent events in the namespace (sorted by time)kubectl get events -n "${SOLO_NAMESPACE}" --sort-by='.lastTimestamp'# Node and pod resource usagekubectl top nodes
kubectl top pods -n "${SOLO_NAMESPACE}"
Getting Help
1. Check the Logs
Always start by examining logs:
# Solo logscat ~/.solo/logs/solo.log | tail -100
# Pod logskubectl logs -n "${SOLO_NAMESPACE}" <pod-name>
Thrown when solo reads its local configuration but no file exists at the resolved path (~/.solo/local-config.yaml, or $SOLO_HOME/local-config.yaml when SOLO_HOME is set). The local config records cluster references, deployments, and the active user context, so most commands load it before doing any work. The file is missing because solo init has not yet run on this machine, because SOLO_HOME points at a different directory than the one the file was created in, or because it was manually moved or deleted.
Troubleshooting Steps
Create a local config: solo deployment config create –deployment –namespace
4.1.1.2 - SOLO-1002
WriteLocalConfigFileError — Configuration
WriteLocalConfigFileError
Code
SOLO-1002
Category
Configuration
Ownership
Infrastructure
Retryable
No
Description
Thrown when solo cannot persist the local configuration to disk at ~/.solo/local-config.yaml (or $SOLO_HOME/local-config.yaml). The local config is rewritten whenever solo records a new cluster reference, deployment, or context, and this error wraps the underlying filesystem failure (cause). It means the data was prepared but could not be written: typical causes are missing write permissions on the ~/.solo directory, a read-only or full disk, or a parent directory that is missing or locked.
Troubleshooting Steps
Check file system permissions for ~/.solo
4.1.1.3 - SOLO-1003
RefreshLocalConfigSourceError — Configuration
RefreshLocalConfigSourceError
Code
SOLO-1003
Category
Configuration
Ownership
Infrastructure
Retryable
No
Description
Thrown when solo fails to reload the local configuration from its on-disk source — that is, the re-read and re-parse of ~/.solo/local-config.yaml (or $SOLO_HOME/local-config.yaml) did not complete; the message names the offending file and the underlying failure is wrapped in cause. Unlike LocalConfigNotFoundSoloError, the file is present: it could not be read (insufficient permissions, an I/O error) or its contents could not be parsed into the expected configuration because the file is malformed or corrupt. A malformed file can be regenerated from a cluster’s remote config with solo deployment config import.
Troubleshooting Steps
Check file system permissions and contents of the file:
4.1.1.4 - SOLO-1004
RemoteConfigsMismatchSoloError — Configuration
RemoteConfigsMismatchSoloError
Code
SOLO-1004
Category
Configuration
Ownership
Infrastructure
Retryable
No
Description
Thrown when a deployment spans multiple clusters and solo finds that the remote configuration stored in two of them does not agree; the message names the two clusters whose copies diverged. solo keeps the remote config as a ConfigMap that must be an identical replica in every cluster of the deployment, so it compares them and raises this when they differ. The usual cause is a prior write that was applied to one cluster but not the others (a partial or failed update), a ConfigMap that was edited manually, or clusters that have otherwise drifted out of sync.
Troubleshooting Steps
Inspect both configs: kubectl get configmap -n
Sync manually before retrying
4.1.1.5 - SOLO-1005
IncompleteLocalConfigError — Configuration
IncompleteLocalConfigError
Code
SOLO-1005
Category
Configuration
Ownership
Infrastructure
Retryable
No
Description
Thrown when the local configuration file (~/.solo/local-config.yaml, or $SOLO_HOME/local-config.yaml) parses as valid YAML but is missing required top-level keys such as deployments or clusterRefs; the message names the file and the missing keys. Without this check a partial file — typically left behind by an interrupted write or a manual edit — would silently load as a valid-but-empty config and only surface later as a confusing DeploymentNotFoundError. The file can be regenerated from a cluster’s remote config with solo deployment config import.
Troubleshooting Steps
Or restore the missing keys in the file manually:
4.1.1.6 - SOLO-1006
RemoteConfigDataInvalidSoloError — Configuration
RemoteConfigDataInvalidSoloError
Code
SOLO-1006
Category
Configuration
Ownership
Infrastructure
Retryable
No
Description
Thrown when the remote configuration stored in the solo-remote-config ConfigMap cannot be turned into a configuration object: the remote-config-data value is empty, is not parseable as YAML, or parses to something that is not a configuration object (a bare scalar, null, or a sequence). solo treats that ConfigMap as the source of truth for a deployment and reads it before almost any other work, so an unusable value blocks the whole command. The value is normally only written by solo itself, so this means it was hand-edited, truncated by a partial or interrupted write, or otherwise corrupted in the cluster. The offending value is captured on the error (meta.capturedData) so it can be inspected after the fact.
Troubleshooting Steps
Inspect the stored value: kubectl get configmap solo-remote-config -n -o yaml
The full captured value is recorded in ~/.solo/logs/solo.log
Recover by deleting and recreating the cluster: solo one-shot single destroy, then solo one-shot single deploy
Collect a diagnostics bundle: solo deployment diagnostics debug
Thrown when solo cannot migrate the legacy local configuration from the old cache path ($SOLO_HOME/cache/local-config.yaml) to the current path ($SOLO_HOME/local-config.yaml). The migration copies the legacy file to the current path and validates it before the legacy file is removed, so this error is raised either because a filesystem operation failed (copy/remove/mkdir, wrapped in cause) or because the legacy configuration is corrupt and cannot be parsed. In both cases the legacy file is left in place — it is never deleted while unvalidated — and the corrupt copy (if any) is discarded, so no configuration is silently propagated or lost.
Troubleshooting Steps
Inspect the legacy file at . If it is corrupt, fix the YAML or remove it, then re-run the command. Also verify file system permissions for your Solo home directory.Inspect the legacy local configuration file. If it is corrupt, fix the YAML or remove it, then re-run the command. Also verify file system permissions for your Solo home directory.
Thrown when the solo-remote-config ConfigMap that backs a deployment cannot be found and the deployment targets a local kind cluster. solo keeps the authoritative deployment state in that ConfigMap, so its absence means the deployment recorded in the local config no longer has anything backing it in the cluster; the usual causes are a kind cluster that was deleted and recreated, a namespace that was removed with kubectl, or a ConfigMap that was deleted by hand. A local kind cluster holds nothing worth preserving, so the recorded deployment cannot be resumed and the fix is to tear the leftover state down with solo one-shot single destroy and deploy again from a clean slate. solo one-shot single deploy detects this state up front and offers that teardown itself; every other command reports this error and stops. Deployments on non-kind clusters fail with the generic resource-not-found error instead, since their state may still be recoverable.
Troubleshooting Steps
Confirm the kind cluster and namespace still exist: kind get clusters && kubectl get namespaces
Inspect the remote config ConfigMap: kubectl get configmap solo-remote-config -n
Tear the leftover state down before deploying again: solo one-shot single destroy –deployment
4.1.2 - Deployment
4.1.2.1 - SOLO-2001
CreateDeploymentSoloError — Deployment
CreateDeploymentSoloError
Code
SOLO-2001
Category
Deployment
Ownership
Infrastructure
Retryable
Yes
Description
Thrown when solo deployment config create cannot record a new deployment; the underlying failure is wrapped in cause. Creating a deployment writes its entry to the local configuration and provisions the associated namespace, so this is raised when that work fails — for example the local config could not be written, or the Kubernetes API rejected or could not create the namespace. It is retryable because a transient cluster or filesystem issue often clears on a second attempt.
Troubleshooting Steps
Check the logs for details: tail -n 100 ~/.solo/logs/solo.log
4.1.2.2 - SOLO-2002
DeploymentAlreadyExistsSoloError — Deployment
DeploymentAlreadyExistsSoloError
Code
SOLO-2002
Category
Deployment
Ownership
User
Retryable
No
Description
Thrown when solo deployment config create is asked to create a deployment whose name is already present in the local configuration; the message names the conflicting deployment. Deployment names must be unique because solo keys each deployment’s namespace and cluster references by name, so it refuses to overwrite an existing entry. Choose a different name, or operate on the existing deployment instead of recreating it.
Troubleshooting Steps
Check existing deployments: solo deployment config list
Choose a different name for your deployment
4.1.2.3 - SOLO-2003
DeploymentNotFoundError — Deployment
DeploymentNotFoundError
Code
SOLO-2003
Category
Deployment
Ownership
User
Retryable
No
Description
Thrown when a command resolves a deployment by name but that name is not registered in the local configuration; the error message names the deployment that was requested. solo looks the deployment up to find its namespace and cluster references before acting, so the lookup fails when the --deployment value is misspelled, when the deployment was never created with solo deployment config create, or when it was removed by a prior delete. It can also surface after switching SOLO_HOME to a config that does not contain the deployment.
Troubleshooting Steps
List available deployments: solo deployment config list
Create a deployment if needed: solo deployment config create
4.1.2.4 - SOLO-2004
DeploymentHasRemoteResourcesError — Deployment
DeploymentHasRemoteResourcesError
Code
SOLO-2004
Category
Deployment
Ownership
User
Retryable
No
Description
Thrown when a deployment is deleted while it still has live components running in one of its clusters; the message names the deployment and the clusterReference where resources remain. Before removing a deployment’s local entry, solo checks each attached cluster and refuses to proceed if it still hosts components (mirror node, relay, explorer, block node, or the consensus network), since deleting the entry would orphan those running workloads. Destroy the components first, then delete the deployment.
Troubleshooting Steps
Destroy all components in the deployment before deleting it:
solo mirror node destroy
solo relay node destroy
solo explorer node destroy
solo block node destroy
solo consensus network destroy
4.1.2.5 - SOLO-2005
DeploymentDeleteFailedError — Deployment
DeploymentDeleteFailedError
Code
SOLO-2005
Category
Deployment
Ownership
Infrastructure
Retryable
Yes
Description
Thrown when removing a deployment fails; the underlying failure is wrapped in cause. Deleting a deployment removes its entry from the local configuration and may reach into each attached cluster to clean up, so this is raised when that work cannot complete — most often because one of the deployment’s cluster references or its kubeconfig context is invalid or unreachable. It is retryable, since a transient connectivity problem often clears on a later attempt once the contexts are reachable again.
Troubleshooting Steps
Check logs for details: tail -n 100 ~/.solo/logs/solo.log
Verify cluster references and their contexts are valid: solo cluster-ref config list
4.1.2.6 - SOLO-2006
ClusterAddFailedError — Deployment
ClusterAddFailedError
Code
SOLO-2006
Category
Deployment
Ownership
Infrastructure
Retryable
Yes
Description
Thrown when attaching a cluster to a deployment fails; the underlying failure is wrapped in cause. Attaching binds a registered cluster reference (and its kubeconfig context) to the deployment so components can be placed there, so this is raised when that step cannot complete — commonly because the cluster reference has not been created/connected yet, the kubeconfig context does not exist, or the cluster is unreachable. It is retryable, since a transient connectivity issue often clears once the reference and context are valid.
Troubleshooting Steps
Verify the cluster context exists: kubectl config get-contexts
Make sure the cluster reference is created: cluster-ref config connect
Check logs for details: tail -n 100 ~/.solo/logs/solo.log
4.1.2.7 - SOLO-2007
DeploymentListFailedError — Deployment
DeploymentListFailedError
Code
SOLO-2007
Category
Deployment
Ownership
Infrastructure
Retryable
Yes
Description
Thrown when solo deployment config list cannot enumerate the configured deployments; the underlying failure is wrapped in cause. Listing reads the deployment entries from the local configuration and may consult the clusters they reference, so this is raised when that read fails — for example the local config could not be read or parsed, or a referenced cluster could not be queried. It is retryable because transient filesystem or cluster issues often resolve on a later attempt.
Troubleshooting Steps
Check logs for details: tail -n 100 ~/.solo/logs/solo.log
4.1.2.8 - SOLO-2008
ClusterReferenceNotFoundError — Deployment
ClusterReferenceNotFoundError
Code
SOLO-2008
Category
Deployment
Ownership
User
Retryable
No
Description
Thrown when a command refers to a cluster reference that is not registered in the local configuration; the message names the missing reference. A cluster reference is the named link between solo and a kubeconfig context, created with solo cluster-ref config connect, so this is raised when the supplied name was never connected, was misspelled, or was disconnected. Connect the cluster reference (or correct the name) before retrying.
Troubleshooting Steps
List available cluster references: solo cluster-ref config list
Connect a cluster: solo cluster-ref config connect
4.1.2.9 - SOLO-2009
ClusterReferenceAlreadyExistsError — Deployment
ClusterReferenceAlreadyExistsError
Code
SOLO-2009
Category
Deployment
Ownership
User
Retryable
No
Description
Thrown when a cluster reference that is already attached to the deployment is added again; the message names the duplicate reference. solo keeps each cluster reference attached to a deployment at most once, so it rejects a second add rather than creating a conflicting duplicate entry. If you intend to re-add it (for example to change its binding), disconnect it first and then connect it again.
Troubleshooting Steps
List current cluster references: solo cluster-ref config list
Disconnect it first if you want to re-add it: solo cluster-ref config disconnect
4.1.2.10 - SOLO-2010
NamespaceNotSetError — Deployment
NamespaceNotSetError
Code
SOLO-2010
Category
Deployment
Ownership
User
Retryable
No
Description
Thrown when a command needs a target Kubernetes namespace but none could be resolved. solo determines the namespace from the --namespace flag or from the selected deployment’s configuration, so this is raised when neither is available — the flag was not passed and the deployment has no namespace recorded. Supply --namespace, or select a deployment whose configuration defines one.
Troubleshooting Steps
Ensure a namespace is specified: pass –namespace to your command
Check deployment config: solo deployment config info –deployment
4.1.2.11 - SOLO-2011
NoClustersForDeploymentError — Deployment
NoClustersForDeploymentError
Code
SOLO-2011
Category
Deployment
Ownership
User
Retryable
No
Description
Thrown when an operation targets a deployment that has no clusters attached; the message names the deployment. A deployment must have at least one cluster reference attached before solo can place or manage its components, so this is raised when the deployment exists but its cluster list is empty — typically because solo deployment cluster attach has not yet been run for it. Attach a cluster to the deployment before retrying.
Troubleshooting Steps
Attach a cluster to the deployment: solo deployment cluster attach –deployment
Thrown when solo cannot resolve which cluster reference a deployment should use; the message names the deployment. Internally a command expected the deployment to yield a single, unambiguous cluster reference (so it knows where to act) but the resolution returned nothing usable. While an unattached deployment is the visible trigger, this is classified as a Solo-owned error because the calling code should have ensured a cluster was attached before reaching this point — it points to a missing precondition in solo’s flow.
Troubleshooting Steps
Verify the deployment has clusters attached: solo deployment config info
Attach the cluster reference to the deployment: solo deployment cluster attach
4.1.2.13 - SOLO-2013
ContextNotFoundForClusterError — Deployment
ContextNotFoundForClusterError
Code
SOLO-2013
Category
Deployment
Ownership
User
Retryable
No
Description
Thrown when a cluster reference exists in the local configuration but has no kubeconfig context bound to it; the message names the cluster reference. solo needs the context to know which cluster the reference points at, so this is raised when the mapping is missing — usually because the reference was recorded without being connected to a context, or the binding was removed. Connect a kubeconfig context to the cluster reference before retrying.
Troubleshooting Steps
Connect a kubeconfig context to the cluster: solo cluster-ref config connect
4.1.2.14 - SOLO-2014
NoDeploymentsFoundError — Deployment
NoDeploymentsFoundError
Code
SOLO-2014
Category
Deployment
Ownership
User
Retryable
No
Description
Thrown when a command needs at least one deployment to act on but the local configuration contains none. solo stores every deployment in local config and several commands assume one already exists, so this is raised when that list is empty — typically because no deployment has been created yet, or because they were all deleted (or the active SOLO_HOME/local config does not contain any). Create a deployment before running the command.
Troubleshooting Steps
Create a deployment: solo deployment config create
4.1.2.15 - SOLO-2015
DeploymentListPortsFailedError — Deployment
DeploymentListPortsFailedError
Code
SOLO-2015
Category
Deployment
Ownership
Infrastructure
Retryable
Yes
Description
Thrown when solo cannot enumerate the forwarded ports for a deployment; the underlying failure is wrapped in cause. Listing ports queries the Kubernetes API in the deployment’s namespace to discover the active port-forwards exposing its components, so this is raised when that query fails — typically because the cluster’s API server is unreachable or the namespace cannot be inspected. It is retryable, as a transient connectivity problem often clears on a later attempt.
Troubleshooting Steps
Check logs for details: tail -n 100 ~/.solo/logs/solo.log
Verify the Kubernetes API server is reachable: kubectl cluster-info
List port-forwards in the namespace to check for any issues: kubectl get port-forwards -n
4.1.2.16 - SOLO-2016
ClusterSetupFailedSoloError — Deployment
ClusterSetupFailedSoloError
Code
SOLO-2016
Category
Deployment
Ownership
Infrastructure
Retryable
No
Description
Thrown when solo cluster-ref config setup cannot install the cluster-level shared infrastructure that deployments depend on — the solo-cluster-setup chart and its components (Prometheus, MinIO, metrics-server, and the cluster role). It wraps the underlying failure (cause.message), which is most often a failed Helm release (bad chart version or values), an image that cannot be pulled, missing RBAC permissions on the target cluster, or a cluster that lacks the CPU/memory to schedule the new pods.
Troubleshooting Steps
Check solo logs: tail -n 100 ~/.solo/logs/solo.log
List installed Helm releases: helm list -A
Inspect cluster pods: kubectl get pods -A
Re-run cluster setup: solo cluster-ref config setup
4.1.2.17 - SOLO-2017
ClusterResetFailedSoloError — Deployment
ClusterResetFailedSoloError
Code
SOLO-2017
Category
Deployment
Ownership
Infrastructure
Retryable
No
Description
Thrown when solo cluster-ref config reset cannot tear down the cluster-level resources that setup installed (the solo-cluster-setup chart and its components); the underlying failure is wrapped in cause. It means the uninstall did not complete cleanly — for example a Helm release could not be removed, or the cluster API was unreachable mid-reset — so some resources may still be present. Inspect the remaining Helm releases and pods to see what was left behind.
Troubleshooting Steps
Check solo logs: tail -n 100 ~/.solo/logs/solo.log
Inspect cluster state: kubectl get pods -A
Check Helm releases still present: helm list -A
Re-run cluster reset: solo cluster-ref config reset
4.1.2.18 - SOLO-2018
MinioInstallFailedSoloError — Deployment
MinioInstallFailedSoloError
Code
SOLO-2018
Category
Deployment
Ownership
Infrastructure
Retryable
No
Description
Thrown during cluster setup when the MinIO Operator Helm chart fails to install; the underlying failure is wrapped in cause. MinIO provides the S3-compatible object storage that solo’s cluster-level stack relies on, so its install is part of solo cluster-ref config setup. The failure is usually a Helm error (bad chart version or values), an image that cannot be pulled, or a cluster lacking the resources/connectivity to schedule the operator.
Troubleshooting Steps
Check solo logs: tail -n 100 ~/.solo/logs/solo.log
Inspect cluster state: kubectl get pods -A
Check Helm release status: helm list -A
Verify cluster connectivity: kubectl cluster-info
4.1.2.19 - SOLO-2019
PrometheusInstallFailedSoloError — Deployment
PrometheusInstallFailedSoloError
Code
SOLO-2019
Category
Deployment
Ownership
Infrastructure
Retryable
No
Description
Thrown during cluster setup when the Prometheus stack Helm chart fails to install; the underlying failure is wrapped in cause. The Prometheus stack supplies the monitoring and metrics collection for the cluster-level stack installed by solo cluster-ref config setup. The failure is typically a Helm error (bad chart version or values), an image that cannot be pulled, or a cluster without the resources/connectivity to schedule its pods.
Troubleshooting Steps
Check solo logs: tail -n 100 ~/.solo/logs/solo.log
Inspect cluster pods: kubectl get pods -A
Check Helm release status: helm list -A
Verify cluster connectivity: kubectl cluster-info
4.1.2.20 - SOLO-2020
MetricsServerInstallFailedSoloError — Deployment
MetricsServerInstallFailedSoloError
Code
SOLO-2020
Category
Deployment
Ownership
Infrastructure
Retryable
No
Description
Thrown during cluster setup when the metrics-server Helm chart fails to install; the underlying failure is wrapped in cause. metrics-server provides the resource-usage metrics API the cluster-level stack depends on, installed as part of solo cluster-ref config setup. The failure is usually a Helm error (bad chart version or values), an image that cannot be pulled, or a cluster lacking the resources/connectivity to schedule the pod.
Troubleshooting Steps
Check solo logs: tail -n 100 ~/.solo/logs/solo.log
Inspect cluster pods: kubectl get pods -A
Check Helm release status: helm list -A
Verify cluster connectivity: kubectl cluster-info
4.1.2.21 - SOLO-2021
ClusterRoleInstallFailedSoloError — Deployment
ClusterRoleInstallFailedSoloError
Code
SOLO-2021
Category
Deployment
Ownership
Infrastructure
Retryable
No
Description
Thrown during cluster setup when the pod-monitor-role ClusterRole cannot be installed; the underlying failure is wrapped in cause. This ClusterRole grants the monitoring stack permission to scrape pods cluster-wide, so it is created as part of solo cluster-ref config setup. The failure most often means the current kubeconfig user lacks the RBAC permission to create ClusterRoles, but it can also stem from an API server that is unreachable or rejected the request.
Troubleshooting Steps
Check solo logs: tail -n 100 ~/.solo/logs/solo.log
Verify RBAC permissions: kubectl get clusterroles
Inspect cluster state: kubectl get pods -A
4.1.2.22 - SOLO-2022
ClusterApiServerTimeoutSoloError — Deployment
ClusterApiServerTimeoutSoloError
Code
SOLO-2022
Category
Deployment
Ownership
Infrastructure
Retryable
Yes
Description
Thrown when a cluster’s Kubernetes API server does not become ready within the allowed number of attempts; the message names the context and the maxAttempts tried, and wraps the last failure in cause. solo polls the API server before proceeding so it does not act against a cluster that is still starting, and raises this once polling is exhausted. It is retryable because a cluster that is merely slow to come up (for example a Kind cluster still initialising) often becomes ready shortly after; a persistent failure points to a cluster that is down, unreachable, or pointed at by the wrong context.
Troubleshooting Steps
Check solo logs: tail -n 100 ~/.solo/logs/solo.log
Verify the cluster context is reachable: kubectl cluster-info –context
Thrown when solo cannot configure networking for a Kind cluster — either the Kind network setup itself or the MetalLB Helm repository configuration it depends on; the underlying failure is wrapped in cause. solo configures MetalLB so that LoadBalancer services in the local Kind cluster receive reachable addresses, and raises this when that setup fails. Common roots are Docker not running (Kind needs it), an unreachable or misconfigured Helm repository, or a problem with the Kind cluster’s Docker network.
Troubleshooting Steps
Check solo logs: tail -n 100 ~/.solo/logs/solo.log
Verify Docker is running: docker ps
Check existing Kind clusters: kind get clusters
Verify Helm repository access: helm repo list
4.1.2.24 - SOLO-2024
BackupExportFailedSoloError — Deployment
BackupExportFailedSoloError
Code
SOLO-2024
Category
Deployment
Ownership
Infrastructure
Retryable
No
Description
Thrown during solo config ops backup when a particular resource cannot be exported into the backup; the message names the resourceType and wraps the underlying failure in cause. Backup reads each resource from the cluster and writes it to the backup archive, so this is raised when reading a resource or writing it out fails — for example the Kubernetes API is unreachable, the deployment or resource no longer exists, or the archive destination cannot be written.
Troubleshooting Steps
Check solo logs: tail -n 100 ~/.solo/logs/solo.log
Verify Kubernetes connectivity: kubectl get pods -A
Check that the deployment exists: solo deployment config list
Run backup again: solo config ops backup
4.1.2.25 - SOLO-2025
BackupImportFailedSoloError — Deployment
BackupImportFailedSoloError
Code
SOLO-2025
Category
Deployment
Ownership
Infrastructure
Retryable
No
Description
Thrown during solo config ops restore-config when a particular resource cannot be imported from a backup; the message names the resourceType and wraps the underlying failure in cause. Restore reads each resource from the backup archive and applies it to the cluster, so this is raised when reading the archive entry or applying it fails — for example the backup archive is incomplete or corrupt, the resource is invalid, or the Kubernetes API is unreachable or rejected it.
Troubleshooting Steps
Check solo logs: tail -n 100 ~/.solo/logs/solo.log
Verify Kubernetes connectivity: kubectl get pods -A
Verify the backup archive is complete and valid
Run restore: solo config ops restore-config
4.1.2.26 - SOLO-2026
BackupRestoreClustersFailedSoloError — Deployment
BackupRestoreClustersFailedSoloError
Code
SOLO-2026
Category
Deployment
Ownership
Infrastructure
Retryable
No
Description
Thrown when solo config ops restore-clusters cannot recreate the clusters captured in a backup; the underlying failure is wrapped in cause. This step reads the backup archive and rebuilds the cluster(s) it describes (for example recreating a Kind cluster) before the rest of a restore can proceed, so the error means that rebuild failed. Common roots are an invalid or incomplete backup archive, an incorrect input directory, or Docker/Kind not being available to create the clusters.
Troubleshooting Steps
Check solo logs: tail -n 100 ~/.solo/logs/solo.log
Verify the backup archive is valid and the input directory is correct
Check Docker or Kind cluster availability: kind get clusters
Run cluster restore: solo config ops restore-clusters
4.1.2.27 - SOLO-2027
DeployNetworkFailedSoloError — Deployment
DeployNetworkFailedSoloError
Code
SOLO-2027
Category
Deployment
Ownership
Infrastructure
Retryable
No
Description
Thrown when solo consensus network deploy cannot bring up the consensus network; the underlying failure is wrapped in cause. This step installs the solo-deployment Helm chart that creates the consensus node pods and their supporting services, so the error means that install did not succeed. Typical roots are a Helm release failure (bad chart version or values), an image that cannot be pulled, insufficient cluster resources to schedule the nodes, or a loss of connectivity to the cluster during the deploy.
Troubleshooting Steps
Check solo logs: tail -n 100 ~/.solo/logs/solo.log
Thrown when solo needs to act on a block node but cannot determine which cluster (kubeconfig context) it lives in; the message names the blockNodeId. solo maps each block node to a registered cluster reference to find the context for its operations, so this is raised when no such mapping resolves — typically because the block node is not associated with a registered cluster reference, or the referenced cluster is missing from the deployment configuration.
Troubleshooting Steps
List registered cluster references: solo cluster-ref config list
Verify the block node is associated with a registered cluster
Check deployment configuration: solo deployment config info
Thrown when solo needs to act on a mirror node but cannot determine which cluster (kubeconfig context) it lives in; the message names the mirrorNodeId. solo maps each mirror node to a registered cluster reference to find the context for its operations, so this is raised when no such mapping resolves — typically because the mirror node is not associated with a registered cluster reference, or the referenced cluster is missing from the deployment configuration.
Troubleshooting Steps
List registered cluster references: solo cluster-ref config list
Verify the mirror node is associated with a registered cluster
Check deployment configuration: solo deployment config info
4.1.2.30 - SOLO-2031
DeploymentImportFailedSoloError — Deployment
DeploymentImportFailedSoloError
Code
SOLO-2031
Category
Deployment
Ownership
Infrastructure
Retryable
Yes
Description
Thrown when solo deployment config import cannot reconstruct the local config from a cluster’s solo-remote-config ConfigMap: the cluster is unreachable, no Solo deployment exists in the targeted context/namespace, the remote config is unparseable, or the selection is ambiguous in quiet mode. Retryable because transient connectivity issues often resolve on retry.
Troubleshooting Steps
Verify the kube context is reachable: kubectl –context get namespaces
Verify the targeted namespace contains a Solo deployment (solo-remote-config ConfigMap)
Check logs for details: tail -n 100 ~/.solo/logs/solo.log
4.1.3 - Component
4.1.3.1 - SOLO-3001
NodeTransactionFailedSoloError — Component
NodeTransactionFailedSoloError
Code
SOLO-3001
Category
Component
Ownership
Infrastructure
Retryable
No
Description
Thrown when a Hedera SDK transaction that solo submitted to a consensus node receives a receipt whose status is not SUCCESS. The error message carries the operation that failed and the raw network status code (for example node create transaction failed with status: INVALID_SIGNATURE). This means the network reached and rejected the transaction rather than failing to deliver it: common causes are a node that has not yet reached ACTIVE during setup, staking, or a network upgrade; an operator/admin key that does not match the account; or an address-book/state precondition that the transaction violated. The specific status code identifies which.
Troubleshooting Steps
Check the solo logs for details: tail -n 100 ~/.solo/logs/solo.log
Verify the node pod is running: kubectl get pods -n -l solo.hedera.com/type=network-node
Consult the Hedera documentation for the meaning of the status code
4.1.3.2 - SOLO-3003
NodeBuildUploadFailedSoloError — Component
NodeBuildUploadFailedSoloError
Code
SOLO-3003
Category
Component
Ownership
Infrastructure
Retryable
Yes
Description
Thrown when solo cannot upload the build.zip artifact; the underlying failure is wrapped in cause. solo uploads the packaged build so nodes can be provisioned from it, so this means the upload failed — for example the source file was missing or unreadable, or the destination was unreachable. It is retryable.
Troubleshooting Steps
Review solo logs: tail -n 100 ~/.solo/logs/solo.log
Check node pod status: kubectl get pods -n -l solo.hedera.com/type=network-node
Inspect the pod for more detail: kubectl describe pod -n
4.1.3.3 - SOLO-3004
NodeBuildCopyFailedSoloError — Component
NodeBuildCopyFailedSoloError
Code
SOLO-3004
Category
Component
Ownership
Infrastructure
Retryable
Yes
Description
Thrown when solo cannot copy a local build into a consensus node; the underlying failure is wrapped in cause. When running with a local platform build, solo copies the build artifacts into the node pod, so this means that copy failed — for example the pod was not reachable, the destination path was not writable, or the connection dropped mid-copy. It is retryable.
Troubleshooting Steps
Check pod status: kubectl get pods -n -l solo.hedera.com/type=network-node
Verify the local build path is valid and readable
Review solo logs: tail -n 100 ~/.solo/logs/solo.log
4.1.3.4 - SOLO-3005
NodeJfrExecutionFailedSoloError — Component
NodeJfrExecutionFailedSoloError
Code
SOLO-3005
Category
Component
Ownership
Infrastructure
Retryable
Yes
Description
Thrown when a Java Flight Recorder (JFR) operation on a consensus node pod fails; the message names the operation and the pod. solo runs JFR commands inside the node container to capture profiling data, so this means that command failed — for example the pod was not reachable or the command returned an error. It is retryable.
Troubleshooting Steps
Check if the node pod is running: kubectl get pod -n
Verify the pod has jcmd available: kubectl exec -n – which jcmd
Review solo logs: tail -n 100 ~/.solo/logs/solo.log
4.1.3.5 - SOLO-3006
NodeJfrPidNotFoundSoloError — Component
NodeJfrPidNotFoundSoloError
Code
SOLO-3006
Category
Component
Ownership
Solo
Retryable
No
Description
Thrown when solo cannot find the ServicesMain process id inside a consensus node pod; the message names the pod. JFR profiling must attach to the running node process, so this is raised when that process cannot be located — which points to an unexpected container state or a defect in how solo locates the process, and is treated as an internal Solo error.
Troubleshooting Steps
Verify the consensus node is running inside the pod: kubectl exec – ps axww -o pid,command
Check node startup logs: kubectl logs -n
Restart the node if ServicesMain is absent: solo consensus node restart
4.1.3.6 - SOLO-3007
NodeDebugArchiveFailedSoloError — Component
NodeDebugArchiveFailedSoloError
Code
SOLO-3007
Category
Component
Ownership
Solo
Retryable
No
Description
Thrown when solo cannot create the debug archive it assembles for troubleshooting; the underlying failure is wrapped in cause. The archive bundles a node’s logs and diagnostic data, and reaching this failure points to a problem in solo’s archive-creation logic rather than user or infrastructure input, so it is treated as an internal Solo error and should be reported with the full error output.
Troubleshooting Steps
Verify the output directory is writable
Check available disk space: df -h
Review solo logs: tail -n 100 ~/.solo/logs/solo.log
4.1.3.7 - SOLO-3008
BlockNodeConfigFailedSoloError — Component
BlockNodeConfigFailedSoloError
Code
SOLO-3008
Category
Component
Ownership
Infrastructure
Retryable
Yes
Description
Thrown when solo fails while building the block-nodes configuration; the underlying failure is wrapped in cause. solo generates the configuration that tells consensus nodes how to reach the block nodes, so this means that generation step failed — for example required connection details could not be resolved. It is retryable, since a transient resolution problem often clears on a later attempt.
Troubleshooting Steps
Check block node pod status: kubectl get pods -n -l block-node.hiero.com/type=block-node
Check network node pod status: kubectl get pods -n -l solo.hedera.com/type=network-node
Review solo logs: tail -n 100 ~/.solo/logs/solo.log
Verify the cluster is reachable: kubectl cluster-info –context
4.1.3.8 - SOLO-3009
ChartInstallFailedSoloError — Component
ChartInstallFailedSoloError
Code
SOLO-3009
Category
Component
Ownership
Infrastructure
Retryable
Yes
Description
Thrown when solo cannot install a Helm chart; the message names the chart and wraps the underlying failure in cause. solo installs charts to deploy its components, so this means the Helm install failed — for example a bad chart version or values, an image that cannot be pulled, or a cluster that is unreachable or short on resources. It is retryable, since transient registry or cluster issues often clear on a later attempt.
Troubleshooting Steps
Check Helm release status: helm list -n
Review Helm errors: helm status -n
Verify the cluster is reachable: kubectl cluster-info –context
Retry after inspecting solo logs: tail -n 100 ~/.solo/logs/solo.log
4.1.3.9 - SOLO-3010
NetworkDestroyFailedSoloError — Component
NetworkDestroyFailedSoloError
Code
SOLO-3010
Category
Component
Ownership
Infrastructure
Retryable
No
Description
Thrown when solo consensus network destroy cannot tear down the consensus network; the underlying failure is wrapped in cause. Destroy uninstalls the network Helm release and removes its consensus node pods and resources, so this means teardown did not complete — for example a Helm release could not be removed or the cluster API was unreachable.
Troubleshooting Steps
Check remaining Helm releases: helm list -A
Check for stuck namespaces: kubectl get namespaces
Manually clean up: helm uninstall -n
Review solo logs: tail -n 100 ~/.solo/logs/solo.log
4.1.3.10 - SOLO-3011
NodeNotReadySoloError — Component
NodeNotReadySoloError
Code
SOLO-3011
Category
Component
Ownership
Infrastructure
Retryable
No
Description
Thrown when a consensus node does not reach the expected status within the allotted polling attempts; the message names the node alias, the expected status, and the attempt count (attempt/maxAttempts). solo polls node status while waiting for nodes to come up or change state, and raises this once the attempts are exhausted without the node reaching the expected status — for example the node is crash-looping, stuck during startup, or unable to join the network.
Troubleshooting Steps
Check node pod status: kubectl get pods -n -l solo.hedera.com/node-name=
Review solo logs: tail -n 100 ~/.solo/logs/solo.log
4.1.3.11 - SOLO-3012
RapidFireExecutionSoloError — Component
RapidFireExecutionSoloError
Code
SOLO-3012
Category
Component
Ownership
Infrastructure
Retryable
Yes
Description
Thrown when a rapid-fire load test step fails to execute; the message describes the failing step and, when present, wraps the underlying cause. Rapid-fire runs load against the network, so this means one of its execution steps did not succeed. It is retryable, since transient cluster or network issues during the test often clear on a later attempt.
Troubleshooting Steps
Check NLG pod logs for TPS output and errors: kubectl logs -n -l app.kubernetes.io/instance=network-load-generator
Retry with lower load parameters or a reduced –max-tps value
4.1.3.12 - SOLO-3013
NodeStakeTransactionErrorSoloError — Component
NodeStakeTransactionErrorSoloError
Code
SOLO-3013
Category
Component
Ownership
Infrastructure
Retryable
Yes
Description
Thrown when a staking transaction fails to execute; when available the underlying failure is wrapped in cause. solo submits staking transactions to configure how accounts and nodes stake, so this means the transaction was rejected or could not be submitted. It is retryable, since a transient network or node-readiness issue often clears on a later attempt.
Troubleshooting Steps
Verify the treasury account has sufficient HBAR balance.
Confirm the node is in ACTIVE status: kubectl get pods -n -l solo.hedera.com/type=network-node
Check gRPC connectivity to the consensus node.
Review solo logs: tail -n 100 ~/.solo/logs/solo.log
Thrown when the prepare-upgrade transaction fails to execute; when available the underlying failure is wrapped in cause. This transaction stages the upgrade artifacts on the network before a freeze-upgrade, so this means staging was rejected or could not be submitted — for example the upgrade file was not present or valid, or the network could not be reached. It is retryable.
Troubleshooting Steps
Verify the node admin key is correct and loaded from the k8s secret.
Confirm the freeze admin account has sufficient HBAR balance.
Verify the upgrade zip file hash is correct.
Check node client connection to the consensus network.
Review solo logs: tail -n 100 ~/.solo/logs/solo.log
Thrown when a freeze-upgrade transaction fails to execute; when available the underlying failure is wrapped in cause. solo submits this transaction to freeze the network in preparation for a software upgrade, so this means it was rejected or could not be submitted — for example the prepared upgrade was not staged, the admin key did not sign, or the network could not be reached. It is retryable.
Troubleshooting Steps
Verify the node admin key is correct and loaded from the k8s secret.
Confirm the freeze admin account has sufficient HBAR balance.
Verify the nodes have completed the prepare upgrade step.
Verify gossip endpoints and gRPC service endpoints are reachable from the network.
Review solo logs: tail -n 100 ~/.solo/logs/solo.log
4.1.3.15 - SOLO-3016
NodeFreezeTransactionErrorSoloError — Component
NodeFreezeTransactionErrorSoloError
Code
SOLO-3016
Category
Component
Ownership
Infrastructure
Retryable
Yes
Description
Thrown when a freeze-only transaction fails to execute; when available the underlying failure is wrapped in cause. solo submits a freeze-only transaction to pause the network (for example before maintenance), so this means the transaction was rejected or could not be submitted. It is retryable, since a transient network or node-readiness problem often clears on a later attempt.
Troubleshooting Steps
Verify the node admin key is correct and loaded from the k8s secret.
Confirm the freeze admin account has the correct operator key set.
Verify the freeze admin account has sufficient HBAR balance.
Verify gossip endpoints and gRPC service endpoints are reachable from the network.
Review solo logs: tail -n 100 ~/.solo/logs/solo.log
4.1.3.16 - SOLO-3017
NodeUpdateTransactionErrorSoloError — Component
NodeUpdateTransactionErrorSoloError
Code
SOLO-3017
Category
Component
Ownership
Infrastructure
Retryable
No
Description
Thrown when the node-update transaction fails to execute; when available the underlying failure is wrapped in cause. solo submits a node-update transaction to change a consensus node’s address-book entry (keys or endpoints), so this means the transaction was rejected or could not be submitted — for example the signing key was wrong, the updated values were invalid, or the network could not be reached.
Troubleshooting Steps
Verify the node admin key is correct and loaded from the k8s secret.
Confirm the node client is connected to the consensus network.
Check if the new account number is valid and funded.
Review solo logs: tail -n 100 ~/.solo/logs/solo.log
4.1.3.17 - SOLO-3018
NodeDeleteTransactionErrorSoloError — Component
NodeDeleteTransactionErrorSoloError
Code
SOLO-3018
Category
Component
Ownership
Infrastructure
Retryable
No
Description
Thrown when the node-delete transaction fails to execute; when available the underlying failure is wrapped in cause. solo submits a node-delete transaction to remove a consensus node from the address book, so this means the transaction was rejected or could not be submitted — for example the admin key did not sign, the target node id was invalid, or the network could not be reached.
Troubleshooting Steps
Verify the node admin key is correct and loaded from the k8s secret.
Confirm the node exists in the current address book.
Verify gossip endpoints and gRPC service endpoints are reachable from the network.
Review solo logs: tail -n 100 ~/.solo/logs/solo.log
4.1.3.18 - SOLO-3019
NodeCreateTransactionErrorSoloError — Component
NodeCreateTransactionErrorSoloError
Code
SOLO-3019
Category
Component
Ownership
Infrastructure
Retryable
No
Description
Thrown when the node-create transaction fails to execute; when available the underlying failure is wrapped in cause. solo submits a node-create transaction to add a consensus node to the network’s address book, so this means the transaction was rejected or could not be submitted — for example the admin key did not sign, the node endpoints or parameters were invalid, or the network could not be reached.
Troubleshooting Steps
Verify gossip endpoints and gRPC service endpoints are reachable from the network.
Confirm the admin key is valid and the account has sufficient HBAR.
Review solo logs: tail -n 100 ~/.solo/logs/solo.log
4.1.3.19 - SOLO-3021
AccountBalanceQueryFailedSoloError — Component
AccountBalanceQueryFailedSoloError
Code
SOLO-3021
Category
Component
Ownership
Infrastructure
Retryable
Yes
Description
Thrown when solo cannot read an account’s HBAR balance from the network via the Hedera SDK; the message names the account and, when present, wraps the underlying cause. solo queries balances to verify funding and confirm operations, so this is raised when the balance query does not return — typically because the target consensus node is unreachable or not yet ACTIVE, or the SDK client is misconfigured. It is retryable, since a transient network or node-readiness issue often clears on a later attempt.
Troubleshooting Steps
Verify gossip endpoints and gRPC service endpoints are reachable from the network.
Confirm the account ID is valid and exists on the network.
Review solo logs: tail -n 100 ~/.solo/logs/solo.log
4.1.3.20 - SOLO-3022
ExplorerDeployFailedSoloError — Component
ExplorerDeployFailedSoloError
Code
SOLO-3022
Category
Component
Ownership
Infrastructure
Retryable
No
Description
Thrown when solo explorer node add cannot bring up the Hiero Explorer: the Helm release for the explorer chart failed to install, or its pods never reached a Ready state before solo stopped waiting. The original failure is wrapped in cause.message. Typical roots are an explorer image that cannot be pulled, misconfigured chart values (for example an unreachable mirror-node endpoint), a TLS/cert-manager prerequisite that is not ready, or insufficient cluster resources to schedule the pod.
Troubleshooting Steps
Check solo logs: tail -n 100 ~/.solo/logs/solo.log
Inspect explorer pods: kubectl get pods -A -l app.kubernetes.io/component=hiero-explorer
Inspect Helm release: helm status -n
4.1.3.21 - SOLO-3023
ExplorerUpgradeFailedSoloError — Component
ExplorerUpgradeFailedSoloError
Code
SOLO-3023
Category
Component
Ownership
Infrastructure
Retryable
No
Description
Thrown when solo explorer node upgrade cannot upgrade the Hiero Explorer; the underlying failure is wrapped in cause. Upgrade re-applies the explorer Helm release at a new chart or version, so this means the upgrade did not succeed — for example a Helm failure, an image that cannot be pulled, or misconfigured values.
Troubleshooting Steps
Check solo logs: tail -n 100 ~/.solo/logs/solo.log
Inspect Helm release: helm status -n
View explorer pod logs: kubectl logs -n
4.1.3.22 - SOLO-3024
ExplorerDestroyFailedSoloError — Component
ExplorerDestroyFailedSoloError
Code
SOLO-3024
Category
Component
Ownership
Infrastructure
Retryable
No
Description
Thrown when solo explorer node destroy cannot tear down the Hiero Explorer; the underlying failure is wrapped in cause. Destroy uninstalls the explorer Helm release and removes its resources, so this means that teardown did not complete — for example a Helm release could not be removed or the cluster API was unreachable.
Troubleshooting Steps
Check solo logs: tail -n 100 ~/.solo/logs/solo.log
List Helm releases: helm list -A
Force-uninstall if stuck: helm uninstall -n
4.1.3.23 - SOLO-3025
RelayDeployFailedSoloError — Component
RelayDeployFailedSoloError
Code
SOLO-3025
Category
Component
Ownership
Infrastructure
Retryable
No
Description
Thrown when solo relay node add cannot deploy the JSON-RPC relay; the underlying failure is wrapped in cause. Deploy installs the relay Helm release, so this means that install did not succeed — for example a Helm failure, an image that cannot be pulled, misconfigured values (such as an unreachable network or mirror-node endpoint), or insufficient cluster resources.
Troubleshooting Steps
Check solo logs: tail -n 100 ~/.solo/logs/solo.log
Inspect relay pods: kubectl get pods -A -l app.kubernetes.io/instance=relay-
Inspect Helm release: helm status -n
4.1.3.24 - SOLO-3026
RelayUpgradeFailedSoloError — Component
RelayUpgradeFailedSoloError
Code
SOLO-3026
Category
Component
Ownership
Infrastructure
Retryable
No
Description
Thrown when solo relay node upgrade cannot upgrade the JSON-RPC relay; the underlying failure is wrapped in cause. Upgrade re-applies the relay Helm release at a new chart or version, so this means the upgrade did not succeed — for example a Helm failure, an image that cannot be pulled, or misconfigured values.
Troubleshooting Steps
Check solo logs: tail -n 100 ~/.solo/logs/solo.log
Inspect Helm release: helm status -n
View relay pod logs: kubectl logs -n
4.1.3.25 - SOLO-3027
RelayDestroyFailedSoloError — Component
RelayDestroyFailedSoloError
Code
SOLO-3027
Category
Component
Ownership
Infrastructure
Retryable
No
Description
Thrown when solo relay node destroy cannot tear down the JSON-RPC relay; the underlying failure is wrapped in cause. Destroy uninstalls the relay Helm release and removes its resources, so this means teardown did not complete — for example a Helm release could not be removed or the cluster API was unreachable.
Troubleshooting Steps
Check solo logs: tail -n 100 ~/.solo/logs/solo.log
List Helm releases: helm list -A
Force-uninstall if stuck: helm uninstall -n
4.1.3.26 - SOLO-3028
RelayNotRunningSoloError — Component
RelayNotRunningSoloError
Code
SOLO-3028
Category
Component
Ownership
Infrastructure
Retryable
Yes
Description
Thrown when a JSON-RPC relay that should be running is not; the message names the release and wraps the underlying failure in cause. solo checks that the relay pods are present and running before relying on it, so this means that check failed. It is retryable, since a relay that is still starting or briefly restarting often recovers on a later attempt.
Troubleshooting Steps
Check relay pod status: kubectl get pods -A | grep
View relay pod logs: kubectl logs -n -l app.kubernetes.io/instance=
Check solo logs: tail -n 100 ~/.solo/logs/solo.log
4.1.3.27 - SOLO-3029
RelayNotReadySoloError — Component
RelayNotReadySoloError
Code
SOLO-3029
Category
Component
Ownership
Infrastructure
Retryable
Yes
Description
Thrown when a deployed JSON-RPC relay does not become ready in time; the message names the release and wraps the underlying failure in cause. solo waits for the relay pods to reach a Ready state after install, so this means that wait did not succeed in time. It is retryable, since a relay that is merely slow to start often becomes ready on a later attempt; a persistent failure points to a crash-looping or misconfigured relay.
Troubleshooting Steps
Check relay pod status: kubectl get pods -A | grep
Describe relay pods to check readiness probe failures: kubectl describe pods -A -l app.kubernetes.io/instance=
Check solo logs: tail -n 100 ~/.solo/logs/solo.log
Thrown when solo cannot retrieve the operator key the JSON-RPC relay needs; the underlying failure is wrapped in cause. The relay signs transactions with an operator account key that solo reads (for example from a secret), so this means that retrieval failed. It is retryable, since a transient cluster or lookup problem often clears on a later attempt.
Troubleshooting Steps
Verify K8s API connectivity: kubectl get pods -n
If an operator key secret exists, verify it has a privateKey field: kubectl get secret -n -o yaml | grep privateKey
Check solo logs: tail -n 100 ~/.solo/logs/solo.log
4.1.3.29 - SOLO-3031
MirrorNodeDeployFailedSoloError — Component
MirrorNodeDeployFailedSoloError
Code
SOLO-3031
Category
Component
Ownership
Infrastructure
Retryable
No
Description
Thrown when solo mirror node add cannot deploy the mirror node; the underlying failure is wrapped in cause. Deploy installs the mirror node Helm release (its importer, REST, and database components), so this means that install did not succeed — for example a Helm failure, an image that cannot be pulled, misconfigured values, or insufficient cluster resources.
Troubleshooting Steps
Check solo logs: tail -n 100 ~/.solo/logs/solo.log
Inspect mirror node pods: kubectl get pods -A -l app.kubernetes.io/instance=mirror-
Inspect Helm release: helm status -n
4.1.3.30 - SOLO-3032
MirrorNodeUpgradeFailedSoloError — Component
MirrorNodeUpgradeFailedSoloError
Code
SOLO-3032
Category
Component
Ownership
Infrastructure
Retryable
No
Description
Thrown when solo mirror node upgrade cannot upgrade the mirror node; the underlying failure is wrapped in cause. Upgrade re-applies the mirror node Helm release at a new chart or version, so this means the upgrade did not succeed — for example a Helm failure, an image that cannot be pulled, or misconfigured values.
Troubleshooting Steps
Check solo logs: tail -n 100 ~/.solo/logs/solo.log
Inspect Helm release: helm status -n
View mirror node pod logs: kubectl logs -n
4.1.3.31 - SOLO-3033
MirrorNodeDestroyFailedSoloError — Component
MirrorNodeDestroyFailedSoloError
Code
SOLO-3033
Category
Component
Ownership
Infrastructure
Retryable
No
Description
Thrown when solo mirror node destroy cannot tear down the mirror node; the underlying failure is wrapped in cause. Destroy uninstalls the mirror node Helm release and removes its resources, so this means teardown did not complete — for example a Helm release could not be removed or the cluster API was unreachable.
Troubleshooting Steps
Check solo logs: tail -n 100 ~/.solo/logs/solo.log
Thrown when solo cannot retrieve the operator key the mirror node needs; the underlying failure is wrapped in cause. solo reads the operator account key (for example from a secret) so the mirror node can perform its operations, so this means that retrieval failed. It is retryable, since a transient cluster or lookup problem often clears on a later attempt.
Troubleshooting Steps
Verify K8s API connectivity: kubectl get pods -n
If an operator key secret exists, verify it has a privateKey field: kubectl get secret -n -o yaml | grep privateKey
Check solo logs: tail -n 100 ~/.solo/logs/solo.log
4.1.3.33 - SOLO-3035
OneShotDeployFailedSoloError — Component
OneShotDeployFailedSoloError
Code
SOLO-3035
Category
Component
Ownership
Infrastructure
Retryable
No
Description
Thrown when a one-shot deployment fails; the message describes the failing step and wraps the underlying failure in cause. One-shot mode brings up a complete network in a single command by running many deploy steps in sequence, so this means one of those steps did not succeed — the message identifies which, and common roots are Helm, image, or cluster-resource problems in the underlying step.
Troubleshooting Steps
Check solo logs: tail -n 100 ~/.solo/logs/solo.log
If rollback was skipped, clean up partial resources: solo one-shot single destroy
If nothing else works, remove the SOLO_HOME directory and delete the cluster:
+kind delete cluster –name solo-cluster
rm -rf ~/.solo
4.1.3.34 - SOLO-3036
OneShotDestroyFailedSoloError — Component
OneShotDestroyFailedSoloError
Code
SOLO-3036
Category
Component
Ownership
Infrastructure
Retryable
No
Description
Thrown when destroying a one-shot deployment fails; the underlying failure is wrapped in cause. One-shot destroy tears down everything a one-shot deploy created, so this means that teardown did not complete — for example a Helm release or cluster could not be removed, or the cluster API was unreachable.
Troubleshooting Steps
Check solo logs: tail -n 100 ~/.solo/logs/solo.log
Thrown when solo cannot retrieve information about a one-shot deployment; the underlying failure is wrapped in cause. solo reads deployment details (such as component status and endpoints) to report them, so this means that lookup failed — for example the cluster was unreachable or the expected resources were not found.
Troubleshooting Steps
Check solo logs: tail -n 100 ~/.solo/logs/solo.log
Verify kubeconfig context is valid: kubectl cluster-info
Thrown when solo cannot prepare the Falcon values file used during deployment; the underlying failure is wrapped in cause. solo assembles this Helm values file from configuration and runtime inputs before installing, so this means that preparation step failed — for example a required input was missing or invalid, or the file could not be written.
Troubleshooting Steps
Check solo logs: tail -n 100 ~/.solo/logs/solo.log
Verify the profile YAML is valid: solo deployment profile validate
4.1.3.37 - SOLO-3039
BlockNodeDeployFailedSoloError — Component
BlockNodeDeployFailedSoloError
Code
SOLO-3039
Category
Component
Ownership
Infrastructure
Retryable
No
Description
Thrown when solo block node add cannot deploy a block node; the underlying failure is wrapped in cause. Deploy installs the block node Helm release, so this means that install did not succeed — for example a Helm failure, an image that cannot be pulled, misconfigured values, or insufficient cluster resources.
Troubleshooting Steps
Check solo logs: tail -n 100 ~/.solo/logs/solo.log
Inspect block node pods: kubectl get pods -A -l block-node.hiero.com/type=block-node
Inspect Helm release: helm status -n
Check Helm history: helm history -n
4.1.3.38 - SOLO-3040
BlockNodeDestroyFailedSoloError — Component
BlockNodeDestroyFailedSoloError
Code
SOLO-3040
Category
Component
Ownership
Infrastructure
Retryable
No
Description
Thrown when solo block node destroy cannot tear down a block node; the underlying failure is wrapped in cause. Destroy uninstalls the block node Helm release and removes its resources, so this means teardown did not complete — for example a Helm release could not be removed or the cluster API was unreachable.
Troubleshooting Steps
Check solo logs: tail -n 100 ~/.solo/logs/solo.log
Inspect block node pods: kubectl get pods -A -l block-node.hiero.com/type=block-node
Inspect Helm release: helm status -n
Check Helm history: helm history -n
4.1.3.39 - SOLO-3041
BlockNodeUpgradeFailedSoloError — Component
BlockNodeUpgradeFailedSoloError
Code
SOLO-3041
Category
Component
Ownership
Infrastructure
Retryable
No
Description
Thrown when solo block node upgrade cannot upgrade a block node; the underlying failure is wrapped in cause. Upgrade re-applies the block node Helm release at a new chart or version, so this means the upgrade did not succeed — for example a Helm failure, an image that cannot be pulled, or misconfigured values.
Troubleshooting Steps
Check solo logs: tail -n 100 ~/.solo/logs/solo.log
Inspect block node pods: kubectl get pods -A -l block-node.hiero.com/type=block-node
Inspect Helm release: helm status -n
Check Helm history: helm history -n
4.1.3.40 - SOLO-3042
BlockNodeAddExternalFailedSoloError — Component
BlockNodeAddExternalFailedSoloError
Code
SOLO-3042
Category
Component
Ownership
Infrastructure
Retryable
No
Description
Thrown when solo cannot register an external block node with the deployment; the underlying failure is wrapped in cause. Adding an external block node records a block node that runs outside this deployment so consensus nodes can use it, so this means that registration step failed — for example the provided endpoint was unreachable or the remote configuration could not be updated.
Troubleshooting Steps
Check solo logs: tail -n 100 ~/.solo/logs/solo.log
Inspect the remote config for the registered node: solo deployment config info
Inspect block node pods: kubectl get pods -A -l block-node.hiero.com/type=block-node
If the issue persists, report it with your solo log
Thrown when solo cannot remove an external block node from the deployment; the underlying failure is wrapped in cause. Removing an external block node updates the configuration so consensus nodes no longer use it, so this means that removal step failed — for example the remote configuration could not be updated.
Troubleshooting Steps
Check solo logs: tail -n 100 ~/.solo/logs/solo.log
Inspect the remote config for the registered node: solo deployment config info
Inspect block node pods: kubectl get pods -A -l block-node.hiero.com/type=block-node
If the issue persists, report it with your solo log
4.1.3.42 - SOLO-3044
BlockNodeHealthCheckFailedSoloError — Component
BlockNodeHealthCheckFailedSoloError
Code
SOLO-3044
Category
Component
Ownership
Infrastructure
Retryable
Yes
Description
Thrown when a block node health check does not pass; the message states the reason. solo health-checks a block node to confirm it is up and serving before relying on it, so this means the check reported the node unhealthy or could not reach it. It is retryable, since a block node that is still starting often passes on a later attempt.
Troubleshooting Steps
Check block node pod status: kubectl get pods -A -l block-node.hiero.com/type=block-node
Check pod logs: kubectl logs -n -l block-node.hiero.com/type=block-node
Check solo logs: tail -n 100 ~/.solo/logs/solo.log
4.1.3.43 - SOLO-3045
RapidFireLoadStartFailedSoloError — Component
RapidFireLoadStartFailedSoloError
Code
SOLO-3045
Category
Component
Ownership
Infrastructure
Retryable
Yes
Description
Thrown when solo cannot start a rapid-fire load run; the underlying failure is wrapped in cause. This step launches the load generator against the network, so this means startup failed — for example the load-test workload could not be created or scheduled. It is retryable, since transient cluster issues often clear on a later attempt.
Troubleshooting Steps
Check solo logs: tail -n 100 ~/.solo/logs/solo.log
Check NLG pod status: kubectl get pods -n -l app.kubernetes.io/instance=network-load-generator
Describe NLG pods for scheduling or image-pull errors: kubectl describe pods -n -l app.kubernetes.io/instance=network-load-generator
Check the NLG Helm release: helm status network-load-generator -n
4.1.3.44 - SOLO-3046
RapidFireLoadStopFailedSoloError — Component
RapidFireLoadStopFailedSoloError
Code
SOLO-3046
Category
Component
Ownership
Infrastructure
Retryable
No
Description
Thrown when solo cannot stop a rapid-fire load run; the underlying failure is wrapped in cause. This step halts the running load generator, so this means the stop did not succeed — for example the workload could not be reached or removed.
Troubleshooting Steps
Check solo logs for the root cause: tail -n 100 ~/.solo/logs/solo.log
Check NLG pod status: kubectl get pods -n -l app.kubernetes.io/instance=network-load-generator
Check for running NLG Java processes: kubectl exec -n – ps aux | grep java
To force-stop, uninstall the NLG chart: helm uninstall network-load-generator -n
4.1.3.45 - SOLO-3047
RapidFireKillFailedSoloError — Component
RapidFireKillFailedSoloError
Code
SOLO-3047
Category
Component
Ownership
Infrastructure
Retryable
No
Description
Thrown when solo cannot stop a running rapid-fire load test; the message names the test class and wraps the underlying failure in cause. This step terminates the load generator, so this means the stop did not succeed — for example the load-test pod or process could not be reached or signaled.
Troubleshooting Steps
Check if the test process is still running: kubectl exec -n – ps aux | grep
Manually kill the process: kubectl exec -n – pkill -f
To stop the load test entirely, uninstall the NLG chart: helm uninstall network-load-generator -n
4.1.3.46 - SOLO-3048
AccountCreationFailedSoloError — Component
AccountCreationFailedSoloError
Code
SOLO-3048
Category
Component
Ownership
Infrastructure
Retryable
No
Description
Thrown when creating a Hedera account through the SDK fails; the underlying failure is wrapped in cause. solo creates accounts (for example operator or treasury accounts) during network setup, so this means the create transaction did not succeed — commonly because the network rejected it (insufficient payer balance, key problems) or the consensus node could not be reached.
Troubleshooting Steps
Check solo logs: tail -n 100 ~/.solo/logs/solo.log
Verify consensus nodes are running: kubectl get pods -n
Check node logs for errors: kubectl logs -n
Create a new account: solo ledger account create
4.1.3.47 - SOLO-3049
AccountKeyUpdateFailedSoloError — Component
AccountKeyUpdateFailedSoloError
Code
SOLO-3049
Category
Component
Ownership
Infrastructure
Retryable
No
Description
Thrown when updating the keys on a Hedera account fails; the message names the account. solo rotates account keys (for example replacing genesis keys) with an update transaction, so this means that transaction did not succeed — commonly because the existing key did not sign correctly, the new key is invalid, or the network rejected or could not be reached.
Troubleshooting Steps
Check solo logs: tail -n 100 ~/.solo/logs/solo.log
Verify consensus nodes are running: kubectl get pods -n
Verify the account ID is correct and the account exists on the network
4.1.3.48 - SOLO-3050
AccountKeysBatchUpdateFailedSoloError — Component
AccountKeysBatchUpdateFailedSoloError
Code
SOLO-3050
Category
Component
Ownership
Infrastructure
Retryable
No
Description
Thrown when a batch key-update over several accounts does not fully succeed; the message reports how many accounts were not updated. solo updates account keys in bulk during setup and raises this when one or more of those updates is rejected — typically due to signing or key problems on the affected accounts, or transient network failures while submitting the batch.
Troubleshooting Steps
Check solo logs: tail -n 100 ~/.solo/logs/solo.log
Verify consensus nodes are running: kubectl get pods -n
Verify operator account has sufficient permissions
Update individual accounts: solo ledger account update
4.1.3.49 - SOLO-3051
AccountTransferFailedSoloError — Component
AccountTransferFailedSoloError
Code
SOLO-3051
Category
Component
Ownership
Infrastructure
Retryable
No
Description
Thrown when an HBAR transfer transaction fails; the underlying failure is wrapped in cause. solo transfers HBAR to fund accounts during setup and account operations, so this means the transfer was rejected or could not be submitted — commonly an insufficient sender balance, a signing problem, or an unreachable consensus node.
Troubleshooting Steps
Check solo logs: tail -n 100 ~/.solo/logs/solo.log
Verify consensus nodes are running: kubectl get pods -n
Verify the sender account has sufficient HBAR balance
4.1.3.50 - SOLO-3052
AccountInfoFailedSoloError — Component
AccountInfoFailedSoloError
Code
SOLO-3052
Category
Component
Ownership
Infrastructure
Retryable
No
Description
Thrown when solo cannot retrieve an account’s information from the network via the SDK; the underlying failure is wrapped in cause. It means the account-info query did not return — for example the account does not exist, the consensus node is unreachable or not yet ACTIVE, or the SDK client is misconfigured.
Troubleshooting Steps
Check solo logs: tail -n 100 ~/.solo/logs/solo.log
Verify consensus nodes are running: kubectl get pods -n
Verify the account ID exists on the network
4.1.3.51 - SOLO-3053
AccountUpdateFailedSoloError — Component
AccountUpdateFailedSoloError
Code
SOLO-3053
Category
Component
Ownership
Infrastructure
Retryable
No
Description
Thrown when updating a Hedera account’s properties fails; the message names the account. solo submits an account-update transaction to change account settings, so this means that transaction did not succeed — for example the account’s key did not sign, the requested change was invalid, or the network rejected or could not be reached.
Troubleshooting Steps
Check solo logs: tail -n 100 ~/.solo/logs/solo.log
Verify consensus nodes are running: kubectl get pods -n
Verify the account exists on the network: solo ledger account update
4.1.3.52 - SOLO-3054
AccountSecretCreationFailedSoloError — Component
AccountSecretCreationFailedSoloError
Code
SOLO-3054
Category
Component
Ownership
Infrastructure
Retryable
No
Description
Thrown when solo cannot store an account’s key material as a Kubernetes secret; the message names the account. After creating or updating an account, solo persists its keys in a cluster secret so other components can use them, so this is raised when that secret cannot be created — for example the namespace is missing, a conflicting secret exists, or the Kubernetes API rejected the request.
Troubleshooting Steps
Check solo logs: tail -n 100 ~/.solo/logs/solo.log
Verify Kubernetes connectivity: kubectl get pods -n
Check existing secrets: kubectl get secrets -n
Verify RBAC permissions allow secret creation
4.1.3.53 - SOLO-3055
EvmAddressRetrievalFailedSoloError — Component
EvmAddressRetrievalFailedSoloError
Code
SOLO-3055
Category
Component
Ownership
Infrastructure
Retryable
No
Description
Thrown when solo cannot determine the EVM address associated with a Hedera account; the message names the account. solo derives or looks up the account EVM (alias) address for EVM-compatible workflows, so this is raised when that lookup fails — for example the account has no EVM address, or its account info could not be retrieved from the network.
Troubleshooting Steps
Check solo logs: tail -n 100 ~/.solo/logs/solo.log
Verify consensus nodes are running: kubectl get pods -n
Verify the account ID is valid and the account exists on the network
4.1.3.54 - SOLO-3056
NodeAccessConfigFailedSoloError — Component
NodeAccessConfigFailedSoloError
Code
SOLO-3056
Category
Component
Ownership
Infrastructure
Retryable
No
Description
Thrown when solo cannot configure access to a consensus node; the underlying failure is wrapped in cause. This step establishes the connection (such as a port-forward) and credentials needed to reach a node, so this means that configuration failed — for example the node pod or service was not reachable, or a required port-forward could not be created.
Troubleshooting Steps
Check solo logs: tail -n 100 ~/.solo/logs/solo.log
Verify consensus node pods are running: kubectl get pods -n
Check node logs: kubectl logs -n
Restart the consensus node: solo consensus node restart
4.1.3.55 - SOLO-3057
NodeClientLoadFailedSoloError — Component
NodeClientLoadFailedSoloError
Code
SOLO-3057
Category
Component
Ownership
Infrastructure
Retryable
No
Description
Thrown when solo cannot load the Hedera SDK client used to talk to the network; the underlying failure is wrapped in cause. The client is built from network and node connection details plus operator credentials, so this means that load step failed — for example the node services or endpoints could not be resolved, or the operator key was missing or invalid.
Troubleshooting Steps
Check solo logs: tail -n 100 ~/.solo/logs/solo.log
Verify consensus node pods are running: kubectl get pods -n
Inspect node pod logs: kubectl logs -n
Verify network port-forwards are active: solo deployment port-forwards refresh
4.1.3.56 - SOLO-3058
NodeClientRefreshFailedSoloError — Component
NodeClientRefreshFailedSoloError
Code
SOLO-3058
Category
Component
Ownership
Infrastructure
Retryable
No
Description
Thrown when solo cannot refresh the Hedera SDK client’s view of the network; the underlying failure is wrapped in cause. solo refreshes the client when the network’s nodes or endpoints change, so this means re-resolving the connection details failed — for example node services could not be retrieved or the new endpoints were unreachable.
Troubleshooting Steps
Check solo logs: tail -n 100 ~/.solo/logs/solo.log
Verify consensus node pods are running: kubectl get pods -n
Inspect node pod logs: kubectl logs -n
Verify network port-forwards are active: solo deployment port-forwards refresh
4.1.3.57 - SOLO-3059
NodeClientSetupFailedSoloError — Component
NodeClientSetupFailedSoloError
Code
SOLO-3059
Category
Component
Ownership
Infrastructure
Retryable
No
Description
Thrown when solo cannot set up the Hedera SDK client for the network; the underlying failure is wrapped in cause. Setup wires the client to the network node endpoints and operator account before any SDK calls, so this means that configuration step failed — for example endpoints could not be resolved or operator credentials were missing or invalid.
Troubleshooting Steps
Check solo logs: tail -n 100 ~/.solo/logs/solo.log
Verify consensus node pods are running: kubectl get pods -n
Check port-forward status: solo deployment port-forwards refresh
Inspect node logs: kubectl logs -n
4.1.3.58 - SOLO-3060
SdkPingFailedSoloError — Component
SdkPingFailedSoloError
Code
SOLO-3060
Category
Component
Ownership
Infrastructure
Retryable
Yes
Description
Thrown when solo SDK ping to a network node does not succeed within the allowed retries; the message names the node alias and the number of retries tried. solo pings nodes to confirm they are reachable and responsive before relying on them, and raises this once retries are exhausted. It is retryable because a node that is merely slow to start often responds on a later attempt; a persistent failure points to a node that is down or unreachable.
Troubleshooting Steps
Check solo logs: tail -n 100 ~/.solo/logs/solo.log
Verify the node pod is running: kubectl get pods -n -l solo.hedera.com/node-name=
Inspect node logs: kubectl logs -n
Check port-forward status: solo deployment port-forwards refresh
Restart the node: solo consensus node restart
4.1.3.59 - SOLO-3061
NodeServicesRetrievalFailedSoloError — Component
NodeServicesRetrievalFailedSoloError
Code
SOLO-3061
Category
Component
Ownership
Infrastructure
Retryable
No
Description
Thrown when solo cannot retrieve the Kubernetes services for the network’s consensus nodes; the underlying failure is wrapped in cause. solo reads these services to discover node endpoints, so this means the lookup failed — for example the namespace is wrong, the services do not exist yet, or the Kubernetes API was unreachable.
Troubleshooting Steps
Check solo logs: tail -n 100 ~/.solo/logs/solo.log
List Kubernetes services in the namespace: kubectl get svc -n
Verify consensus nodes are deployed: kubectl get pods -n
Thrown when solo cannot store a consensus node’s gossip keys as a Kubernetes secret; the message names the node alias. Gossip keys secure node-to-node communication and are mounted from a cluster secret, so this means that secret could not be created — for example the namespace is missing, a conflicting secret exists, or the Kubernetes API rejected the request.
Troubleshooting Steps
Check solo logs: tail -n 100 ~/.solo/logs/solo.log
Check existing secrets: kubectl get secrets -n
Verify RBAC permissions allow secret creation in the namespace
Re-run node setup: solo consensus node setup
4.1.3.61 - SOLO-3063
TlsKeySecretCreationFailedSoloError — Component
TlsKeySecretCreationFailedSoloError
Code
SOLO-3063
Category
Component
Ownership
Infrastructure
Retryable
No
Description
Thrown when solo cannot store a generated TLS key as a Kubernetes secret; when available the underlying failure is wrapped in cause. solo persists TLS keys in cluster secrets so components can mount them, so this means the secret could not be created — for example the namespace is missing, a conflicting secret exists, or the Kubernetes API rejected the request.
Troubleshooting Steps
Check solo logs: tail -n 100 ~/.solo/logs/solo.log
Check existing secrets: kubectl get secrets -n
Verify RBAC permissions allow secret creation in the namespace
Re-run node setup: solo consensus node setup
4.1.3.62 - SOLO-3064
TlsKeyGenerationFailedSoloError — Component
TlsKeyGenerationFailedSoloError
Code
SOLO-3064
Category
Component
Ownership
Infrastructure
Retryable
No
Description
Thrown when solo cannot generate a TLS key; the message includes the underlying error text. solo generates TLS keys to secure node communication, so this means generation failed — for example the key-generation tooling errored or a working file could not be written.
Troubleshooting Steps
Check solo logs: tail -n 100 ~/.solo/logs/solo.log
Verify required key generation tools are available
Re-run node setup: solo consensus node setup
4.1.3.63 - SOLO-3065
SigningKeyGenerationFailedSoloError — Component
SigningKeyGenerationFailedSoloError
Code
SOLO-3065
Category
Component
Ownership
Infrastructure
Retryable
No
Description
Thrown when solo cannot generate a node signing key; the underlying failure is wrapped in cause. Signing keys establish a consensus node identity, so this means generation failed — for example the key-generation tooling errored or a working file could not be written.
Troubleshooting Steps
Check solo logs: tail -n 100 ~/.solo/logs/solo.log
Verify key generation tools are available
Re-run key generation: solo keys consensus
4.1.3.64 - SOLO-3066
GrpcTlsKeyGenerationFailedSoloError — Component
GrpcTlsKeyGenerationFailedSoloError
Code
SOLO-3066
Category
Component
Ownership
Infrastructure
Retryable
No
Description
Thrown when solo cannot generate the gRPC TLS key for a consensus node; the underlying failure is wrapped in cause. solo generates this key to secure node gRPC traffic, so this means key generation failed — for example the key-generation tooling errored or a working file could not be written.
Troubleshooting Steps
Check solo logs: tail -n 100 ~/.solo/logs/solo.log
Verify key generation tools are available
Re-run node setup: solo consensus node setup
4.1.3.65 - SOLO-3067
GrpcTlsCertMismatchSoloError — Component
GrpcTlsCertMismatchSoloError
Code
SOLO-3067
Category
Component
Ownership
User
Retryable
No
Description
Thrown when the gRPC TLS certificate and key supplied by the user do not correspond; the message lists the certificate and key paths. solo pairs each provided certificate with its key for node gRPC TLS, so this means the structures do not match — typically a certificate and key from different pairs, or paths that were swapped or point to the wrong files.
Troubleshooting Steps
Ensure the number of certificate paths matches the number of key paths
Each certificate must have a corresponding private key in the same position
Verify the certificate and key files exist at the specified paths
4.1.3.66 - SOLO-3068
GrpcWebTlsCertMismatchSoloError — Component
GrpcWebTlsCertMismatchSoloError
Code
SOLO-3068
Category
Component
Ownership
User
Retryable
No
Description
Thrown when the gRPC Web TLS certificate and key supplied by the user do not correspond; the message lists the certificate and key paths. solo pairs each provided certificate with its key for the node’s gRPC Web TLS, so this means the structures do not match — typically a certificate and key from different pairs, or paths that were swapped or point to the wrong files.
Troubleshooting Steps
Ensure the number of certificate paths matches the number of key paths
Each certificate must have a corresponding private key in the same position
Verify the certificate and key files exist at the specified paths
Thrown when solo cannot create the TLS certificate secret for a consensus node; the message names the node alias. solo stores node certificates as Kubernetes secrets so they can be mounted, so this means the secret could not be created — for example the namespace is missing, a conflicting secret exists, or the Kubernetes API rejected the request.
Troubleshooting Steps
Check solo logs: tail -n 100 ~/.solo/logs/solo.log
Check existing secrets: kubectl get secrets -n
Verify RBAC permissions allow secret creation
Re-run node setup: solo consensus node setup
4.1.3.68 - SOLO-3070
CertificateParsingFailedSoloError — Component
CertificateParsingFailedSoloError
Code
SOLO-3070
Category
Component
Ownership
User
Retryable
No
Description
Thrown when solo cannot parse a certificate input the user provided; the message names the input, its type, and the line and index of the offending entry. solo parses each supplied certificate to validate and use it, so this means the content is not valid for the expected format — for example a malformed or truncated certificate, or the wrong kind of file supplied.
Troubleshooting Steps
Verify the certificate input format is correct for the expected type
Check the value at line , position of the input
Ensure certificate values are properly formatted (PEM or DER encoded)
4.1.3.69 - SOLO-3071
CertificateFileNotFoundSoloError — Component
CertificateFileNotFoundSoloError
Code
SOLO-3071
Category
Component
Ownership
User
Retryable
No
Description
Thrown when a certificate file the user referenced does not exist at the given path; the message names the path and input type, with the line and index of the offending entry. solo reads certificate files from the paths provided on the command line or in configuration, so this means the file is missing or the path is wrong — for example a typo, a relative path resolved from an unexpected directory, or a file that was moved.
Troubleshooting Steps
Verify the file exists at the path:
Ensure the path is absolute or relative to the working directory
Check file permissions allow reading the certificate file
Thrown when solo cannot create the TLS certificate secret used by the Hiero Explorer; when available the underlying failure is wrapped in cause. The explorer is served over TLS using a certificate stored as a Kubernetes secret, so this means that secret could not be created — for example the namespace is missing, a conflicting secret exists, or the Kubernetes API rejected the request.
Troubleshooting Steps
Check solo logs: tail -n 100 ~/.solo/logs/solo.log
Check existing secrets: kubectl get secrets -n
Verify RBAC permissions allow secret creation
Re-deploy the explorer: solo explorer node add
4.1.3.71 - SOLO-3073
PlatformFileNotFoundSoloError — Component
PlatformFileNotFoundSoloError
Code
SOLO-3073
Category
Component
Ownership
Infrastructure
Retryable
No
Description
Thrown when a platform file solo needs does not exist; the message names the path. solo reads platform artifacts from expected locations during setup, so this means the file is missing — for example the platform build was incomplete, an earlier download or extract step did not produce it, or the path is wrong.
Troubleshooting Steps
Check solo logs: tail -n 100 ~/.solo/logs/solo.log
Verify the file exists at:
Ensure the node build artifacts are present and the build path is correct
4.1.3.72 - SOLO-3074
PlatformFileCopyFailedSoloError — Component
PlatformFileCopyFailedSoloError
Code
SOLO-3074
Category
Component
Ownership
Infrastructure
Retryable
No
Description
Thrown when solo cannot copy platform files into a consensus node pod; the message names the source files, the pod, and the destination directory, and wraps the underlying failure in cause. solo copies platform artifacts into the node container during setup, so this means the copy failed — for example the pod was not reachable, the destination path was not writable, or the connection dropped mid-copy.
Troubleshooting Steps
Check solo logs: tail -n 100 ~/.solo/logs/solo.log
Verify the pod is running: kubectl get pod -n
Check available disk space in the pod
Inspect pod logs: kubectl logs -n
4.1.3.73 - SOLO-3075
PlatformKeyFileMissingSoloError — Component
PlatformKeyFileMissingSoloError
Code
SOLO-3075
Category
Component
Ownership
Infrastructure
Retryable
No
Description
Thrown when a required key file is missing; the message names the file. solo expects certain key files to be present when provisioning a node, so this means one of them was not found — for example key generation did not produce it, or it was not copied into the expected location.
Troubleshooting Steps
Check solo logs: tail -n 100 ~/.solo/logs/solo.log
Verify the key file exists at:
Re-generate keys if needed: solo keys consensus
Re-run node setup: solo consensus node setup
4.1.3.74 - SOLO-3076
GenesisAdminKeySecretFailedSoloError — Component
GenesisAdminKeySecretFailedSoloError
Code
SOLO-3076
Category
Component
Ownership
Infrastructure
Retryable
No
Description
Thrown when solo cannot store a genesis account’s admin key as a Kubernetes secret; the message names the account. During genesis setup solo persists admin keys in cluster secrets for later use, so this is raised when that secret cannot be created — for example the namespace is missing, a conflicting secret exists, or the Kubernetes API rejected the request.
Troubleshooting Steps
Check solo logs: tail -n 100 ~/.solo/logs/solo.log
Check existing secrets: kubectl get secrets -n
Verify RBAC permissions allow secret creation
Redeploy the network: solo consensus network deploy
4.1.3.75 - SOLO-3077
GenesisDataGenerationFailedSoloError — Component
GenesisDataGenerationFailedSoloError
Code
SOLO-3077
Category
Component
Ownership
Infrastructure
Retryable
No
Description
Thrown when solo fails to generate the genesis data used to bootstrap a new network; the underlying failure is wrapped in cause. Genesis generation produces the initial accounts, keys, and configuration the network starts from, so this means that generation step did not complete — for example required inputs were missing or invalid, or a file could not be written.
Troubleshooting Steps
Check solo logs: tail -n 100 ~/.solo/logs/solo.log
Verify all consensus node configurations are correct
Check deployment configuration: solo deployment config info
Redeploy the network: solo consensus network deploy
4.1.3.76 - SOLO-3078
PostgresInitScriptCopyFailedSoloError — Component
PostgresInitScriptCopyFailedSoloError
Code
SOLO-3078
Category
Component
Ownership
Infrastructure
Retryable
No
Description
Thrown when solo cannot copy the mirror node Postgres initialization script into its container; the message names the namespace and wraps the underlying failure in cause. solo copies this script into the database container before running it, so this means the copy failed — for example the target container or pod was not reachable, or the destination was not writable.
Troubleshooting Steps
Check solo logs: tail -n 100 ~/.solo/logs/solo.log
Verify the Postgres pod is running: kubectl get pods -n -l app.kubernetes.io/name=postgresql
Inspect Postgres pod logs: kubectl logs -n
Re-deploy the mirror node: solo mirror node add
4.1.3.77 - SOLO-3079
PostgresInitScriptFailedSoloError — Component
PostgresInitScriptFailedSoloError
Code
SOLO-3079
Category
Component
Ownership
Infrastructure
Retryable
Yes
Description
Thrown when the mirror node Postgres initialization script fails to run; the message includes the number of attempts made and wraps the underlying failure. solo runs this script to initialize the mirror node database, so this means execution did not succeed across the attempts tried — for example the database was not ready or the script returned an error. It is retryable, since a database that is still starting often accepts the script on a later attempt.
Troubleshooting Steps
Check solo logs: tail -n 100 ~/.solo/logs/solo.log
Inspect Postgres pod logs: kubectl logs -n
Check Postgres pod status: kubectl describe pod -n
Re-deploy the mirror node: solo mirror node add
4.1.3.78 - SOLO-3080
MirrorPasswordSecretMissingSoloError — Component
MirrorPasswordSecretMissingSoloError
Code
SOLO-3080
Category
Component
Ownership
Infrastructure
Retryable
No
Description
Thrown when the mirror node database owner credential is absent from the expected secret — specifically MIRROR_IMPORTER_DB_OWNER is not present in the mirror-passwords secret. solo reads this secret to obtain the importer’s database owner, so this means the secret exists without the required key, or was not populated as expected during deployment.
Troubleshooting Steps
Check solo logs: tail -n 100 ~/.solo/logs/solo.log
Inspect the mirror-passwords secret: kubectl get secret mirror-passwords -n -o jsonpath="{.data}"
Re-deploy the mirror node to recreate secrets: solo mirror node add
Thrown when solo’s verification of a file’s content fails; the message describes what was being verified. solo verifies file content at certain steps to ensure it matches the expected value, so this means that check did not pass — the content was missing, incomplete, or different from what was required.
Troubleshooting Steps
Check solo logs: tail -n 100 ~/.solo/logs/solo.log
Verify consensus nodes are running and healthy: kubectl get pods -n
Inspect node logs for errors: kubectl logs -n
4.1.3.80 - SOLO-3082
HederaFileCreationFailedSoloError — Component
HederaFileCreationFailedSoloError
Code
SOLO-3082
Category
Component
Ownership
Infrastructure
Retryable
No
Description
Thrown when a Hedera File Service create transaction returns a non-success status; the message includes the network status. solo uses the File Service to store artifacts on the network (such as upgrade files), so this means the file create was rejected — the specific status code identifies why, for example a payer or signature problem or an invalid file.
Troubleshooting Steps
Check solo logs: tail -n 100 ~/.solo/logs/solo.log
Verify consensus nodes are running: kubectl get pods -n
Consult the Hedera documentation for the meaning of the status code
4.1.3.81 - SOLO-3083
HederaFileUpdateFailedSoloError — Component
HederaFileUpdateFailedSoloError
Code
SOLO-3083
Category
Component
Ownership
Infrastructure
Retryable
No
Description
Thrown when a Hedera File Service update transaction returns a non-success status; the message includes the network status. solo updates network-stored files (such as upgrade files) via the File Service, so this means the update was rejected — the specific status code identifies why.
Troubleshooting Steps
Check solo logs: tail -n 100 ~/.solo/logs/solo.log
Verify consensus nodes are running: kubectl get pods -n
Consult the Hedera documentation for the meaning of the status code
4.1.3.82 - SOLO-3084
HederaFileAppendFailedSoloError — Component
HederaFileAppendFailedSoloError
Code
SOLO-3084
Category
Component
Ownership
Infrastructure
Retryable
No
Description
Thrown when a Hedera File Service append transaction returns a non-success status; the message includes the chunk index and the network status. Large files are uploaded in chunks, so this means appending a particular chunk was rejected — the specific status code identifies why, for example a size limit or a payer or signature problem.
Troubleshooting Steps
Check solo logs: tail -n 100 ~/.solo/logs/solo.log
Verify consensus nodes are running: kubectl get pods -n
Consult the Hedera documentation for the meaning of the status code
4.1.3.83 - SOLO-3085
NodeStatusEmptyResponseSoloError — Component
NodeStatusEmptyResponseSoloError
Code
SOLO-3085
Category
Component
Ownership
Infrastructure
Retryable
No
Description
Thrown when a consensus node’s status check returns an empty response. solo queries each node’s status endpoint to determine its state, so an empty reply means the node returned nothing usable — typically because the node is not yet serving its status endpoint, or the request reached a target that is not ready.
Troubleshooting Steps
Check solo logs: tail -n 100 ~/.solo/logs/solo.log
Verify the consensus node pod is running: kubectl get pods -n
Inspect node logs: kubectl logs -n
4.1.3.84 - SOLO-3086
NodeStatusMissingLineSoloError — Component
NodeStatusMissingLineSoloError
Code
SOLO-3086
Category
Component
Ownership
Infrastructure
Retryable
No
Description
Thrown when a consensus node’s status check response is missing the expected status line. solo parses the status output to read the node’s current state, so this means the response came back but did not contain the line solo needs — usually because the node is still starting and has not produced full status output, or the output format was unexpected.
Troubleshooting Steps
Check solo logs: tail -n 100 ~/.solo/logs/solo.log
Verify the consensus node pod is running: kubectl get pods -n
Thrown when solo fails to create the set of predefined accounts it seeds into a new network; the underlying failure is wrapped in cause. These accounts are created during setup to provide ready-to-use funded accounts, so this means one of those creations did not succeed — commonly a network rejection, a signing or key problem, or an unreachable consensus node.
Troubleshooting Steps
Check solo logs: tail -n 100 ~/.solo/logs/solo.log
Verify consensus nodes are running: kubectl get pods -n
Check node logs for errors: kubectl logs -n
4.1.3.86 - SOLO-3088
FileContentMismatchSoloError — Component
FileContentMismatchSoloError
Code
SOLO-3088
Category
Component
Ownership
Infrastructure
Retryable
No
Description
Thrown when content read back from the network does not match what solo uploaded. After uploading a file (for example via the Hedera File Service), solo re-reads it and compares, so this means the round-trip verification failed — the stored content differs from what was sent, indicating the upload was incomplete or corrupted.
Troubleshooting Steps
Retry the file upload — transient network issues can cause partial or corrupt writes
Check solo logs for chunk append errors: tail -n 100 ~/.solo/logs/solo.log
Verify consensus nodes are healthy: kubectl get pods -n
Check node logs for transaction errors: kubectl logs -n
Confirm no concurrent process modified the same Hedera file during the upload
4.1.3.87 - SOLO-3089
NodeServiceNotFoundSoloError — Component
NodeServiceNotFoundSoloError
Code
SOLO-3089
Category
Component
Ownership
User
Retryable
No
Description
Thrown when solo cannot resolve the Kubernetes service for a specific consensus node; the message names the node alias. solo expects each node to expose a service it can reach, so this is raised when no matching service is found — typically because the node alias does not correspond to a deployed node, or the selected deployment or namespace does not contain it.
Troubleshooting Steps
Verify that node ‘’ exists in the deployment: solo deployment info
List all node services in the namespace: kubectl get svc -n
Check that the consensus node pod is running: kubectl get pods -n -l app=
Check solo logs for more context: tail -n 100 ~/.solo/logs/solo.log
4.1.3.88 - SOLO-3090
BlockNodeJfrCollectionFailedSoloError — Component
BlockNodeJfrCollectionFailedSoloError
Code
SOLO-3090
Category
Component
Ownership
Infrastructure
Retryable
Yes
Description
Thrown when solo block node collect-jfr cannot collect the Java Flight Recorder recording from a block node; the underlying failure is wrapped in cause. Retryable, since a transient pod or cluster-API problem often clears on a later attempt.
Troubleshooting Steps
Check solo logs: tail -n 100 ~/.solo/logs/solo.log
Inspect block node pods: kubectl get pods -A -l block-node.hiero.com/type=block-node
Verify the block node was deployed with Java Flight Recorder enabled
Verify the cluster is reachable: kubectl cluster-info –context
4.1.3.89 - SOLO-3091
GossipKeySecretRestoreFailedSoloError — Component
GossipKeySecretRestoreFailedSoloError
Code
SOLO-3091
Category
Component
Ownership
Infrastructure
Retryable
No
Description
Thrown when solo cannot restore a consensus node’s gossip keys from its Kubernetes secret back to the local keys directory; the message names the node alias. When --debug is off the on-disk gossip keys are deleted after they are uploaded to the cluster, so later commands re-fetch them from the secret — this means that secret could not be read or did not contain the expected key files (for example the namespace or secret is missing, or the Kubernetes API rejected the request).
Troubleshooting Steps
Check solo logs: tail -n 100 ~/.solo/logs/solo.log
Confirm the gossip key secret exists: kubectl get secret network--keys-secrets -n
Verify RBAC permissions allow reading secrets in the namespace
4.1.3.90 - SOLO-3092
SdkClientNoHealthyNodesSoloError — Component
SdkClientNoHealthyNodesSoloError
Code
SOLO-3092
Category
Component
Ownership
Infrastructure
Retryable
Yes
Description
Thrown when the Hedera SDK client reports “failed to find a healthy working node”, meaning the SDK client’s gRPC connections to the consensus network are all marked unhealthy. This refers to the SDK client’s network connectivity, not the consensus node’s platform status — the consensus node itself is often still ACTIVE. The usual culprits are a broken local port-forward tunnel, an HAProxy issue, or a failure in another component whose deployment performs SDK transactions. It is retryable because re-establishing the connection (for example by recreating the port-forward) often resolves it.
Troubleshooting Steps
Check solo logs: tail -n 100 ~/.solo/logs/solo.log
Verify the consensus node platform status: solo consensus node states –deployment –node-aliases
Recreate the port-forwards: solo deployment refresh port-forwards
Check the HAProxy pods are running: kubectl get pods -n -l app.kubernetes.io/name=haproxy
If the consensus node is ACTIVE, inspect the other components that were being deployed (for example the JSON-RPC relay or mirror node database): kubectl get pods -n
4.1.3.91 - SOLO-3093
NodeKeyLoadFailedSoloError — Component
NodeKeyLoadFailedSoloError
Code
SOLO-3093
Category
Component
Ownership
User
Retryable
No
Description
Thrown when solo cannot load a consensus node key or certificate from its PEM file; the underlying failure is wrapped in cause and the message names the offending file. solo reads the gossip and gRPC TLS PEM files back from disk before using them, so this means the file is missing, truncated, or not valid PEM content — regenerating the keys replaces the corrupt files.
Troubleshooting Steps
Verify the file exists and contains valid PEM content:
Regenerate the node keys: solo keys consensus generate –deployment –generate-gossip-keys –generate-tls-keys
Check solo logs: tail -n 100 ~/.solo/logs/solo.log
4.1.3.92 - SOLO-3094
NodeContainerCrashedSoloError — Component
NodeContainerCrashedSoloError
Code
SOLO-3094
Category
Component
Ownership
Infrastructure
Retryable
No
Description
Thrown when solo detects that a consensus node’s container has entered a non-recoverable crash state (e.g. CrashLoopBackOff, OOMKilled) while polling for the node to become active. The underlying process will never recover on its own, so solo fails fast instead of exhausting the full polling timeout.
Troubleshooting Steps
Check node pod status: kubectl get pods -n -l solo.hedera.com/node-name=
Thrown when solo cannot store the JSON-RPC relay’s operator credentials as a Kubernetes secret; the message names the secret. Solo passes the relay operator id and key to the relay Helm chart via a pre-created Kubernetes secret rather than plaintext --set values, so this is raised when that secret cannot be created — for example the namespace is missing or the Kubernetes API rejected the request.
Troubleshooting Steps
Check solo logs: tail -n 100 ~/.solo/logs/solo.log
Verify Kubernetes connectivity: kubectl get pods -n
Check solo logs: tail -n 100 ~/.solo/logs/solo.log
Inspect mirror node importer pods: kubectl get pods -A -l app.kubernetes.io/component=importer
Verify the mirror node was deployed or upgraded with the Java Flight Recorder values overlay, which runs the importer on the JVM image
Verify the cluster is reachable: kubectl cluster-info –context
4.1.3.95 - SOLO-3097
NodeRestoreStatusMismatchSoloError — Component
NodeRestoreStatusMismatchSoloError
Code
SOLO-3097
Category
Component
Ownership
User
Retryable
No
Description
Thrown when a --state-file restore settles some nodes into ACTIVE and others into FREEZE_COMPLETE instead of all nodes reaching the same terminal status; the message lists each node alias with the status it reached. checkAllNodesAreActiveOrFrozen waits for every node to reach one of those two statuses and only skips the ACTIVE-only follow-up work when every node came up frozen, so a mixed result means the nodes disagree about whether the restored snapshot replays back into a freeze — continuing would run the ACTIVE-only checks against a node that can never become ACTIVE without a fresh start, which only fails after burning the full activeness timeout.
Troubleshooting Steps
Every restored node must reach the same status, ACTIVE or FREEZE_COMPLETE
Check pod status for the node(s) that disagree: kubectl get pods -n -l solo.hedera.com/node-name=
Thrown when code reaches a point that requires a value but the value is absent or empty; the error message describes the argument that was expected. In most cases this is a required CLI flag or configuration value that the command was invoked without (for example a deployment selection left empty). It is also used as an internal guard when a method is called without a mandatory argument, in which case it points to a defect in the calling code rather than to user input.
Troubleshooting Steps
Provide the missing argument. Run solo –help for usage information
4.1.4.2 - SOLO-4002
IllegalArgumentError — Validation
IllegalArgumentError
Code
SOLO-4002
Category
Validation
Ownership
User
Retryable
No
Description
Thrown when an argument value is not legal for the operation; the message states the reason, and the offending value is attached. solo validates argument values before using them, so this means a provided value was out of range, malformed, or otherwise unacceptable.
Troubleshooting Steps
An argument has an valid value or format.
Verify the argument value before retrying
4.1.4.3 - SOLO-4003
InvalidOutputFormatError — Validation
InvalidOutputFormatError
Code
SOLO-4003
Category
Validation
Ownership
User
Retryable
No
Description
Thrown when an output format is not one of the allowed values; the message names the offending value and the allowed set (json, yaml, wide). solo formats command output according to this flag, so this means an unsupported value was supplied.
Troubleshooting Steps
Valid output formats are: json, yaml, wide
4.1.4.4 - SOLO-4004
ConsensusNodeCountRequiredError — Validation
ConsensusNodeCountRequiredError
Code
SOLO-4004
Category
Validation
Ownership
User
Retryable
No
Description
Thrown when the consensus node count flag is required but missing; the message names the flag and the phase in which it is needed. solo needs to know how many consensus nodes to act on, so this means the flag must be supplied at that phase.
Troubleshooting Steps
Specify the number of consensus nodes using the – flag, e.g. – 3
4.1.4.5 - SOLO-4005
InvalidPortNumberError — Validation
InvalidPortNumberError
Code
SOLO-4005
Category
Validation
Ownership
User
Retryable
No
Description
Thrown while validating a port value supplied through a CLI flag or configuration field, when the value does not denote a usable TCP/UDP port: it is not an integer, or it falls outside the valid range of 1–65535. The error message echoes the offending value. This is raised before solo tries to bind, forward, or configure the port, so it reflects bad input (a typo, a non-numeric string, or 0/a negative/too-large number) rather than a port that is already in use.
Troubleshooting Steps
Port numbers must be integers between 1 and 65535
4.1.4.6 - SOLO-4006
LocalBuildPathNotFoundSoloError — Validation
LocalBuildPathNotFoundSoloError
Code
SOLO-4006
Category
Validation
Ownership
User
Retryable
No
Description
Thrown when a local build path does not exist; the message names it. solo reads platform artifacts from this path, so this means it is missing or the path is wrong.
Troubleshooting Steps
Verify the path exists: ls -la
Set the correct path: solo consensus node setup –local-build-path
Build the platform locally and point to the data/ directory output
Thrown when a local build path is missing the required apps and lib subdirectories; the message names the path. solo expects a local platform build to contain both, so this means the path does not point at a complete build.
Troubleshooting Steps
Verify the directory structure: ls -la
Ensure the path points to the data/ directory of the Hedera platform build
Expected layout: /apps/.jar and /lib/.jar (set via –local-build-path)
4.1.4.8 - SOLO-4008
LocalBuildNoJarFilesSoloError — Validation
LocalBuildNoJarFilesSoloError
Code
SOLO-4008
Category
Validation
Ownership
User
Retryable
No
Description
Thrown when no jar files are found in a local build subdirectory; the message names the subdirectory. solo expects the build subdirectories to contain jars, so this means the build is incomplete or the path is wrong.
Troubleshooting Steps
List files in the directory: ls -la
Ensure a complete platform build was performed before using –local-build-path
Expected: /apps/HederaNode.jar and /lib/*.jar
4.1.4.9 - SOLO-4009
NodeJarFilesNotInContainerSoloError — Validation
NodeJarFilesNotInContainerSoloError
Code
SOLO-4009
Category
Validation
Ownership
Solo
Retryable
No
Description
Thrown when no JAR files are found in the expected directory inside a node container; the message names the node alias and the directory. The platform software should have been copied to the node before starting it, so their absence indicates an internal ordering or setup defect and is treated as an internal Solo error.
Troubleshooting Steps
Run setup before starting: solo consensus node setup
Verify the directory inside the pod: kubectl exec -n – ls
Re-copy platform software: solo consensus node setup –local-build-path
4.1.4.10 - SOLO-4010
GrpcEndpointsRequiredSoloError — Validation
GrpcEndpointsRequiredSoloError
Code
SOLO-4010
Category
Validation
Ownership
User
Retryable
No
Description
Thrown when --grpc-endpoints is required for the chosen endpoint type but was not provided; the message names the endpoint type. Certain endpoint types need explicit gRPC endpoints, so this means the flag must be supplied for that type.
Troubleshooting Steps
Provide gRPC endpoints: solo consensus node add –grpc-endpoints ip:port,...
Or switch endpoint type: solo consensus node add –endpoint-type FQDN
Review flag usage: solo consensus node add –help
4.1.4.11 - SOLO-4011
OutputDirectoryNotSpecifiedSoloError — Validation
OutputDirectoryNotSpecifiedSoloError
Code
SOLO-4011
Category
Validation
Ownership
User
Retryable
No
Description
Thrown when an output directory is required but --output-dir was not set. solo exports context data to this directory, so this means the flag must be provided.
Troubleshooting Steps
Provide the output directory: solo node –output-dir
Run with –help to see required flags: solo node –help
4.1.4.12 - SOLO-4012
InputDirectoryNotSpecifiedSoloError — Validation
InputDirectoryNotSpecifiedSoloError
Code
SOLO-4012
Category
Validation
Ownership
User
Retryable
No
Description
Thrown when an input directory is required but --input-dir was not set. solo reads context data from this directory, so this means the flag must be provided.
Troubleshooting Steps
Provide the input directory: solo node –input-dir
Run with –help to see required flags: solo node –help
4.1.4.13 - SOLO-4013
WrapsKeyPathNotFoundSoloError — Validation
WrapsKeyPathNotFoundSoloError
Code
SOLO-4013
Category
Validation
Ownership
User
Retryable
No
Description
Thrown when the WRAPs key path does not exist; the message names the path. solo reads the WRAPs key from this path, so this means it is missing or the path is wrong.
Troubleshooting Steps
Verify the path: ls -la
Set the correct path: solo consensus node add –wraps-key-path
Or omit the flag to download WRAPs keys automatically
4.1.4.14 - SOLO-4014
ConfigFileNotFoundSoloError — Validation
ConfigFileNotFoundSoloError
Code
SOLO-4014
Category
Validation
Ownership
User
Retryable
No
Description
Thrown when a configuration file referenced by a flag does not exist; the message names the flag and the absolute and relative paths tried. solo reads the file from the provided path, so this means it is missing or the path is wrong — for example a typo or a relative path resolved from an unexpected directory.
Troubleshooting Steps
Verify the file exists: ls -la
Set the correct file path for the – flag
Run with –help for configuration file flags: solo consensus node setup –help
4.1.4.15 - SOLO-4015
NodeVersionMismatchSoloError — Validation
NodeVersionMismatchSoloError
Code
SOLO-4015
Category
Validation
Ownership
User
Retryable
No
Description
Thrown when the consensus node version saved in the remote config differs from the requested version; the message names both. solo guards against mixing versions, so this means the requested version does not match what the deployment recorded — align the versions.
Troubleshooting Steps
Check the saved version: solo deployment config info –deployment
Use the same version: solo consensus node setup –release-tag
Or upgrade the network first: solo consensus network upgrade –upgrade-version
4.1.4.16 - SOLO-4016
UpgradeVersionNotFoundSoloError — Validation
UpgradeVersionNotFoundSoloError
Code
SOLO-4016
Category
Validation
Ownership
User
Retryable
No
Description
Thrown when a requested upgrade version does not exist; the message names the version. solo looks up upgrade versions before using them, so this means the version is not available — for example a wrong or not-yet-published version.
Use a published release tag: solo consensus network upgrade –upgrade-version v0.x.y
4.1.4.17 - SOLO-4017
PvcFlagNotEnabledSoloError — Validation
PvcFlagNotEnabledSoloError
Code
SOLO-4017
Category
Validation
Ownership
User
Retryable
No
Description
Thrown when an operation needs PVCs but the PVCs flag is not enabled. Adding a node requires persistent storage, so this means PVCs must be enabled first.
Troubleshooting Steps
Redeploy with PVCs enabled: solo consensus network deploy –pvcs true
Check the current deployment configuration: solo deployment config info –deployment
PVCs are required for node add operations to persist state across pod restarts
4.1.4.18 - SOLO-4018
NonInteractivePromptSoloError — Validation
NonInteractivePromptSoloError
Code
SOLO-4018
Category
Validation
Ownership
User
Retryable
No
Description
Thrown when solo would need to prompt for input but is running non-interactively. A required value was not supplied and solo cannot ask for it (for example in CI or with prompts disabled), so provide the missing value explicitly (such as via the deployment flag).
Troubleshooting Steps
Provide required flags explicitly instead of relying on interactive prompts
Use to specify the deployment name
Run with –help to see all available flags: solo consensus node –help
4.1.4.19 - SOLO-4020
WrapsVersionConstraintSoloError — Validation
WrapsVersionConstraintSoloError
Code
SOLO-4020
Category
Validation
Ownership
User
Retryable
No
Description
Thrown when --wraps is used with a consensus node version below the minimum required; the message names the minimum version. WRAPs support requires a sufficiently new node version, so this means the selected version is too old.
Troubleshooting Steps
Upgrade consensus node first: solo consensus network upgrade –upgrade-version
Or disable WRAPs: solo consensus network deploy –wraps false
4.1.4.20 - SOLO-4021
StateFilePathNotFoundSoloError — Validation
StateFilePathNotFoundSoloError
Code
SOLO-4021
Category
Validation
Ownership
User
Retryable
No
Description
Thrown when the provided state file path does not exist; the message names the path (or notes it was not specified). solo needs a valid path to the state file, so this means the path is missing or wrong.
Troubleshooting Steps
Verify the path exists: ls -la <path ?? ‘'>
Download a valid state file first: solo consensus state download
Then provide either the downloaded .zip file or the download parent directory using –state-file
When a directory is provided, Solo looks for state files under: /states//
4.1.4.21 - SOLO-4022
StateFileNotFoundSoloError — Validation
StateFileNotFoundSoloError
Code
SOLO-4022
Category
Validation
Ownership
User
Retryable
No
Description
Thrown when a state file does not exist or is not a regular file; the message names the path. solo reads saved state from this file, so this means it is missing or the path points at something that is not a file.
Troubleshooting Steps
Verify the file exists and is a regular file: ls -la
Make sure the path points to a .zip file, not a directory or missing symlink target.
Download a valid state file first: solo consensus state download
When using a directory, pass the parent directory; Solo looks under /states//.
4.1.4.22 - SOLO-4023
InvalidStateFileFormatSoloError — Validation
InvalidStateFileFormatSoloError
Code
SOLO-4023
Category
Validation
Ownership
User
Retryable
No
Description
Thrown when a state file is not a .zip; the message names the path. solo expects saved state as a zip archive, so this means a non-zip file was supplied.
Troubleshooting Steps
Use a state file ending in .zip with –state-file <stateFile.zip>
Download a valid state file first: solo consensus state download
If passing a directory instead, Solo will select node-specific state files from /states//.
4.1.4.23 - SOLO-4024
InvalidStateZipFileNameSoloError — Validation
InvalidStateZipFileNameSoloError
Code
SOLO-4024
Category
Validation
Ownership
User
Retryable
No
Description
Thrown when a state zip file name is invalid; the message names it. solo expects state zip files to follow a specific naming convention, so this means the name does not match it.
Troubleshooting Steps
Download a valid state file first: solo consensus state download
Or rename the state zip file to use only letters, numbers, dots, underscores, and hyphens.
The file name must not start with a hyphen and must not contain slashes, spaces, shell syntax, or path traversal.
Example valid name: node1-state.zip
4.1.4.24 - SOLO-4025
ExplorerInvalidComponentIdSoloError — Validation
ExplorerInvalidComponentIdSoloError
Code
SOLO-4025
Category
Validation
Ownership
User
Retryable
No
Description
Thrown when an explorer component id is not valid; the message includes the value and its runtime type. solo expects component ids in a specific form, so this means the supplied id is malformed or of the wrong type.
Troubleshooting Steps
Inspect remote config state for corruption: kubectl get configmap solo-remote-config -n -o yaml
Check solo logs for config loading errors: tail -n 100 ~/.solo/logs/solo.log
If the issue persists, this may be an internal bug — report it with your solo log
4.1.4.25 - SOLO-4026
RelayInvalidComponentIdSoloError — Validation
RelayInvalidComponentIdSoloError
Code
SOLO-4026
Category
Validation
Ownership
User
Retryable
No
Description
Thrown when a relay component id is not valid; the message includes the value and its runtime type. solo expects component ids in a specific form, so this means the supplied id is malformed or of the wrong type.
Troubleshooting Steps
Inspect remote config state for corruption: kubectl get configmap solo-remote-config -n -o yaml
Check solo logs for config loading errors: tail -n 100 ~/.solo/logs/solo.log
If the issue persists, this may be an internal bug — report it with your solo log
Thrown when a mirror node component id is not valid; the message includes the value and its runtime type. solo expects component ids in a specific form, so this means the supplied id is malformed or of the wrong type.
Troubleshooting Steps
Inspect remote config state for corruption: kubectl get configmap solo-remote-config -n -o yaml
Check solo logs for config loading errors: tail -n 100 ~/.solo/logs/solo.log
If the issue persists, this may be an internal bug — report it with your solo log
4.1.4.27 - SOLO-4029
BlockNodeLocalImageNotFoundSoloError — Validation
BlockNodeLocalImageNotFoundSoloError
Code
SOLO-4029
Category
Validation
Ownership
User
Retryable
No
Description
Thrown when a local block node image with the given tag does not exist; the message names the tag. solo expects the referenced local image to be present (for example built or loaded into the cluster), so this means it is missing — build or load the image, or correct the tag.
Troubleshooting Steps
Verify the image exists locally: docker images | grep
Pull the image if missing: docker pull /block-node:
Ensure the tag is a valid semantic version
4.1.4.28 - SOLO-4030
BlockNodeInvalidComponentIdSoloError — Validation
BlockNodeInvalidComponentIdSoloError
Code
SOLO-4030
Category
Validation
Ownership
Solo
Retryable
No
Description
Thrown when a block node component id is not the expected type or format; the message includes the value and its runtime type. solo expects component ids in a specific form, so an invalid value passed internally points to a defect in the calling code and is treated as an internal Solo error.
Troubleshooting Steps
Inspect remote config for corruption: kubectl get configmap solo-remote-config -n -o yaml
Check solo logs for config loading errors: tail -n 100 ~/.solo/logs/solo.log
If the issue persists, this may be an internal bug — report it with your solo log
4.1.4.29 - SOLO-4033
InvalidHbarAmountSoloError — Validation
InvalidHbarAmountSoloError
Code
SOLO-4033
Category
Validation
Ownership
User
Retryable
No
Description
Thrown when an HBAR amount is invalid; the message includes the offending value. solo parses HBAR amounts from flags and config, so this means the value is not a valid amount — for example non-numeric, or negative where it is not allowed.
Troubleshooting Steps
Provide a valid positive numeric HBAR amount (e.g., 100 or 0.5)
Run solo ledger account create –help for usage information
4.1.4.30 - SOLO-4034
InvalidFileIdFormatSoloError — Validation
InvalidFileIdFormatSoloError
Code
SOLO-4034
Category
Validation
Ownership
User
Retryable
No
Description
Thrown when a file ID is not in the expected 0.0.<number> format; the message includes the offending value and an example. solo parses Hedera file IDs from input, so this means the value is malformed.
Troubleshooting Steps
Provide a file ID in the format 0.0. (e.g., 0.0.150)
Run solo ledger file –help for usage information
4.1.4.31 - SOLO-4035
InvalidEndpointFormatSoloError — Validation
InvalidEndpointFormatSoloError
Code
SOLO-4035
Category
Validation
Ownership
User
Retryable
No
Description
Thrown when an endpoint is not in the expected url:port format; the message includes the offending value. solo parses endpoints from flags and config, so this means the value is malformed — provide it as url:port.
Troubleshooting Steps
Provide the endpoint in url:port format (e.g., 127.0.0.1:50211)
Run solo –help for usage information
4.1.4.32 - SOLO-4036
InvalidCommaSeparatedStringSoloError — Validation
InvalidCommaSeparatedStringSoloError
Code
SOLO-4036
Category
Validation
Ownership
User
Retryable
No
Description
Thrown when an input is not a valid comma-separated string; the message includes the offending value. solo parses comma-separated lists from flags and config, so this means the value could not be parsed as such — for example stray separators or empty entries.
Troubleshooting Steps
Provide a comma-separated list of values (e.g., node1,node2,node3)
Do not include spaces around commas unless they are part of the values
4.1.4.33 - SOLO-4037
InvalidConfigNumberValueSoloError — Validation
InvalidConfigNumberValueSoloError
Code
SOLO-4037
Category
Validation
Ownership
User
Retryable
No
Description
Thrown when a numeric configuration value cannot be parsed; the message names the value and wraps the underlying failure in cause. solo expects a number here, so this means the provided value is not numeric or is not in the accepted form.
Troubleshooting Steps
Provide a valid integer or decimal number for this configuration option
Run solo –help for usage information
4.1.4.34 - SOLO-4038
InvalidStorageTypeSoloError — Validation
InvalidStorageTypeSoloError
Code
SOLO-4038
Category
Validation
Ownership
User
Retryable
No
Description
Thrown when a storage type value is invalid; the message includes the offending value. solo accepts a fixed set of storage types, so this means the supplied value is not one of them.
Troubleshooting Steps
Provide a valid storage type value
Run solo –help for usage information and supported storage types
4.1.4.35 - SOLO-4039
UnsupportedFlagFieldTypeSoloError — Validation
UnsupportedFlagFieldTypeSoloError
Code
SOLO-4039
Category
Validation
Ownership
Solo
Retryable
No
Description
Thrown when a flag is declared with a field type solo does not support; the message names the flag and the field type. solo maps flag field types to handling logic, so an unsupported type indicates an internal flag-definition defect and is treated as an internal Solo error.
Thrown when an upgrade target version is older than the currently deployed version; the message names the component, the target and current versions, and the flag to use. solo blocks downgrades to prevent accidental rollbacks, so this means the requested version is too old — choose a version equal to or newer than the deployed one.
Troubleshooting Steps
Specify a version equal to or newer than the currently deployed version () using
Downgrades are not supported — check the available releases before upgrading
4.1.4.37 - SOLO-4041
AdminKeysCountMismatchSoloError — Validation
AdminKeysCountMismatchSoloError
Code
SOLO-4041
Category
Validation
Ownership
User
Retryable
No
Description
Thrown when the number of admin public keys provided does not match the number of consensus nodes; the message reports both counts. solo expects one DER-encoded ED25519 public key per node, so this means the supplied comma-separated list is the wrong length — provide exactly one key per node.
Troubleshooting Steps
Provide exactly comma-separated DER encoded ED25519 public keys, one for each consensus node
Run solo consensus network deploy –help for usage information
4.1.4.38 - SOLO-4042
ComponentAlreadyExistsSoloError — Validation
ComponentAlreadyExistsSoloError
Code
SOLO-4042
Category
Validation
Ownership
Solo
Retryable
No
Description
Thrown when a component being added already exists in the remote configuration; the message names the component id. solo expects to add each component once, so a duplicate id at this point indicates an internal bookkeeping defect and is treated as an internal Solo error.
Thrown when a component id is required but was not provided; the message echoes the value. solo needs an id to locate or record a component, so a missing value passed internally points to a defect in the calling code and is treated as an internal Solo error.
Thrown when a component cannot be found during an operation; the message names the component id, its type, and the operation attempted. solo expected the component to be present at this point, so its absence indicates an internal inconsistency and is treated as an internal Solo error.
Thrown when a component of a given type and id is not present in the remote configuration; the message names both. solo expected the component to be recorded, so its absence here indicates an internal inconsistency and is treated as an internal Solo error.
Thrown when solo encounters a component type it does not recognize; the message names the type and, when present, the component id. solo dispatches on known component types, so an unknown value indicates an internal inconsistency and is treated as an internal Solo error.
Thrown when a configuration file is empty or contains invalid content. solo reads this file to drive a command, so this means it had no usable content — for example an empty file or content that does not match the expected format.
Troubleshooting Steps
Verify the configuration file is a valid YAML or JSON document
Check that the file is not empty and contains the expected fields
Run solo config ops backup to export a valid configuration for reference
4.1.4.44 - SOLO-4048
MultipleClustersFoundSoloError — Validation
MultipleClustersFoundSoloError
Code
SOLO-4048
Category
Validation
Ownership
User
Retryable
No
Description
Thrown when several clusters are available but none was selected; the message lists them. solo cannot guess which cluster to use, so it asks you to disambiguate with --cluster-ref.
Troubleshooting Steps
Specify the cluster reference using the –cluster-ref flag
List available cluster references: solo cluster-ref config list
4.1.4.45 - SOLO-4049
CacheNotMaterializedSoloError — Validation
CacheNotMaterializedSoloError
Code
SOLO-4049
Category
Validation
Ownership
User
Retryable
No
Description
Thrown when the cache is used before it has been materialized. solo requires the cache to be populated before it can be read, so this means a read happened too early in the workflow — materialize the cache first.
Troubleshooting Steps
Check solo logs: tail -n 100 ~/.solo/logs/solo.log
Run the cache pull step before using cached images: solo cache image –help
4.1.4.46 - SOLO-4050
CacheImageTemplateUnknownSoloError — Validation
CacheImageTemplateUnknownSoloError
Code
SOLO-4050
Category
Validation
Ownership
User
Retryable
No
Description
Thrown when a cache image template key is not recognized; the message names the key. solo resolves image versions against a known set of template keys, so this means the supplied key is not one of them — for example a typo or an unsupported template.
Troubleshooting Steps
Verify the cache image template key is correct in your configuration
Declare the template in the templates section before using it in version fields
4.1.4.47 - SOLO-4052
PathTraversalDetectedSoloError — Validation
PathTraversalDetectedSoloError
Code
SOLO-4052
Category
Validation
Ownership
User
Retryable
No
Description
Thrown when a resolved path falls outside the allowed base directory; the message names the resolved path and the base. solo blocks path traversal for safety, so this means the supplied path escaped the permitted directory — for example .. segments or an absolute path outside the base.
Troubleshooting Steps
Provide a path that is within the allowed base directory
Avoid using “..” path components that escape the base directory
4.1.4.48 - SOLO-4053
NodeAliasesMustBeArraySoloError — Validation
NodeAliasesMustBeArraySoloError
Code
SOLO-4053
Category
Validation
Ownership
Solo
Retryable
No
Description
Thrown when a node-aliases value is not an array of strings where one was required. solo expects this value to already be normalized to an array internally, so a non-array here points to a defect in the calling code and is treated as an internal Solo error.
Thrown when solo cannot resolve a node ID from a node alias; the message names the alias. solo maps aliases to node IDs, so this means the alias is not recognized — for example a typo or an alias not present in the deployment.
Troubleshooting Steps
Verify the node alias ‘’ is registered in the current deployment
Check registered nodes: solo deployment config info
4.1.4.50 - SOLO-4055
NodeAliasInferenceFailedSoloError — Validation
NodeAliasInferenceFailedSoloError
Code
SOLO-4055
Category
Validation
Ownership
User
Retryable
No
Description
Thrown when solo cannot infer a node alias from address data; the message includes the offending data. solo derives aliases from address-book data, so this means the data did not yield a usable alias — for example a malformed or unexpected entry.
Troubleshooting Steps
Verify the address data format is correct
Ensure the address book contains valid node alias information
4.1.4.51 - SOLO-4056
NodeAliasParseFailedSoloError — Validation
NodeAliasParseFailedSoloError
Code
SOLO-4056
Category
Validation
Ownership
User
Retryable
No
Description
Thrown when solo cannot parse a node alias from input; the message includes the offending value. solo parses node aliases from flags and config, so this means the value could not be parsed as an alias.
Troubleshooting Steps
Verify the node alias format (expected: node where N is a positive integer)
Check deployment configuration for valid node aliases: solo deployment config info
4.1.4.52 - SOLO-4057
DomainNameParseFailedSoloError — Validation
DomainNameParseFailedSoloError
Code
SOLO-4057
Category
Validation
Ownership
User
Retryable
No
Description
Thrown when solo cannot parse a domain name from the provided data; the message includes the offending input. solo parses domain names from configuration and flags, so this means the value is not a parseable domain — for example a malformed or empty value.
Troubleshooting Steps
Verify the domain name format is correct
Check the address book configuration for valid domain names
4.1.4.53 - SOLO-4058
UnknownTemplateDependencySoloError — Validation
UnknownTemplateDependencySoloError
Code
SOLO-4058
Category
Validation
Ownership
Solo
Retryable
No
Description
Thrown when a template references a dependency solo does not know; the message names the dependency. Templates may only reference declared dependencies, so an unknown one indicates an internal template defect and is treated as an internal Solo error.
Thrown when no consensus nodes are found to operate on. solo derives the node set from the deployment and --node-aliases, so this means neither yielded any nodes — check your deployment or the --node-aliases input.
Troubleshooting Steps
Verify the deployment has consensus nodes configured: solo deployment config info
Deploy consensus nodes: solo consensus node setup
Use –node-aliases to specify target nodes explicitly
4.1.4.55 - SOLO-4060
ServiceTypeMismatchSoloError — Validation
ServiceTypeMismatchSoloError
Code
SOLO-4060
Category
Validation
Ownership
Infrastructure
Retryable
No
Description
Thrown when a Kubernetes service is not the expected network-node service; the message names the service. solo expects a service of a specific kind when resolving node endpoints, so this means the service exists but is of the wrong type — indicating an unexpected cluster state.
Troubleshooting Steps
Check solo logs: tail -n 100 ~/.solo/logs/solo.log
Inspect Kubernetes services: kubectl get svc -n
Verify the network is deployed correctly: solo consensus network deploy
4.1.4.56 - SOLO-4061
BackupConfigNotFoundSoloError — Validation
BackupConfigNotFoundSoloError
Code
SOLO-4061
Category
Validation
Ownership
User
Retryable
No
Description
Thrown when the backup configuration file does not exist; the message names the path. solo reads this file to run a backup or restore, so this means it is missing or the path is wrong — for example a typo or a file that was moved.
Troubleshooting Steps
Verify the configuration file exists at:
Export a new backup to generate a configuration file: solo config ops backup
4.1.4.57 - SOLO-4062
BackupConfigInvalidSoloError — Validation
BackupConfigInvalidSoloError
Code
SOLO-4062
Category
Validation
Ownership
User
Retryable
No
Description
Thrown when the backup configuration file is empty or invalid. solo reads this file to drive a backup or restore, so this means it contained no usable configuration — for example an empty file or content that does not match the expected format.
Troubleshooting Steps
Verify the configuration file is a valid YAML or JSON document and is not empty
Export a new backup to generate a valid configuration file: solo config ops backup
4.1.4.58 - SOLO-4063
BackupConfigReadFailedSoloError — Validation
BackupConfigReadFailedSoloError
Code
SOLO-4063
Category
Validation
Ownership
Infrastructure
Retryable
No
Description
Thrown when solo cannot read the backup configuration file; the message names the path and wraps the underlying failure in cause. solo reads this file during restore, so this means it could not be read — for example missing permissions or an I/O error.
Troubleshooting Steps
Verify the file exists and is readable:
Check file permissions
Export a new backup to regenerate the configuration file: solo config ops backup
4.1.4.59 - SOLO-4064
BackupConfigMapKeyMissingSoloError — Validation
BackupConfigMapKeyMissingSoloError
Code
SOLO-4064
Category
Validation
Ownership
Infrastructure
Retryable
No
Description
Thrown when the backup ConfigMap does not contain a required key; the message names the missing key. solo reads specific keys from the backup ConfigMap during restore, so this means the ConfigMap exists but is missing data it needs — indicating an incomplete or unexpected backup source.
Troubleshooting Steps
Check solo logs: tail -n 100 ~/.solo/logs/solo.log
Verify the Kubernetes ConfigMap contains the expected data
Re-export the backup to regenerate the ConfigMap: solo config ops backup
4.1.4.60 - SOLO-4065
BackupConfigParseFailedSoloError — Validation
BackupConfigParseFailedSoloError
Code
SOLO-4065
Category
Validation
Ownership
Infrastructure
Retryable
No
Description
Thrown when solo cannot parse the backup configuration; the underlying failure is wrapped in cause. solo parses the backup configuration to drive a restore, so this means the content could not be parsed — for example malformed YAML or an unexpected structure.
Troubleshooting Steps
Verify the backup configuration file is valid YAML or JSON
Check that the configuration was exported with a compatible Solo version
Re-export the backup to regenerate the configuration: solo config ops backup –deployment
Thrown when the backup input directory does not exist; the message names it. solo reads backup data from this directory during restore, so this means it is missing or the path is wrong.
Troubleshooting Steps
Verify the directory exists at:
Use –input-dir to specify the correct path to the backup directory
Run solo config ops restore-clusters –help for usage information
4.1.4.62 - SOLO-4067
BackupNoClusterDirectoriesSoloError — Validation
BackupNoClusterDirectoriesSoloError
Code
SOLO-4067
Category
Validation
Ownership
User
Retryable
No
Description
Thrown when the backup input directory contains no per-cluster directories; the message names the directory. A valid backup groups data under cluster directories, so this means none were found — the directory is not a valid backup or is empty.
Troubleshooting Steps
Verify the input directory contains cluster subdirectories:
Ensure you are pointing to the correct backup directory
Thrown when a backup input directory does not contain the expected solo-remote-config.yaml; the message names the path and the expected <input-dir>/<cluster-ref>/configmaps/solo-remote-config.yaml structure. solo validates the backup layout before restoring, so this means the directory is not a valid backup or the wrong path was given.
Troubleshooting Steps
Verify the backup archive was exported with compatible Solo and cluster versions
Check cluster references: solo cluster-ref config list
Re-export the backup from the original cluster: solo config ops backup
4.1.4.64 - SOLO-4069
BackupNoClusterInfoSoloError — Validation
BackupNoClusterInfoSoloError
Code
SOLO-4069
Category
Validation
Ownership
User
Retryable
No
Description
Thrown when the backup configuration file contains no cluster information. solo reads cluster details from the backup config to restore, so this means that section is missing or empty — indicating an incomplete or invalid backup config.
Troubleshooting Steps
Verify the backup configuration file contains cluster information
Ensure the backup was exported with a compatible Solo version
Re-export the backup: solo config ops backup
4.1.4.65 - SOLO-4070
BackupNoComponentsSoloError — Validation
BackupNoComponentsSoloError
Code
SOLO-4070
Category
Validation
Ownership
User
Retryable
No
Description
Thrown when the deployment state to restore contains no components. solo restores components recorded in the backup, so this means none were found to restore — for example an empty or incomplete backup.
Troubleshooting Steps
Verify the backup archive contains component state information
Ensure the backup was exported from a deployment with active components
Re-export the backup: solo config ops backup
4.1.4.66 - SOLO-4071
BackupOptionsFileNotFoundSoloError — Validation
BackupOptionsFileNotFoundSoloError
Code
SOLO-4071
Category
Validation
Ownership
User
Retryable
No
Description
Thrown when the restore options file does not exist; the message names it. solo reads restore options from this file, so this means it is missing or the path is wrong.
Troubleshooting Steps
Verify the options file exists at:
Run solo config ops restore-network –help for usage information
4.1.4.67 - SOLO-4072
BackupZipFileRequiredSoloError — Validation
BackupZipFileRequiredSoloError
Code
SOLO-4072
Category
Validation
Ownership
User
Retryable
No
Description
Thrown when --zip-password is used without --zip-file. A password applies to a specific zip archive, so this means the required --zip-file was not provided — supply it or omit the password.
Troubleshooting Steps
Provide the –zip-file flag when using –zip-password
Run solo config ops restore-clusters –help for usage information
4.1.4.68 - SOLO-4073
BackupInputPathNotFoundSoloError — Validation
BackupInputPathNotFoundSoloError
Code
SOLO-4073
Category
Validation
Ownership
User
Retryable
No
Description
Thrown when the backup input path does not exist; the message names it. solo reads the backup from this path, so this means it is missing or the path is wrong.
Troubleshooting Steps
Verify the input path exists:
Use –input-dir or –zip-file to specify the correct backup path
Run solo config ops restore-clusters –help for usage information
4.1.4.69 - SOLO-4074
BackupInputMustBeZipSoloError — Validation
BackupInputMustBeZipSoloError
Code
SOLO-4074
Category
Validation
Ownership
User
Retryable
No
Description
Thrown when --zip-password is used but the input path is not a .zip file. A password only applies to a zip archive, so this means the supplied input is not a zip — provide a .zip file or omit the password.
Troubleshooting Steps
Provide a .zip archive as the input path when using –zip-password
Run solo config ops restore-clusters –help for usage information
4.1.4.70 - SOLO-4075
BackupNoLogFilesSoloError — Validation
BackupNoLogFilesSoloError
Code
SOLO-4075
Category
Validation
Ownership
User
Retryable
No
Description
Thrown when no log files are found to restore for a context; the message names the context. solo restores log files captured in the backup, so this means none were present for that context.
Troubleshooting Steps
Verify the backup archive contains log files for context ‘’
Check the backup directory structure for expected log files
Re-export the backup to include log files: solo config ops backup
4.1.4.71 - SOLO-4076
FlagInputFailedSoloError — Validation
FlagInputFailedSoloError
Code
SOLO-4076
Category
Validation
Ownership
User
Retryable
No
Description
Thrown when input validation for a flag fails; the message names the flag and wraps the underlying failure in cause. solo validates and coerces flag inputs before using them, so this means the provided value did not pass validation — correct the flag value.
Troubleshooting Steps
Verify the value provided for – is valid
Run solo –help for usage information and accepted flag values
4.1.4.72 - SOLO-4077
ConfirmationRequiredSoloError — Validation
ConfirmationRequiredSoloError
Code
SOLO-4077
Category
Validation
Ownership
User
Retryable
No
Description
Thrown when an action requires interactive confirmation but solo cannot ask for it (for example when running with –quiet or –force, or in a non-interactive environment such as CI). Rather than proceed without the user’s consent, solo refuses and asks the user to confirm interactively.
Troubleshooting Steps
Re-run the command interactively (without –quiet or –force) so the confirmation prompt can be shown
4.1.4.73 - SOLO-4078
ValuesFileNotFoundSoloError — Validation
ValuesFileNotFoundSoloError
Code
SOLO-4078
Category
Validation
Ownership
User
Retryable
No
Description
Thrown when the values file supplied to --values-file does not exist. solo reads this YAML file to populate per-component configuration before deploying, so this means the path is missing or wrong — for example a typo in the file name or a relative path resolved from an unexpected directory.
Troubleshooting Steps
Verify the file exists: ls -la
Check the path passed to –values-file for typos and for the correct file extension (.yaml)
Relative paths are resolved against the current working directory
4.1.4.74 - SOLO-4079
ValuesFileParseFailedSoloError — Validation
ValuesFileParseFailedSoloError
Code
SOLO-4079
Category
Validation
Ownership
User
Retryable
No
Description
Thrown when a Helm values file cannot be parsed; the underlying failure is wrapped in cause. solo reads values files supplied via --values-file and values files it caches under the solo home directory before handing them to Helm, so this means the file content is neither valid JSON nor valid YAML — for example a stale or partially written cached values file left behind by an interrupted run.
Troubleshooting Steps
Open and correct the syntax reported above
{{be rewritten in block style or have all of its keys and string values quoted
Regenerate a cached values file by deleting it and re-running the command: rm
Cached values files live under the solo home directory (default ~/.solo) and are rewritten on the next run
4.1.4.75 - SOLO-4080
BackupDatabaseDumpNotFoundSoloError — Validation
BackupDatabaseDumpNotFoundSoloError
Code
SOLO-4080
Category
Validation
Ownership
User
Retryable
No
Description
Thrown when the external database dump file is missing from the restore input directory; the message names the expected path. The backup must be created with –backup-external-database for this path to exist.
Troubleshooting Steps
Re-run the backup with –backup-external-database to include the database dump
Verify the restore input path points to an extracted backup directory, not a zip file
Expected dump file location:
4.1.4.76 - SOLO-4081
InvalidFlagValueSoloError — Validation
InvalidFlagValueSoloError
Code
SOLO-4081
Category
Validation
Ownership
User
Retryable
No
Description
Thrown when the value supplied for a flag does not satisfy the rules that flag declares — for example a namespace that is not a valid DNS label, a node alias that is not of the form node<number>, or a count below its minimum. The message names the flag, the rejected value and the requirement it broke. solo checks flag values before doing any work, so nothing has been changed on the cluster — correct the value and re-run.
Troubleshooting Steps
Correct the value passed to –
Run solo –help for usage information and accepted flag values
4.1.4.77 - SOLO-4082
TransplantRequiresStateFileSoloError — Validation
TransplantRequiresStateFileSoloError
Code
SOLO-4082
Category
Validation
Ownership
User
Retryable
No
Description
Thrown when –transplant is supplied without –state-file. A transplant replaces the roster carried by a state captured on a different network, so without a state file there is nothing to transplant and the flag would silently have no effect.
Troubleshooting Steps
Pass the state captured on the other network, e.g. –transplant –state-file <path-to-state.zip>
Omit –transplant when restoring a network from its own state, which must keep the roster in that state
Thrown when a docker save archive’s manifest.json does not list the image reference passed via --component-image. Loading such an archive succeeds, but the deployed pod then fails much later with ErrImageNeverPull since the requested tag was never actually loaded into the Kind cluster.
Troubleshooting Steps
Pass the exact image reference reported by docker save in –component-image
Re-create the archive with docker save <image>:<tag> -o <archive> using the intended tag
4.1.5 - System
4.1.5.1 - SOLO-2032
MinioOperatorCrdsOrphanedSoloError — System
MinioOperatorCrdsOrphanedSoloError
Code
SOLO-2032
Category
System
Ownership
User
Retryable
No
Description
Thrown when the MinIO Operator’s cluster-scoped CRDs exist but no Helm release owns them. The CRDs outlive the namespace the operator was installed into, so deleting that namespace leaves them behind. Helm will not adopt resources another release created, so installing over them fails; and treating their presence as “already installed” would be worse — the operator would never run, and the Tenant resource created later would sit unreconciled with nothing pointing at the cause.
Troubleshooting Steps
Delete the leftover CRDs, then run the setup again: kubectl delete crd <crdNames.join(’ ‘)>
Deleting these CRDs also deletes any MinIO Tenant resources defined by them
They are usually left behind when the operator namespace was deleted directly rather than through solo cluster-ref config reset
4.1.5.2 - SOLO-5001
ResourceNotFoundError — System
ResourceNotFoundError
Code
SOLO-5001
Category
System
Ownership
Infrastructure
Retryable
No
Description
Thrown when an expected resource cannot be found; the message names the resource and, when available, wraps the underlying cause. solo looks up Kubernetes and related resources by name as it works, so this means the resource was absent where it was expected — for example it was not yet created, was deleted, or was searched for in the wrong place.
Thrown when solo cannot establish a connection to the Kubernetes API server for a cluster reference; the message names the cluster reference and the kubeconfig context it tried. solo resolves the context from kubeconfig and connects before running any cluster operation, so this fires when that handshake fails: the context names a server that is unreachable or no longer exists, the cluster has not been started yet (for example a Kind cluster that was never created or was deleted), credentials have expired, or a transient network/DNS problem interrupted the call. It is retryable because a cluster that is still coming up, or a brief network blip, often resolves on a later attempt.
Troubleshooting Steps
Verify the kubeconfig context is correct and the cluster is reachable: kubectl cluster-info –context
4.1.5.4 - SOLO-5003
PortForwardRefreshFailedError — System
PortForwardRefreshFailedError
Code
SOLO-5003
Category
System
Ownership
Infrastructure
Retryable
Yes
Description
Thrown when solo cannot refresh its port-forwards; when available the underlying failure is wrapped in cause. solo periodically re-establishes port-forwards so endpoints stay reachable, so this means that refresh failed — for example a target pod was unavailable or the API connection dropped. It is retryable.
Troubleshooting Steps
Check the all pods exist and are running: kubectl get pods -n
Check the port-forwards of your deployment: solo deployment config ports –deployment
Restart the port-forward: solo deployment port-forwards refresh –deployment
4.1.5.5 - SOLO-5004
PortForwardStatusFailedError — System
PortForwardStatusFailedError
Code
SOLO-5004
Category
System
Ownership
Infrastructure
Retryable
Yes
Description
Thrown when solo cannot display port-forward status; when available the underlying failure is wrapped in cause. solo reads the state of active port-forwards to report it, so this means that status query failed — for example the cluster API was unreachable. It is retryable.
Troubleshooting Steps
Check the all pods exist and are running: kubectl get pods -n
Restart the port-forward: solo deployment port-forwards refresh –deployment
4.1.5.6 - SOLO-5005
NamespaceNotFoundSoloError — System
NamespaceNotFoundSoloError
Code
SOLO-5005
Category
System
Ownership
User
Retryable
No
Description
Thrown when a referenced Kubernetes namespace does not exist; the message names the namespace. solo operates within a deployment namespace, so this means the namespace is absent — for example it was never created, was deleted, or the wrong name was supplied.
Troubleshooting Steps
List existing namespaces: kubectl get namespaces
Check the active deployment: solo deployment config info –deployment
Redeploy the network to re-create the namespace: solo consensus network deploy
4.1.5.7 - SOLO-5006
PodNotFoundSoloError — System
PodNotFoundSoloError
Code
SOLO-5006
Category
System
Ownership
Infrastructure
Retryable
Yes
Description
Thrown when solo queries Kubernetes for the pod backing a consensus node alias and the lookup returns no pod; the message names the alias. solo needs the pod to run commands, copy files, or check status on a node, so this fires when no pod matches the expected labels in the namespace. Because pod scheduling is asynchronous, it can appear briefly during startup before the pod exists, which is why it is retryable; if it persists, the pod failed to schedule or start, was evicted, or the node was never deployed. This is the base error for the component-specific variants (explorer, relay, mirror-node, block-node, and Postgres pod-not-found errors).
Troubleshooting Steps
Check pod status: kubectl get pods -n -l solo.hedera.com/node-name=
Describe the pod for events: kubectl describe pod -n -l solo.hedera.com/node-name=
A StatefulSet whose claim cannot be provisioned never creates its pod; check PVC/PV binding: kubectl get pvc,pv -n
Check the storage class and its provisioner: kubectl get storageclass
Review solo logs: tail -n 100 ~/.solo/logs/solo.log
4.1.5.8 - SOLO-5007
HaproxyPodsNotFoundSoloError — System
HaproxyPodsNotFoundSoloError
Code
SOLO-5007
Category
System
Ownership
Infrastructure
Retryable
Yes
Description
Thrown when solo cannot find any HAProxy pods. solo relies on HAProxy pods to route traffic to consensus nodes, so this is raised when none are present in the namespace. It is retryable because the pods may still be scheduling; if it persists, HAProxy failed to start or was not deployed.
Troubleshooting Steps
Check HAProxy pod status: kubectl get pods -n -l solo.hedera.com/type=haproxy
Check the active deployment: solo deployment config info –deployment
Redeploy the network if HAProxy is missing: solo consensus network deploy
4.1.5.9 - SOLO-5008
LoadBalancerNotFoundSoloError — System
LoadBalancerNotFoundSoloError
Code
SOLO-5008
Category
System
Ownership
Infrastructure
Retryable
Yes
Description
Thrown when solo cannot find the expected load balancer. solo looks up the load balancer that exposes a service externally, so this is raised when none is present yet. It is retryable because the load balancer may still be provisioning (for example waiting on MetalLB or a cloud provider); a persistent failure points to a networking misconfiguration.
Troubleshooting Steps
Check load balancer service status: kubectl get svc -n
Ensure your cloud provider supports LoadBalancer services
Review cloud provisioning logs for LB assignment delays
4.1.5.10 - SOLO-5009
KubeContextNotFoundSoloError — System
KubeContextNotFoundSoloError
Code
SOLO-5009
Category
System
Ownership
Solo
Retryable
No
Description
Thrown when solo cannot determine the Kubernetes context for a node; the message names the node alias. By this point the node context should already be resolvable from configuration, so reaching it indicates an internal inconsistency and is treated as an internal Solo error.
Troubleshooting Steps
Check active deployments: solo deployment config info
Verify that the node alias is registered: kubectl get configmap -n -o yaml
Review solo logs: tail -n 100 ~/.solo/logs/solo.log
4.1.5.11 - SOLO-5010
ConsensusNodeNotInConfigSoloError — System
ConsensusNodeNotInConfigSoloError
Code
SOLO-5010
Category
System
Ownership
Solo
Retryable
No
Description
Thrown when solo looks up a consensus node by alias but it is not present in the configuration; the message names the alias. By this point the node should already be known, so reaching it indicates an internal inconsistency between the requested alias and the loaded configuration, and is treated as an internal Solo error.
Troubleshooting Steps
List registered nodes: solo deployment config info –deployment
Verify the node alias: kubectl get configmap -n -o yaml | grep nodeAlias
Re-run with a valid alias: solo node –node-aliases
4.1.5.12 - SOLO-5011
K8sSecretCreateFailedSoloError — System
K8sSecretCreateFailedSoloError
Code
SOLO-5011
Category
System
Ownership
Infrastructure
Retryable
Yes
Description
Thrown when solo cannot create a Kubernetes secret; the message describes the secret and, when available, wraps the underlying cause. solo stores keys and credentials as cluster secrets, so this means the secret could not be created — for example the namespace is missing, the API rejected the request, or a transient API error occurred. It is retryable.
Review solo logs: tail -n 100 ~/.solo/logs/solo.log
Verify the cluster is reachable: kubectl cluster-info –context
4.1.5.13 - SOLO-5012
StatesDirectoryNotFoundSoloError — System
StatesDirectoryNotFoundSoloError
Code
SOLO-5012
Category
System
Ownership
User
Retryable
No
Description
Thrown when the states directory for a node does not exist; the message names the node alias and the expected directory. solo reads saved consensus state from this directory, so this means it is missing or the path is wrong — for example no state was exported for the node, or the wrong path was supplied.
Troubleshooting Steps
Verify the states directory exists: ls -la
Check that the state download succeeded: solo consensus node states
Use the correct –inputDir path structure: /states///
4.1.5.14 - SOLO-5013
PortForwardMissingSoloError — System
PortForwardMissingSoloError
Code
SOLO-5013
Category
System
Ownership
Infrastructure
Retryable
Yes
Description
Thrown when a configured port-forward is not present; the message names the component, its id, and the local-to-pod port mapping. solo expects each configured port-forward to be active so the component is reachable, so this means it is missing — for example it was never established or was dropped. It is retryable, since re-establishing the port-forward often succeeds.
Troubleshooting Steps
Check port-forward status: solo deployment diagnostics connections –deployment
Re-establish port forwards: solo consensus node start
Verify the pod is running: kubectl get pods -n
4.1.5.15 - SOLO-5014
NoPvcFoundSoloError — System
NoPvcFoundSoloError
Code
SOLO-5014
Category
System
Ownership
User
Retryable
No
Description
Thrown when no PersistentVolumeClaims are found in a namespace where they were expected; the message names the namespace. Some operations require PVCs that are created only when persistent storage is enabled at deployment, so this means PVCs were not enabled for the network — redeploy with PVCs enabled.
Troubleshooting Steps
Redeploy with PVCs enabled: solo consensus network deploy –pvcs true
4.1.5.16 - SOLO-5015
ClusterReferenceUndeterminedSoloError — System
ClusterReferenceUndeterminedSoloError
Code
SOLO-5015
Category
System
Ownership
Solo
Retryable
No
Description
Thrown during initialization when solo cannot determine which cluster reference to use. solo expects the active cluster reference to be resolvable at this point, so reaching this indicates an internal initialization or ordering defect rather than user input, and is treated as an internal Solo error.
Troubleshooting Steps
Check the remote config: kubectl get configmap -n -o yaml
Verify cluster references: solo deployment config info –deployment
Re-initialize solo if needed: solo init
Review solo logs: tail -n 100 ~/.solo/logs/solo.log
4.1.5.17 - SOLO-5016
UpgradeVersionFetchFailedSoloError — System
UpgradeVersionFetchFailedSoloError
Code
SOLO-5016
Category
System
Ownership
Infrastructure
Retryable
Yes
Description
Thrown when solo cannot fetch a requested upgrade version; the message names the version and wraps the underlying failure in cause. solo downloads upgrade artifacts for the chosen version, so this means the fetch did not complete — for example the version assets were unreachable or the download errored. It is retryable, since transient network issues often clear on a later attempt.
Retry the upgrade: solo consensus network upgrade –upgrade-version
4.1.5.18 - SOLO-5017
MultipleDeploymentsFoundSoloError — System
MultipleDeploymentsFoundSoloError
Code
SOLO-5017
Category
System
Ownership
User
Retryable
No
Description
Thrown when a command needs a single deployment but several are configured and none was selected; the message names the source (local or remote) and the deployments found. solo cannot guess which one to use, so it asks you to disambiguate with --deployment.
Troubleshooting Steps
List existing deployments: solo deployment config list
Specify the deployment explicitly: solo node –deployment
4.1.5.19 - SOLO-5018
GrpcProxyEndpointFailedSoloError — System
GrpcProxyEndpointFailedSoloError
Code
SOLO-5018
Category
System
Ownership
Infrastructure
Retryable
Yes
Description
Thrown when solo cannot set the gRPC Web proxy endpoint. solo configures this endpoint so gRPC Web clients can reach the network, so this means that configuration step failed — for example the target service or port-forward was not reachable. It is retryable, since a transient connectivity issue often clears on a later attempt.
Verify gRPC endpoints are reachable: kubectl get svc -n
Retry the node update: solo consensus node update
4.1.5.20 - SOLO-5019
ExplorerPodNotFoundSoloError — System
ExplorerPodNotFoundSoloError
Code
SOLO-5019
Category
System
Ownership
Infrastructure
Retryable
No
Description
Thrown when solo cannot find a Hiero Explorer pod. solo locates the explorer pod to operate on it or check its status, so this is raised when no matching pod exists in the namespace — for example the explorer failed to start, was removed, or was never deployed.
Troubleshooting Steps
Check pod status: kubectl get pods -A | grep explorer
Describe pods to check for crashes or evictions: kubectl describe pods -A -l app.kubernetes.io/component=hiero-explorer
Check recent namespace events: kubectl get events -n –sort-by=.lastTimestamp
4.1.5.21 - SOLO-5020
ExplorerNotInRemoteConfigSoloError — System
ExplorerNotInRemoteConfigSoloError
Code
SOLO-5020
Category
System
Ownership
User
Retryable
No
Description
Thrown when no Hiero Explorer component is present in the deployment remote configuration. solo looks the explorer up in the remote config before acting on it, so this means none is recorded — typically because the explorer was never deployed for this deployment, or was already removed.
Troubleshooting Steps
List components in remote config: solo deployment config info
Deploy the explorer first: solo explorer deploy
4.1.5.22 - SOLO-5021
RelayPodNotFoundSoloError — System
RelayPodNotFoundSoloError
Code
SOLO-5021
Category
System
Ownership
Infrastructure
Retryable
No
Description
Thrown when solo cannot find a JSON-RPC relay pod. solo locates the relay pod to operate on it or check status, so this is raised when no matching pod exists in the namespace — for example the relay failed to start, was removed, or was never deployed.
Troubleshooting Steps
Check pod status: kubectl get pods -A | grep relay
Describe pods to check for crashes or evictions: kubectl describe pods -A -l app.kubernetes.io/instance=relay-
Check recent namespace events: kubectl get events -n –sort-by=.lastTimestamp
4.1.5.23 - SOLO-5022
RelayNotInRemoteConfigSoloError — System
RelayNotInRemoteConfigSoloError
Code
SOLO-5022
Category
System
Ownership
User
Retryable
No
Description
Thrown when no JSON-RPC relay is present in the deployment remote configuration. solo looks the relay up in the remote config before acting on it, so this means none is recorded — typically because it was never deployed for this deployment, or was already removed.
Troubleshooting Steps
List components in remote config: solo deployment config info
Deploy the relay first: solo relay deploy
4.1.5.24 - SOLO-5023
MirrorNodePodsNotFoundSoloError — System
MirrorNodePodsNotFoundSoloError
Code
SOLO-5023
Category
System
Ownership
Infrastructure
Retryable
No
Description
Thrown when solo cannot find any deployed mirror-node pods; the message names the release and namespace. solo locates the mirror node pods to operate on them, so this is raised when none match in the namespace — for example the release failed to deploy, was removed, or the wrong release or namespace was targeted.
Troubleshooting Steps
Check pod status: kubectl get pods -n | grep
Inspect Helm release: helm status -n
4.1.5.25 - SOLO-5024
MirrorIngressControllerPodNotFoundSoloError — System
MirrorIngressControllerPodNotFoundSoloError
Code
SOLO-5024
Category
System
Ownership
Infrastructure
Retryable
No
Description
Thrown when solo cannot find the mirror ingress controller pod. solo locates this pod to manage ingress for the mirror node, so this is raised when no matching pod exists in the namespace — for example it failed to start or was not deployed.
Troubleshooting Steps
Check ingress controller pod status: kubectl get pods -A | grep ingress
Describe pods to check for crashes or evictions: kubectl describe pods -A -l app.kubernetes.io/name=haproxy-ingress
Check recent namespace events: kubectl get events -n –sort-by=.lastTimestamp
4.1.5.26 - SOLO-5025
MirrorNodeNotInRemoteConfigSoloError — System
MirrorNodeNotInRemoteConfigSoloError
Code
SOLO-5025
Category
System
Ownership
User
Retryable
No
Description
Thrown when no mirror node is present in the deployment remote configuration. solo looks the mirror node up in the remote config before acting on it, so this means none is recorded — typically because it was never deployed for this deployment, or was already removed.
Troubleshooting Steps
List components in remote config: solo deployment config info
Deploy the mirror node first: solo mirror node add –deployment
4.1.5.27 - SOLO-5026
ClusterNotFoundInRemoteConfigSoloError — System
ClusterNotFoundInRemoteConfigSoloError
Code
SOLO-5026
Category
System
Ownership
User
Retryable
No
Description
Thrown when a referenced cluster is not present in the deployment remote configuration; the message names the cluster reference. solo expects the cluster to be recorded in the remote config before acting on it, so this means the reference does not match any recorded cluster — typically a misspelled name or a cluster that was never attached to the deployment.
Troubleshooting Steps
List configured cluster references: solo cluster-ref list
Inspect the remote config to see which clusters block nodes reference: kubectl get configmap solo-remote-config -n -o yaml
If the cluster was renamed or removed, the deployment config may need to be repaired
4.1.5.28 - SOLO-5027
GitHubApiRequestFailedError — System
GitHubApiRequestFailedError
Code
SOLO-5027
Category
System
Ownership
Infrastructure
Retryable
Yes
Description
Thrown when a GitHub API request cannot be completed; the message names the URL and wraps the underlying failure in cause. The request did not produce a usable HTTP response at all — for example a network or DNS failure, or a dropped connection. It is retryable, since transient network problems often clear on a later attempt.
Troubleshooting Steps
Check network connectivity and GitHub availability, then retry. If the issue persists, confirm proxy/firewall settings.
4.1.5.29 - SOLO-5028
GitHubApiHttpResponseError — System
GitHubApiHttpResponseError
Code
SOLO-5028
Category
System
Ownership
Infrastructure
Retryable
Yes
Description
Thrown when a GitHub API request returns a non-success HTTP status; the message names the URL and the status code. solo calls the GitHub API to discover releases and download assets, so this means GitHub responded with an error status — for example rate limiting, a missing resource, or a server error. It is retryable, since transient statuses such as rate limits often clear on a later attempt.
Troubleshooting Steps
Verify GitHub API accessibility and credentials/rate limits, then retry.
4.1.5.30 - SOLO-5029
GitHubApiResponseParseFailedError — System
GitHubApiResponseParseFailedError
Code
SOLO-5029
Category
System
Ownership
Infrastructure
Retryable
No
Description
Thrown when solo cannot parse a GitHub API response; the message names the URL and wraps the underlying failure in cause. solo parses release metadata from the API, so this means the body could not be parsed — for example it was not valid JSON or did not match the expected structure.
Troubleshooting Steps
Inspect the GitHub API response shape and endpoint contract.
4.1.5.31 - SOLO-5030
GitHubApiResponseMissingTagNameError — System
GitHubApiResponseMissingTagNameError
Code
SOLO-5030
Category
System
Ownership
Infrastructure
Retryable
No
Description
Thrown when a GitHub API response is missing the expected tag_name field; the message names the URL. solo reads tag_name to identify a release version, so this means the response came back without it — indicating an unexpected response shape from the API.
Troubleshooting Steps
Confirm the repository has a latest release and that the GitHub API response contains expected release fields.
4.1.5.32 - SOLO-5031
BlockNodePodNotFoundSoloError — System
BlockNodePodNotFoundSoloError
Code
SOLO-5031
Category
System
Ownership
Infrastructure
Retryable
Yes
Description
Thrown when solo cannot find a running block node pod. solo locates the block node pod to run commands or check its status, so this is raised when no matching pod exists in the namespace. It is retryable because pod scheduling is asynchronous and the pod may appear shortly; if it persists, the block node failed to start or was never deployed.
Troubleshooting Steps
Check pod status: kubectl get pods -A -l block-node.hiero.com/type=block-node
Describe pods to check for crashes or evictions: kubectl describe pods -A -l block-node.hiero.com/type=block-node
Check recent namespace events: kubectl get events -n –sort-by=.lastTimestamp
4.1.5.33 - SOLO-5032
BlockNodeNotReadySoloError — System
BlockNodeNotReadySoloError
Code
SOLO-5032
Category
System
Ownership
Infrastructure
Retryable
Yes
Description
Thrown when a deployed block node does not become ready; the message names the release and wraps the underlying failure in cause. solo waits for the block node pods to reach a Ready state, so this means that wait did not succeed. It is retryable, since a block node that is merely slow to start often becomes ready on a later attempt; a persistent failure points to a crash-looping or misconfigured block node.
Troubleshooting Steps
Check block node pod status: kubectl get pods -A | grep
Describe pods for readiness probe failures: kubectl describe pods -A -l app.kubernetes.io/instance=
Check solo logs: tail -n 100 ~/.solo/logs/solo.log
4.1.5.34 - SOLO-5033
BlockNodeNotInRemoteConfigSoloError — System
BlockNodeNotInRemoteConfigSoloError
Code
SOLO-5033
Category
System
Ownership
User
Retryable
No
Description
Thrown when a referenced block node is not present in the deployment remote configuration; when provided, the message includes its identifier. solo looks components up in the remote config before acting on them, so this means the block node id does not match any recorded component — typically because it was never added, was already removed, or the wrong id was supplied.
Troubleshooting Steps
List all registered components: solo deployment config info
Verify you are targeting the correct deployment and namespace
Check solo logs: tail -n 100 ~/.solo/logs/solo.log
4.1.5.35 - SOLO-5034
ExternalBlockNodeNotInRemoteConfigSoloError — System
ExternalBlockNodeNotInRemoteConfigSoloError
Code
SOLO-5034
Category
System
Ownership
User
Retryable
No
Description
Thrown when a referenced external block node is not present in the deployment remote configuration; when provided, the message includes its id. solo looks external block nodes up in the remote config before acting on them, so this means the id does not match any recorded external block node — typically because it was never added or the wrong id was supplied.
Troubleshooting Steps
Register the external block node first: solo block node add-external
Check solo logs: tail -n 100 ~/.solo/logs/solo.log
4.1.5.36 - SOLO-5035
HelmRepoSetupFailedSoloError — System
HelmRepoSetupFailedSoloError
Code
SOLO-5035
Category
System
Ownership
Infrastructure
Retryable
No
Description
Thrown when solo cannot set up the Helm chart repositories; the underlying failure is wrapped in cause. solo adds and updates the repositories its charts come from, so this means that setup failed — for example a repository URL was unreachable or the Helm CLI errored.
Troubleshooting Steps
Check solo logs: tail -n 100 ~/.solo/logs/solo.log
List configured Helm repositories: helm repo list
Verify network connectivity to chart repository URLs
Update Helm repositories: helm repo update
4.1.5.37 - SOLO-5036
HelmRepoCheckFailedSoloError — System
HelmRepoCheckFailedSoloError
Code
SOLO-5036
Category
System
Ownership
Infrastructure
Retryable
No
Description
Thrown when solo cannot check the configured Helm chart repositories; the underlying failure is wrapped in cause. solo verifies repositories before installing charts from them, so this means that check failed — for example the Helm CLI errored or a repository was unreachable.
Troubleshooting Steps
Check solo logs: tail -n 100 ~/.solo/logs/solo.log
List configured Helm repositories: helm repo list
Verify network connectivity to chart repository URLs
Update Helm repositories: helm repo update
4.1.5.38 - SOLO-5037
HelmChartListFailedSoloError — System
HelmChartListFailedSoloError
Code
SOLO-5037
Category
System
Ownership
Infrastructure
Retryable
No
Description
Thrown when solo cannot list installed Helm charts; the underlying failure is wrapped in cause. solo lists releases to check what is installed, so this means the helm list failed — for example the Helm CLI errored or the cluster API was unreachable.
Troubleshooting Steps
Check solo logs: tail -n 100 ~/.solo/logs/solo.log
Thrown when solo cannot install a Helm chart release; the message names the release and wraps the underlying failure in cause. This is the generic install failure used by the Helm client, so it means the helm install did not succeed — for example a bad chart version or values, an image that cannot be pulled, or a cluster that is unreachable or short on resources.
Troubleshooting Steps
Check solo logs: tail -n 100 ~/.solo/logs/solo.log
Inspect the Helm release: helm status -n
Check Helm release history: helm history -n
Inspect failing pods: kubectl get pods -A
4.1.5.40 - SOLO-5039
HelmChartUninstallFailedSoloError — System
HelmChartUninstallFailedSoloError
Code
SOLO-5039
Category
System
Ownership
Infrastructure
Retryable
No
Description
Thrown when solo cannot uninstall a Helm chart release; the message names the release and wraps the underlying failure in cause. solo uninstalls releases during teardown, so this means the helm uninstall did not complete — for example the release was not found, a resource could not be deleted, or the cluster API was unreachable.
Troubleshooting Steps
Check solo logs: tail -n 100 ~/.solo/logs/solo.log
Check if the release still exists: helm list -n
Inspect the release status: helm status -n
Check remaining pods: kubectl get pods -A
4.1.5.41 - SOLO-5040
HelmChartUpgradeFailedSoloError — System
HelmChartUpgradeFailedSoloError
Code
SOLO-5040
Category
System
Ownership
Infrastructure
Retryable
No
Description
Thrown when solo cannot upgrade a Helm chart release; the message names the release and wraps the underlying failure in cause. solo upgrades releases to change chart version or values, so this means the helm upgrade did not succeed — for example a bad chart or values, an image that cannot be pulled, or a cluster issue.
Troubleshooting Steps
Check solo logs: tail -n 100 ~/.solo/logs/solo.log
Inspect the release status: helm status -n
Review upgrade history: helm history -n
Check failing pods: kubectl get pods -A
4.1.5.42 - SOLO-5041
FileNotFoundSoloError — System
FileNotFoundSoloError
Code
SOLO-5041
Category
System
Ownership
User
Retryable
No
Description
Thrown when a file solo was asked to use does not exist; the message names the path. solo reads files from paths provided on the command line or in configuration, so this means the file is missing or the path is wrong — for example a typo or a file that was moved or deleted.
Troubleshooting Steps
Verify the file exists at:
Check the path is correct and the file has not been deleted
4.1.5.43 - SOLO-5042
FileCopyFailedSoloError — System
FileCopyFailedSoloError
Code
SOLO-5042
Category
System
Ownership
Infrastructure
Retryable
No
Description
Thrown when a file copy operation fails; the underlying failure is wrapped in cause. solo copies files between local paths and pods during setup, so this means the copy did not complete — for example the source was unreadable, the destination was not writable, or the connection dropped.
Troubleshooting Steps
Check solo logs: tail -n 100 ~/.solo/logs/solo.log
Verify the source file exists and is readable
Check that the destination directory exists and is writable
Verify sufficient disk space is available
4.1.5.44 - SOLO-5043
FileEmptySoloError — System
FileEmptySoloError
Code
SOLO-5043
Category
System
Ownership
User
Retryable
No
Description
Thrown when a file solo was asked to read is empty; the message names the path. solo expects the referenced file to contain data, so this means it exists but has no content — for example the wrong file was supplied or it was not fully written.
Troubleshooting Steps
Verify the file contains valid content:
The file must not be empty to be processed
4.1.5.45 - SOLO-5044
FileInvalidJsonSoloError — System
FileInvalidJsonSoloError
Code
SOLO-5044
Category
System
Ownership
User
Retryable
No
Description
Thrown when a file solo was asked to parse does not contain valid JSON; the message names the path. solo parses JSON from user-provided files, so this means the content could not be parsed — for example a syntax error, a truncated file, or a non-JSON file supplied.
Troubleshooting Steps
Verify the file at contains valid JSON
Check for syntax errors such as missing commas, brackets, or quotes
4.1.5.46 - SOLO-5045
DirectoryCreationFailedSoloError — System
DirectoryCreationFailedSoloError
Code
SOLO-5045
Category
System
Ownership
Infrastructure
Retryable
No
Description
Thrown when solo cannot create a directory; the underlying failure is wrapped in cause. solo creates working and output directories as it runs, so this means the directory could not be created — for example missing permissions, a read-only or full disk, or a conflicting existing path.
Troubleshooting Steps
Check solo logs: tail -n 100 ~/.solo/logs/solo.log
Verify the parent directory exists and is writable
Check available disk space
4.1.5.47 - SOLO-5046
ArchiveUnzipFailedSoloError — System
ArchiveUnzipFailedSoloError
Code
SOLO-5046
Category
System
Ownership
Infrastructure
Retryable
No
Description
Thrown when solo cannot unzip an archive; the message names the source and wraps the underlying failure in cause. solo unzips downloaded packages and state archives, so this means the unzip failed — for example the zip is corrupt or truncated, a wrong password was supplied, or the destination could not be written.
Troubleshooting Steps
Check solo logs: tail -n 100 ~/.solo/logs/solo.log
Verify the archive is a valid zip file:
Ensure the archive is not corrupted
Check available disk space in the destination
4.1.5.48 - SOLO-5047
ArchiveTarFailedSoloError — System
ArchiveTarFailedSoloError
Code
SOLO-5047
Category
System
Ownership
Infrastructure
Retryable
No
Description
Thrown when solo cannot create a tar archive from a source path; the message names the source and wraps the underlying failure in cause. solo packages directories into tar archives (for example to bundle state or logs), so this means the archiving step failed — for example the source path was unreadable, a file changed during archiving, or the destination could not be written.
Troubleshooting Steps
Check solo logs: tail -n 100 ~/.solo/logs/solo.log
Verify the source path exists and is readable:
Check available disk space for the output archive
4.1.5.49 - SOLO-5048
ArchiveUntarFailedSoloError — System
ArchiveUntarFailedSoloError
Code
SOLO-5048
Category
System
Ownership
Infrastructure
Retryable
No
Description
Thrown when solo cannot extract a tar archive; the message names the archive and wraps the underlying failure in cause. solo unpacks tar archives it downloads or restores, so this means extraction failed — for example the archive is corrupt or truncated, or the destination directory could not be written.
Troubleshooting Steps
Check solo logs: tail -n 100 ~/.solo/logs/solo.log
Verify the archive is a valid tar file:
Check the archive is not corrupted
Verify available disk space in the extraction destination
4.1.5.50 - SOLO-5049
DependencyVersionCheckFailedSoloError — System
DependencyVersionCheckFailedSoloError
Code
SOLO-5049
Category
System
Ownership
Infrastructure
Retryable
No
Description
Thrown when solo cannot determine the installed version of a dependency; the message names the dependency and, when present, wraps the underlying cause (otherwise it notes the tool may not be installed or on PATH). solo checks tool versions to confirm they meet its requirements, so this means the version check could not run or its output could not be parsed.
Troubleshooting Steps
Verify is installed and available in your PATH
Check the installation: which
Run solo init to install missing dependencies: solo init
4.1.5.51 - SOLO-5050
DependencyNotFoundSoloError — System
DependencyNotFoundSoloError
Code
SOLO-5050
Category
System
Ownership
Infrastructure
Retryable
No
Description
Thrown when a required dependency is not found; the message names it. solo expects certain external tools to be available, so this means the dependency could not be located — for example it is not installed or not on PATH.
Troubleshooting Steps
Install the missing dependency:
Run solo init to install all required dependencies: solo init
Verify the dependency is in your PATH: which
4.1.5.52 - SOLO-5051
DependencyManagerNotFoundSoloError — System
DependencyManagerNotFoundSoloError
Code
SOLO-5051
Category
System
Ownership
Solo
Retryable
No
Description
Thrown when no dependency manager is registered for a requested dependency; the message names the dependency. solo routes each managed dependency to a registered manager that knows how to install and verify it, so a missing registration points to an internal wiring defect and is treated as an internal Solo error.
Thrown when solo cannot install a managed dependency; the message names the executable and wraps the underlying failure in cause. solo installs tools like kubectl, helm, and kind when they are missing, so this means installation failed — for example the download failed, the archive was invalid, or the target directory was not writable.
Troubleshooting Steps
Check solo logs: tail -n 100 ~/.solo/logs/solo.log
Verify network connectivity for downloading the dependency
Check available disk space
Re-run initialization: solo init
4.1.5.54 - SOLO-5053
DependencyInstallDirectoryConflictSoloError — System
DependencyInstallDirectoryConflictSoloError
Code
SOLO-5053
Category
System
Ownership
User
Retryable
No
Description
Thrown when the chosen installation directory is the same as the temporary directory used during install. solo installs managed dependencies (such as kubectl, helm, kind) into a target directory distinct from its temp workspace, so this means the configured paths collide — choose a different installation directory.
Troubleshooting Steps
Check solo logs: tail -n 100 ~/.solo/logs/solo.log
Configure separate installation and temporary directories in your Solo configuration
4.1.5.55 - SOLO-5054
GitHubReleasesNotFoundSoloError — System
GitHubReleasesNotFoundSoloError
Code
SOLO-5054
Category
System
Ownership
Infrastructure
Retryable
Yes
Description
Thrown when a GitHub repository reports no releases. solo lists releases to choose a version to download, so this means the repository returned an empty release list. It is retryable, since a transient API issue can return empty results that resolve on a later attempt.
Troubleshooting Steps
Verify network connectivity and GitHub availability
Check if GitHub API rate limits have been exceeded
Verify proxy or firewall settings allow access to api.github.com
4.1.5.56 - SOLO-5055
GitHubReleaseTagNotFoundSoloError — System
GitHubReleaseTagNotFoundSoloError
Code
SOLO-5055
Category
System
Ownership
Infrastructure
Retryable
No
Description
Thrown when no GitHub release exists for a requested tag; the message names the tag. solo looks up releases by tag to download a specific version, so this means that tag has no release — for example a wrong or not-yet-published version.
Troubleshooting Steps
Verify the release tag ‘’ exists in the GitHub repository
Check the GitHub releases page for available versions
Verify network connectivity to api.github.com
4.1.5.57 - SOLO-5056
GitHubReleaseAssetNotFoundSoloError — System
GitHubReleaseAssetNotFoundSoloError
Code
SOLO-5056
Category
System
Ownership
Infrastructure
Retryable
No
Description
Thrown when no GitHub release asset matches the running platform and architecture; the message names the platform and arch. solo selects the release asset built for the current OS and CPU, so this means the release exists but has no matching asset — for example the platform or architecture is unsupported by that release.
Troubleshooting Steps
Verify a release asset is available for your platform () and architecture ()
Check the GitHub releases page for supported platforms
Consider installing the dependency manually
4.1.5.58 - SOLO-5057
HomebrewInstallFailedSoloError — System
HomebrewInstallFailedSoloError
Code
SOLO-5057
Category
System
Ownership
Infrastructure
Retryable
No
Description
Thrown when solo cannot install Homebrew. On macOS solo may use Homebrew to install some dependencies, so this means the Homebrew installation did not succeed — for example the install script failed or could not be downloaded.
Troubleshooting Steps
Check solo logs: tail -n 100 ~/.solo/logs/solo.log
Re-run initialization after installing Homebrew: solo init
4.1.5.59 - SOLO-5058
PodmanMachineInspectFailedSoloError — System
PodmanMachineInspectFailedSoloError
Code
SOLO-5058
Category
System
Ownership
Infrastructure
Retryable
No
Description
Thrown when solo cannot inspect the Podman machine; the underlying failure is wrapped in cause. When using Podman, solo inspects the machine to read its configuration, so this means that inspection failed — for example Podman is not installed, the machine is not running, or the command errored.
Troubleshooting Steps
Check solo logs: tail -n 100 ~/.solo/logs/solo.log
Verify Podman is installed: podman –version
List Podman machines: podman machine list
Start the Podman machine if it is not running: podman machine start
4.1.5.60 - SOLO-5059
DockerAuthStaleSoloError — System
DockerAuthStaleSoloError
Code
SOLO-5059
Category
System
Ownership
User
Retryable
No
Description
Thrown when solo detects stale Docker authentication for the GitHub Container Registry (GHCR). solo needs valid GHCR credentials to pull images, so this means the cached Docker auth is expired or invalid — re-authenticate to GHCR to refresh it.
Troubleshooting Steps
Re-authenticate with the GitHub Container Registry: docker login ghcr.io
Verify your GitHub Personal Access Token has the read:packages scope
Clear stale credentials: docker logout ghcr.io
4.1.5.61 - SOLO-5060
PvcCreationFailedSoloError — System
PvcCreationFailedSoloError
Code
SOLO-5060
Category
System
Ownership
Infrastructure
Retryable
No
Description
Thrown when solo cannot create a PersistentVolumeClaim. solo provisions PVCs for components that need persistent storage, so this means the create request failed — for example the API rejected the spec, or no StorageClass could satisfy it.
Troubleshooting Steps
Check solo logs: tail -n 100 ~/.solo/logs/solo.log
Verify available storage in the cluster: kubectl get pv
Check if a StorageClass is configured: kubectl get storageclass
Inspect PVC events: kubectl describe pvc -n
4.1.5.62 - SOLO-5061
KubernetesApiInvalidResponseSoloError — System
KubernetesApiInvalidResponseSoloError
Code
SOLO-5061
Category
System
Ownership
Infrastructure
Retryable
No
Description
Thrown when the Kubernetes API returns an incorrect or unexpected response; when the underlying failure is known it is named in the message and wrapped in cause. solo expects well-formed responses from the API, so this means a call returned something it could not interpret — for example a malformed or partial response, often indicating an API server problem.
Troubleshooting Steps
Check solo logs: tail -n 100 ~/.solo/logs/solo.log
Verify Kubernetes API server is reachable: kubectl cluster-info
Thrown when solo cannot list Kubernetes IngressClasses; the underlying failure is wrapped in cause. solo reads IngressClasses to configure ingress for components, so this means the lookup failed — for example the cluster API was unreachable or the current user lacks permission.
Troubleshooting Steps
Check solo logs: tail -n 100 ~/.solo/logs/solo.log
List IngressClasses manually: kubectl get ingressclass
Ensure the Kubernetes API server supports IngressClass resources (requires v1.18+)
4.1.5.64 - SOLO-5063
MultipleItemsFoundSoloError — System
MultipleItemsFoundSoloError
Code
SOLO-5063
Category
System
Ownership
Solo
Retryable
No
Description
Thrown when a Kubernetes lookup that expected a single resource matches more than one; the filters used are attached to the error. solo expects these filtered lookups to be unique, so multiple matches indicate an internal assumption was violated (for example over-broad filters), and it is treated as an internal Solo error.
Thrown when solo cannot create a Kubernetes pod. solo creates helper or workload pods as part of its operations, so this means the create request did not yield a running pod — for example the API rejected the spec, scheduling failed, or required resources were unavailable.
Troubleshooting Steps
Check solo logs: tail -n 100 ~/.solo/logs/solo.log
Inspect pod events: kubectl get events -n
Check resource quotas: kubectl describe namespace
Verify node resource availability: kubectl get nodes
4.1.5.66 - SOLO-5065
PackageDownloadFailedSoloError — System
PackageDownloadFailedSoloError
Code
SOLO-5065
Category
System
Ownership
Infrastructure
Retryable
Yes
Description
Thrown when solo cannot download a package; the message names the URL and wraps the underlying failure in cause. solo downloads packages such as platform builds and tools, so this means the download did not complete — for example the URL was unreachable, returned an error, or the connection dropped. It is retryable, since transient network issues often clear on a later attempt.
Troubleshooting Steps
Check solo logs: tail -n 100 ~/.solo/logs/solo.log
Verify network connectivity
Check if proxy or firewall settings block access to the download URL
Verify the download URL is accessible
4.1.5.67 - SOLO-5066
ChecksumReadFailedSoloError — System
ChecksumReadFailedSoloError
Code
SOLO-5066
Category
System
Ownership
Infrastructure
Retryable
No
Description
Thrown when solo cannot read a checksum file; the message names the file. solo reads checksum files to verify downloaded artifacts, so this means the file could not be read — for example it is missing, empty, or unreadable due to permissions or an interrupted download.
Troubleshooting Steps
Check solo logs: tail -n 100 ~/.solo/logs/solo.log
Verify the checksum file exists and is readable:
Re-download the package to regenerate the checksum file
4.1.5.68 - SOLO-5067
ContainerInvalidPathSoloError — System
ContainerInvalidPathSoloError
Code
SOLO-5067
Category
System
Ownership
Solo
Retryable
No
Description
Thrown when solo is given an invalid path for a container operation; the message names the context and the path. solo validates container paths before using them for copy or exec operations, so an invalid value here (for example an empty or malformed path passed internally) points to a defect in the calling code and is treated as an internal Solo error.
Thrown when an operation against a container fails; the message names the operation and wraps the underlying failure in cause. solo runs operations such as exec and file copy inside pod containers, so this means that operation failed — for example the container was not reachable, the command errored, or the connection dropped.
Troubleshooting Steps
Check solo logs: tail -n 100 ~/.solo/logs/solo.log
Verify the pod is running: kubectl get pods -n
Inspect pod logs: kubectl logs -n
Check pod status: kubectl describe pod -n
4.1.5.70 - SOLO-5069
PostgresPodNotFoundSoloError — System
PostgresPodNotFoundSoloError
Code
SOLO-5069
Category
System
Ownership
Infrastructure
Retryable
No
Description
Thrown when solo cannot find the Postgres pod; the message names the namespace. solo locates the mirror node Postgres pod to operate on the database, so this is raised when no matching pod exists in the namespace — for example the database failed to start or was not deployed.
Troubleshooting Steps
Check solo logs: tail -n 100 ~/.solo/logs/solo.log
Verify Postgres pods are running: kubectl get pods -n -l app.kubernetes.io/name=postgresql
Re-deploy the mirror node to recreate Postgres: solo mirror node add
4.1.5.71 - SOLO-5070
InitSystemFilesFailedSoloError — System
InitSystemFilesFailedSoloError
Code
SOLO-5070
Category
System
Ownership
Infrastructure
Retryable
No
Description
Thrown when solo cannot initialize its system files; the underlying failure is wrapped in cause. solo lays down the files it needs under its home directory during initialization, so this means that step failed — for example the directory was not writable or a file could not be created.
Troubleshooting Steps
Check solo logs: tail -n 100 ~/.solo/logs/solo.log
Verify write permissions for the Solo home directory (~/.solo)
Check available disk space
Re-run initialization: solo init
4.1.5.72 - SOLO-5071
CacheProviderNotConfiguredSoloError — System
CacheProviderNotConfiguredSoloError
Code
SOLO-5071
Category
System
Ownership
Solo
Retryable
No
Description
Thrown when a cache is built before its required provider or engine has been set; the message names the cache and which piece is missing. solo requires both to be configured before constructing the cache, so reaching this points to an internal setup or ordering defect rather than user input, and is treated as an internal Solo error.
Thrown when pods do not terminate within the allotted time; the message names the namespace and the label selector being waited on. solo waits for matching pods to disappear during teardown, so this means they were still present when the deadline passed — for example a pod is stuck terminating or has a finalizer. It is retryable, since termination often completes shortly after.
Troubleshooting Steps
List pods still present: kubectl get pods -n -l <labels.join(’,’)>
Describe stuck pods for termination events: kubectl describe pod -n -l <labels.join(’,’)>
Check for finalizers blocking deletion: kubectl get pod -n -l <labels.join(’,’)> -o jsonpath=’{.items[*].metadata.finalizers}'
Force-delete stuck pods if safe: kubectl delete pod -n -l <labels.join(’,’)> –force –grace-period=0
Check solo logs for context: tail -n 100 ~/.solo/logs/solo.log
4.1.5.74 - SOLO-5073
ClusterRoleCheckFailedSoloError — System
ClusterRoleCheckFailedSoloError
Code
SOLO-5073
Category
System
Ownership
Infrastructure
Retryable
No
Description
Thrown when solo cannot check whether a Kubernetes ClusterRole exists; the message names the role and wraps the underlying failure in cause. solo queries for ClusterRoles before installing or relying on them, so this means the lookup failed — for example the Kubernetes API was unreachable or the current user lacks permission to read ClusterRoles.
Troubleshooting Steps
Check solo logs: tail -n 100 ~/.solo/logs/solo.log
Verify RBAC permissions: kubectl get clusterroles
Inspect cluster state: kubectl get pods -A
4.1.5.75 - SOLO-5074
UnsupportedLinuxDistributionSoloError — System
UnsupportedLinuxDistributionSoloError
Code
SOLO-5074
Category
System
Ownership
Infrastructure
Retryable
No
Description
Thrown when Solo cannot determine a supported native package manager for the current Linux distribution, so it cannot automatically install system dependencies (git, iptables, podman). Solo supports apt-get (Debian/Ubuntu), dnf (Fedora/RHEL), yum (RHEL 7/CentOS 7), zypper (openSUSE), pacman (Arch) and apk (Alpine).
Troubleshooting Steps
Install one of the supported package managers (apt-get, dnf, yum, zypper, pacman, apk), or
Install Solo and its dependencies (podman, git, iptables) manually, then re-run: solo init
4.1.5.76 - SOLO-5075
BlockNodesJsonEmptySoloError — System
BlockNodesJsonEmptySoloError
Code
SOLO-5075
Category
System
Ownership
User
Retryable
No
Troubleshooting Steps
Ensure at least one block node is deployed: solo block-node deploy
Check the block node mapping flags: –block-node-mapping or –external-block-node-mapping
List all registered components: solo deployment config info
Check solo logs: tail -n 100 ~/.solo/logs/solo.log
4.1.5.77 - SOLO-5076
HelmChartPullNoArchiveSoloError — System
HelmChartPullNoArchiveSoloError
Code
SOLO-5076
Category
System
Ownership
Infrastructure
Retryable
No
Description
Thrown when helm pull completes without error but no new chart tarball appears in the cache charts directory; the message names the chart and version that were being cached. solo identifies the pulled archive by diffing the directory contents before and after the pull, so an empty diff means Helm reported success without producing the expected .tgz — for example due to an unexpected Helm CLI behaviour change or a filesystem issue in the cache directory.
Troubleshooting Steps
Check solo logs: tail -n 100 ~/.solo/logs/solo.log
Verify the Helm CLI works: helm version
Try pulling the chart manually: helm pull –version
4.1.5.78 - SOLO-5077
PodmanRuntimeConfigurationFailedSoloError — System
PodmanRuntimeConfigurationFailedSoloError
Code
SOLO-5077
Category
System
Ownership
Infrastructure
Retryable
No
Description
Thrown when the container runtime stack behind the Homebrew-installed podman on Linux cannot be configured or fails its post-configuration probe — for example the crun or conmon binary is missing from the Homebrew prefix, a network helper download failed, or podman rejects the generated configuration. Without this configuration podman would fall back to the host’s system container stack, which may be too old for it.
Troubleshooting Steps
Check solo logs: tail -n 100 ~/.solo/logs/solo.log
Verify the Homebrew podman installation: brew doctor && podman info
Inspect the generated configuration files under ~/.solo/config (containers.conf, registries.conf)
Reinstall the Homebrew podman stack if binaries are missing: brew reinstall podman
4.1.5.79 - SOLO-5078
ClusterUnreachableError — System
ClusterUnreachableError
Code
SOLO-5078
Category
System
Ownership
Infrastructure
Retryable
Yes
Description
Thrown when a Kubernetes API call against a remote cluster fails for any reason other than the resource being absent; the message names the kubeconfig context and the underlying failure, which is also wrapped in cause. solo reads and writes cluster state over the Kubernetes API for every deployment operation, so this means the call never produced a usable answer: the API server is down or unreachable over the network, the kubeconfig context points at a cluster that no longer exists, credentials have expired, or RBAC denied the request. Kind clusters are excluded — a local kind API failure is reported as a Kubernetes API invalid response instead. It is retryable because an API server that is restarting, or a transient network problem, often clears on a later attempt.
Troubleshooting Steps
Verify the cluster is reachable: kubectl cluster-info –context
Verify the kubeconfig context still exists: kubectl config get-contexts
Verify your credentials and RBAC permissions for the namespace
Check solo logs: tail -n 100 ~/.solo/logs/solo.log
4.1.5.80 - SOLO-5079
KindClusterStoppedError — System
KindClusterStoppedError
Code
SOLO-5079
Category
System
Ownership
Infrastructure
Retryable
Yes
Description
Thrown when a kind cluster’s node container was found stopped, solo started it again, and the cluster’s Kubernetes API still did not answer; the last API failure is wrapped in cause. A kind node that restarts but never serves its API usually means the cluster did not survive whatever stopped it — the host was rebooted and the node’s networking or storage no longer lines up, the container is crash-looping, or the kubeconfig entry now points at a port the restarted node no longer listens on. It is retryable because a control plane can simply need longer than solo waited.
Troubleshooting Steps
Check the node container is running: docker ps -a –filter name=-control-plane
Inspect why the node is not serving its API: docker logs -control-plane
Verify the cluster answers: kubectl cluster-info –context kind-
Recreate the cluster if it did not survive being stopped: kind delete cluster –name
4.1.5.81 - SOLO-5080
ContainerEngineNotRunningError — System
ContainerEngineNotRunningError
Code
SOLO-5080
Category
System
Ownership
User
Retryable
Yes
Description
Thrown when solo needs the local container engine and neither Docker nor Podman answers; the failure that led solo to look is wrapped in cause. A local kind cluster only exists as containers on this machine, so with no engine running solo can neither reach the cluster nor tell whether it is still there. The usual reason is simply that Docker Desktop, the Docker daemon or the Podman machine is not started. solo does not start the engine itself, because doing so is platform-specific and needs privileges the CLI should not take on its own. It is retryable once the engine is up.
Troubleshooting Steps
Start Docker Desktop, or the Docker daemon: sudo systemctl start docker
If you use Podman, start its machine: podman machine start
Confirm the engine answers: docker info
Then re-run the command
4.1.5.82 - SOLO-5081
PodNotReadySoloError — System
PodNotReadySoloError
Code
SOLO-5081
Category
System
Ownership
Infrastructure
Retryable
Yes
Description
Thrown when a pod matching the expected labels was found but never reached the required phase or readiness condition before solo stopped waiting; the message names the pod, its last observed phase, and a per-container summary (readiness, restart count, and any waiting/terminated reason). This is distinct from the pod-not-found errors: the pod exists, but something is keeping it from becoming ready — most commonly a failing startup or readiness probe, a crash-looping container, or an unreachable dependency the container’s health check verifies. It is retryable because readiness is often only delayed; if it persists, inspect the pod rather than the scheduler.
Troubleshooting Steps
Describe the pod for probe failures and events: kubectl describe pod -n
Check container logs, including the previous run: kubectl logs -n –previous
If the readiness probe checks a dependency (e.g. a mirror node or database), verify that dependency is healthy
Check PVC/PV binding and volume attach events: kubectl get pvc -n ; kubectl describe pvc -n
Review solo logs: tail -n 100 ~/.solo/logs/solo.log
4.1.5.83 - SOLO-5082
PortForwardStopFailedError — System
PortForwardStopFailedError
Code
SOLO-5082
Category
System
Ownership
Infrastructure
Retryable
Yes
Description
Thrown when solo cannot stop its port-forwards; when available the underlying failure is wrapped in cause. Stopping tears down the running kubectl port-forward processes and removes their configuration from the deployment’s remote config, so this means that teardown failed — for example a process could not be signalled or the remote config could not be persisted. It is retryable.
Troubleshooting Steps
Check the port-forwards of your deployment: solo deployment config ports –deployment
Check for lingering processes: ps aux | grep port-forward
4.1.5.84 - SOLO-5083
SoloLogsDirectoryNotWritableSoloError — System
SoloLogsDirectoryNotWritableSoloError
Code
SOLO-5083
Category
System
Ownership
Infrastructure
Retryable
No
Description
Thrown when solo cannot write to its log directory or to one of the log files inside it; the message names the offending path and the underlying failure is wrapped in cause. solo opens solo.ndjson and solo.log under its logs directory before running any command, so an unwritable path there stops every invocation — including solo --version, which otherwise touches nothing. The usual cause is a directory or log file left behind by an installation that ran as a different user, for example an earlier sudo npm install -g @hiero-ledger/solo, which leaves the files owned by root.
Troubleshooting Steps
Check who owns the path: ls -la ~/.solo ~/.solo/logs
Take ownership if it belongs to another user: sudo chown -R “$(id -u):$(id -g)” ~/.solo
Or delete the directory and let solo recreate it: rm -rf ~/.solo
Reinstall without sudo so no root-owned files are left behind: npm install -g @hiero-ledger/solo
Or point solo at a writable location instead: export SOLO_HOME=
4.1.5.85 - SOLO-5084
PvcMountVerificationFailedSoloError — System
PvcMountVerificationFailedSoloError
Code
SOLO-5084
Category
System
Ownership
Infrastructure
Retryable
No
Description
Thrown when PVC mount verification finds that a pod’s PersistentVolumeClaim mounts are not backed by the storage the claims requested, and verification was configured to fail rather than warn. Provisioners that hand out directories on an existing filesystem do not enforce the requested size, so this condition is invisible to Kubernetes: the claim binds, the pod runs, and the shortfall only surfaces later as a full disk. The usual cause is that the directory tree the provisioner writes into is not the mount point it was meant to be — a data array that failed to mount at boot leaves the path on the system disk instead.
Troubleshooting Steps
Check what the claims bound to and how large they really are: kubectl get pvc,pv -n
Identify the provisioner and the host directory it writes into: kubectl get storageclass -o yaml
On the node, confirm that directory is on the intended device and not the system disk: df -h ; lsblk; findmnt
If an intended data array or disk failed to mount at boot, mount it and redeploy so the claims are provisioned onto it
To deploy anyway and only warn, omit –verify-pvc-mounts
4.1.5.86 - SOLO-5085
SavedStateHashToolMissingSoloError — System
SavedStateHashToolMissingSoloError
Code
SOLO-5085
Category
System
Ownership
Infrastructure
Retryable
No
Description
Thrown when the consensus-node container has none of sha256sum, shasum, or openssl; the message names the pod. wait-for-stable-saved-state.sh fingerprints the saved-state directory with whichever of those is available to detect when background flushes stop changing disk contents, and this is permanent for a given image rather than something that resolves with more polling attempts, so solo fails fast instead of waiting out the full saved-state stability timeout.
Troubleshooting Steps
Use a consensus-node image that includes sha256sum, shasum, or openssl
Check the image in use: kubectl get pod -n -o jsonpath="{.spec.containers[*].image}"
4.1.5.87 - SOLO-9001
TimeoutSoloError — System
TimeoutSoloError
Code
SOLO-9001
Category
System
Ownership
Infrastructure
Retryable
Yes
Description
Thrown when a bounded operation does not finish within the time solo allows for it. solo guards long-running waits with deadlines — most often while polling for a Kubernetes pod or service to become Ready, but also for Hedera SDK calls and other long-running CLI steps — and raises this once the deadline passes without the expected condition being met. It signals that the operation was still in progress (or stuck), not that it definitively failed, which is why it is retryable: a resource that is merely slow to stabilise often succeeds on a later run or with a larger timeout. It is the base error for more specific timeouts such as PodTerminationTimeoutSoloError and ClusterApiServerTimeoutSoloError.
Troubleshooting Steps
Check solo logs: tail -n 100 ~/.solo/logs/solo.log
Verify the target resource or service is responding
Check Kubernetes pod status: kubectl get pods -A
Increase the timeout if the operation is expected to take longer
4.1.6 - Internal
4.1.6.1 - SOLO-9002
UnsupportedOperationError — Internal
UnsupportedOperationError
Code
SOLO-9002
Category
Internal
Ownership
Solo
Retryable
No
Description
Thrown when execution reaches a branch that is intentionally not implemented or not supported — for example an abstract operation a subclass was expected to override, a not-yet-built feature path, or an input variant the code does not handle; the message states the reason. Because solo should never route a real command into such a path, this is classified as a defect in solo itself rather than a user or infrastructure problem, and reaching it should be reported with the full error output and the command that triggered it.
Thrown when code reads the remote-configuration runtime state before it has been loaded from the cluster. solo fetches the remote config (a ConfigMap) into memory in an explicit load step that must run before any read, so this is a lifecycle guard: reaching it means a command path accessed the remote config without first loading it, or ran the steps out of order. It indicates a defect in solo rather than a user or infrastructure problem.
Thrown when code modifies or persists the remote configuration before it has been loaded from the cluster. solo must load the remote config (a ConfigMap) into memory before mutating it, so that writes are applied on top of the current cluster state rather than an empty one; this guard fires when a command path attempts a write without that load having run, or runs the steps out of order. It indicates a defect in solo itself.
Thrown when an internal consistency check finds a value that differs from what solo required at that point; the message reports the context together with the expected and actual values. solo uses these assertions to verify invariants as data moves between steps — for example confirming that a downloaded artifact’s checksum matches the expected hash before it is used. A mismatch points to a logic error or a broken assumption inside solo rather than to bad user input or an infrastructure fault, so it is treated as an internal defect and should be reported with the full error output.
Thrown when the logging subsystem is asked for a message group by a key that was never registered. solo groups related log messages under named keys, and this is raised when code references a group that does not exist — typically a typo in the key or a group that was renamed or never added. It points to a defect in solo rather than to user input.
Thrown when a command handler returns false from a path that requires it to return true to signal success; the message names the command namespace and command that did so. solo treats the boolean return of these handlers as a success flag, so a false here means the handler completed without throwing yet reported failure — an unexpected internal outcome that indicates a defect in solo rather than invalid user input.
Thrown when the remote configuration contains a component whose type solo does not recognise; the message reports the offending componentType, the solo version recorded in the remote config alongside the running solo version, and the recorded config schema version alongside the highest schema version the running solo supports. solo dispatches on the component type when reading the remote config’s component inventory, and raises this for any value outside the known set. The usual cause is a remote config written by a newer solo than the one running, so it is treated as a cross-version issue the user resolves by aligning solo versions; a hand-edited config can produce the same failure.
Troubleshooting Steps
Upgrade this Solo to or newer (npm install -g @hiero-ledger/solo), or rerun the command with the Solo version that wrote the config
If both Solo versions already match, the remote config was likely edited by hand; restore it to its unedited state
4.1.6.8 - SOLO-9010
RemoteConfigContextUnavailableError — Internal
RemoteConfigContextUnavailableError
Code
SOLO-9010
Category
Internal
Ownership
Solo
Retryable
No
Description
Thrown when remote-configuration access needs a Kubernetes context to reach the cluster but none is available: no context was passed to the call and solo could not fall back to a default one (for example because the current kubeconfig has no current-context to resolve). Because callers are expected to supply or have already resolved a context by this point, reaching it indicates a broken internal assumption in solo rather than a user error.
Thrown while rendering cache image targets when a version field holds a value that looks like a template key (all uppercase letters, digits, and underscores) but is not among the declared templates; the message names the offending key. The renderer treats such a value as a reference to a named template and refuses to emit it verbatim, so the key must first be declared in the template set. Reaching it points to a missing template declaration in solo’s configuration rather than to user input.
Deliberately thrown by solo’s fault-injection hook to exercise failure and recovery paths during testing — it does not represent a genuine problem with your network or environment. When the SOLO_FAIL_AFTER_STEP environment variable is set, the orchestrator compares it against each step title and raises this error immediately after the matching step completes; the message names that step. If you encounter it without intending to test fault handling, it means SOLO_FAIL_AFTER_STEP is set in your environment — unset it to stop the injected failure.
Troubleshooting Steps
This error is intended for testing purposes.
If you did not expect to see this error unset your environment variable: SOLO_FAIL_AFTER_STEP
4.1.6.11 - SOLO-9013
PipelineCancelledSoloError — Internal
PipelineCancelledSoloError
Code
SOLO-9013
Category
Internal
Ownership
Solo
Retryable
No
Description
Thrown to a phase of a parallel orchestration pipeline when a different phase has already failed. When solo deploys network components concurrently, the phases coordinate through an event bus; if one phase throws, the orchestrator aborts the bus so the remaining phases that are waiting on an upstream event stop immediately instead of blocking until their own timeout. This error marks such a downstream cancellation — it is not the root cause. The real failure is carried as this error’s cause and is what solo reports to you; look there (and earlier in the logs) for the phase that actually failed.
Troubleshooting Steps
This phase did not fail on its own — another phase failed first and the pipeline was aborted.
Look at the root cause reported above (and earlier in the logs) for the phase that actually failed.
4.1.6.12 - SOLO-9014
UncaughtFatalErrorSoloError — Internal
UncaughtFatalErrorSoloError
Code
SOLO-9014
Category
Internal
Ownership
Solo
Retryable
No
Description
Thrown when solo traps an error that escaped every handler — either an uncaughtException or an unhandledRejection; the message names which of the two fired along with the escaped error’s own message, and the escaped error is wrapped in cause. Reaching this point means a code path failed without being handled where it occurred, which indicates a defect in solo rather than invalid user input.
Set up a local development environment and contribute to the Solo project. This document covers prerequisites, local setup, running tests, code formatting, version updates, cluster inspection, and pull request requirements for contributors.
How to Contribute to Solo
This document describes how to set up a local development environment and contribute to the Solo project.
Prerequisites
Node.js (use the version specified in the repository, if applicable)
npm
Docker or Podman
Kubernetes (local cluster such as kind, k3d, or equivalent)
task (Taskfile runner)
Git
K9s (optional)
Initial setup
Clone the repository:
git clone https://github.com/hiero-ledger/solo.git
cd solo
Install dependencies:
npm install
Install solo as a local CLI:
npm link
Notes:
This only needs to be done once.
If solo already exists in your PATH, remove it first.
Alternatively, run commands via npm run solo-test -- <COMMAND> <ARGS>.
Run the CLI:
solo
Logs and debugging
Solo writes two log files under $HOME/.solo/logs/ (on native Windows, $env:USERPROFILE\.solo\logs\):
Pull request titles must follow Conventional Commits.
Examples:
feat: add support for grpc-web fqdn endpoints
fix: correct version resolution for platform components
docs: update contributing guide
chore: bump dependency versions
This is required for consistent release notes and changelog generation.
Additional guidelines
Prefer small, focused PRs that are easy to review.
If you are unsure where to start, open a draft PR early to get feedback.
Add description and link all related issues to the PR.
6 - FAQs
Frequently asked questions about the Solo CLI tool, covering deployment options, configuration choices, resource requirements, and common usage patterns. Find quick answers to typical Solo questions.
One-command deployment options and variants
How can I set up a Solo network in a single command?
You can run one of the following commands depending on your needs:
Single Node Deployment (recommended for development):
solo one-shot single deploy
Prerequisite: Install Solo first with npm install -g @hiero-ledger/solo@latest. See System Readiness for full install instructions. Homebrew (brew install hiero-ledger/tools/solo) is deprecated and will stop receiving updates after August 31, 2026.
For more information on Single Node Deployment, see Quickstart
solo one-shot falcon deploy --values-file falcon-values.yaml
For more information on Advanced Deployment (with custom configuration file), see the Advanced Solo Setup
Can I run Solo on a remote server?
Yes. Solo can deploy to any Kubernetes cluster, not just a local Kind cluster. For remote-cluster and more advanced deployment flows, see Advanced Solo Setup.
Destroying a network and cleaning up resources
How can I tear down a Solo network in a single command?
You can run one of the following commands depending on how you deployed:
Single Node Teardown:
solo one-shot single destroy
For more information on Single Node Teardown, see Quickstart
Multiple Node Teardown:
solo one-shot multi destroy
For more information on Multiple Node Teardown, see Quickstart
Advanced Deployment Teardown:
solo one-shot falcon destroy
For more information on Advanced Deployment Teardown (with custom configuration file), see the Advanced Solo Setup
Why should I destroy my network before redeploying?
Running solo one-shot single deploy while a prior deployment still exists causes conflicts and errors. Always run destroy first:
solo one-shot single destroy
solo one-shot single deploy
Accessing exposed services
How do I access services after deployment?
After running solo one-shot single deploy, your local services are available on
localhost. For the complete endpoint reference — default ports for Solo 0.63+
and Solo 0.62 and earlier, verification commands, and port lookup — see
Service Endpoints.
If any service is unreachable, confirm that all pods are healthy first:
kubectl get pods -A | grep -v kube-system
All Solo-related pods should be in a Running or Completed state before the endpoints become available.
How do I connect my application to the local network?
Use these endpoints with your SDK or tooling (Solo 0.63 and later):
Hiero SDK (gRPC): localhost:35211, node account ID 0.0.3
EVM tools (JSON-RPC): http://localhost:37546
Mirror Node REST: http://localhost:38081/api/v1/
For verification commands, legacy ports, and port lookup, see Service Endpoints.
What should I do if solo one-shot single destroy fails or my Solo state is corrupted?
Warning: This is a last resort. Always try solo one-shot single destroy first.
If the standard destroy command fails, perform a full reset manually:
# Delete only Solo-managed Kind clusters (names starting with "solo")kind get clusters | grep '^solo'|whileread cluster;do kind delete cluster -n "$cluster"done# Remove Solo configuration and cacherm -rf ~/.solo
Warning: Always use the grep '^solo' filter above — omitting it will delete every Kind cluster on your machine, including those unrelated to Solo.
After a full reset, you can redeploy by following the Quickstart guide.
If you want to reset everything and start fresh immediately, run:
# Delete only Solo-managed clusters and Solo configkind get clusters | grep '^solo'|whileread cluster;do kind delete cluster -n "$cluster"donerm -rf ~/.solo
# Deploy freshsolo one-shot single deploy
Common usage patterns and gotchas
1. How can I avoid using genesis keys?
You can run solo ledger system init anytime after solo consensus node start.
2. Where can I find the default account keys?
By default, Solo leverages the Hiero Consensus Node well known ED25519 private genesis key:
3. What is the difference between ECDSA keys and ED25519 keys?
ED25519 is Hedera’s native key type, while ECDSA (secp256k1) is used for EVM/Ethereum-style tooling and compatibility. For a detailed explanation of both key types and how they are used on Hedera, see core concept.
4. Where can I find the EVM compatible private key?
You will need to use ECDSA keys for EVM tooling compatibility. If you take the privateKeyRaw provided by Solo and prefix it with 0x you will have the private key used by Ethereum compatible tools.
5. Where are my keys stored?
Keys are stored in ~/.solo/cache/keys/. This directory contains:
7. How to handle error “failed to setup chart repositories”
If during the installation of solo-charts you see the error similar to the following:
failed to setup chart repositories,
repository name (hedera-json-rpc-relay) already exists
You need to remove the old helm repo manually, first run command helm repo list to
see the list of helm repos, and then run helm repo remove <repo-name> to remove the repo.
For example:
helm repo list
NAME URL
haproxy-ingress https://haproxy-ingress.github.io/charts
haproxytech https://haproxytech.github.io/helm-charts
metrics-server https://kubernetes-sigs.github.io/metrics-server/
metallb https://metallb.github.io/metallb
mirror https://hashgraph.github.io/hedera-mirror-node/charts
hedera-json-rpc-relay https://hashgraph.github.io/hedera-json-rpc-relay/charts
Next run the command to remove the repo:
helm repo remove hedera-json-rpc-relay
8. Why do I see unhealthy pods after deployment?
The most common cause is insufficient memory or CPU allocated to Docker Desktop. Minimum requirements:
Deployment type
Minimum RAM
Minimum CPU
Single-node
12 GB
6 cores
Multi-node (3+ nodes)
16 GB
8 cores
Adjust these in Docker Desktop → Settings → Resources and restart Docker before deploying.
9. How do I find my deployment name?
Most management commands (stop, start, diagnostics) require the deployment name. Retrieve it with:
solo one-shot show deployment
This prints your deployment details, including the deployment name — it defaults to one-shot for one-shot deployments, or the value you passed to --deployment. Use it as <deployment-name> in subsequent commands. See Capture your deployment name for more detail.
10. How do I create test accounts after deployment?
Create funded test accounts with:
solo ledger account create --deployment <deployment-name> --hbar-amount 100
11. How do I check which version of Solo I’m running?
solo --version
# For machine-readable output:solo --version -o json
12. Why does resource usage grow during testing?
The mirror node accumulates transaction history while the network is running. If you notice increasing memory or disk usage during extended testing sessions, destroy and redeploy the network to reset it to a clean state.
13. How can I monitor my cluster more easily?
k9s provides a real-time terminal UI for inspecting pods, logs, and cluster state. Install it with:
brew install k9s
Then run k9s to launch. It is especially helpful for watching pod startup progress during deployment.
14. How do I reset the ledger to a clean genesis state without redeploying?
Run solo ledger system reset --deployment <deployment-name> to reset the
ledger to genesis - clearing saved state and ledger-related secrets - while
keeping the same cluster and deployment. See
Reset the ledger to genesis.
7 - Examples Hub
8 - Release Notes
9 - Solo on GitHub
10 -
Solo Release Checklist
1. Verify Workflows
Check that the last merge to main passed all workflows: